
New article
Recently updated
[Example] Configuring Okta for Single Sign-On (SSO)

Who is this article for?IT Administrators implementing Single Sign-On (SSO).
IQM v7.6.1 and IQM Mobile v2.6.0 are required.
Ideagen Quality Management Single Sign-On (SSO) allows end users to authenticate with Windows and Web clients via Single Sign-On with Okta.
This article outlines the steps required to configure Okta for Ideagen Quality Management Single Sign-On (SSO). Please select a tab to walk through the steps for each.
We do not directly support he configuration of Okta. These steps are provided as a guide only to assist in the configuration. Before you begin please ensure your Ideagen Quality Management is using SSL for secure connections.
We are aware of an incompatibility requiring access to the Okta API Admin feature to set up the provider.
We are working on a fix in future releases, 7.6.2 (December 2024) and 7.7.1 (TBC), to remove this requirement.
1. Overview
In version 7.6.1 and above, you will be asked to enter Scope information into the system when configuring the Single Sign-On options. Below is a table listing the different scopes for different parts of the application.| Application | openid | profile | userinfo | offline_access | User.Read | |
| Web | ✓ | ✓ | ✓ | ✓ | ||
| Windows Client | ✓ | ✓ | ✓ | ✓ | ||
| Mobile | ✓ | ✓ | ✓ | ✓ |
Scopes are case sensitive and need to be separated by a space when entered into the system (e.g. openid email profile)
2. Creating a scope
To create a scope:
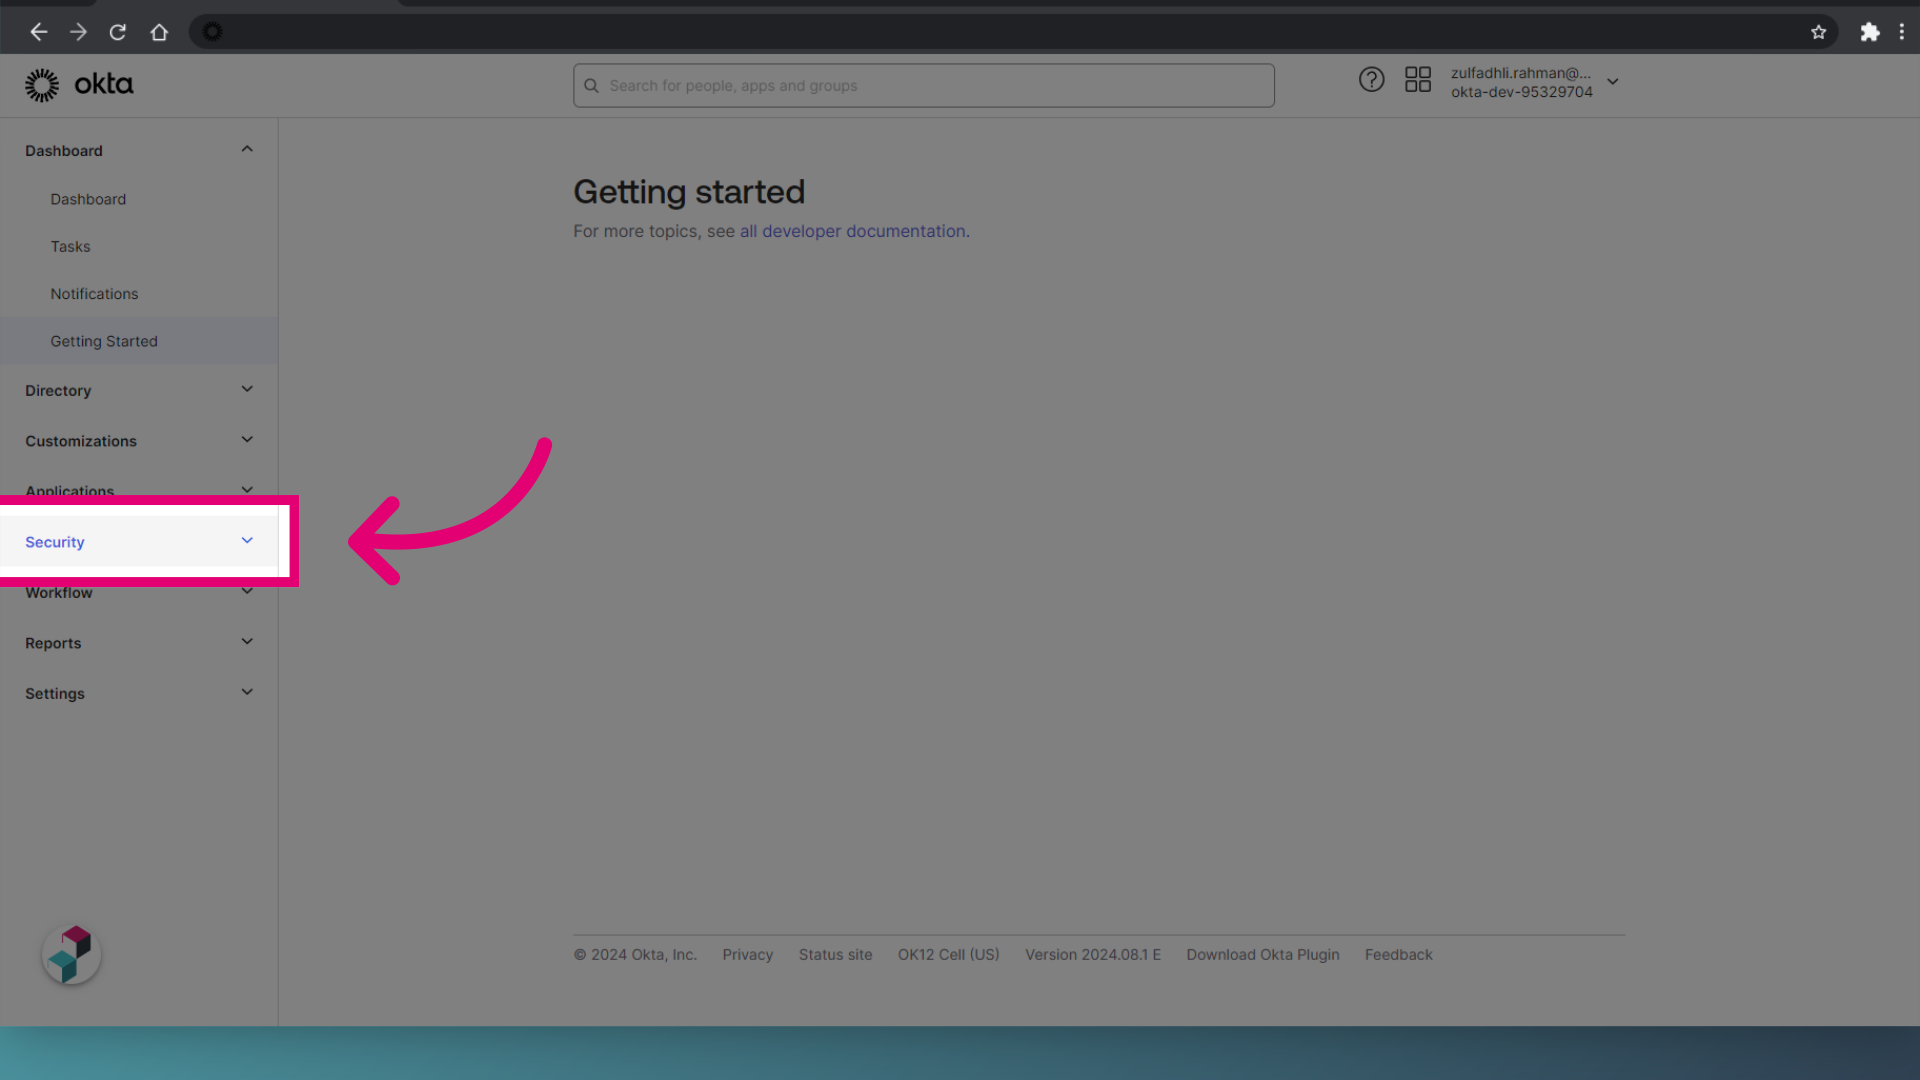
- Log in to Okta.
- Select Security.
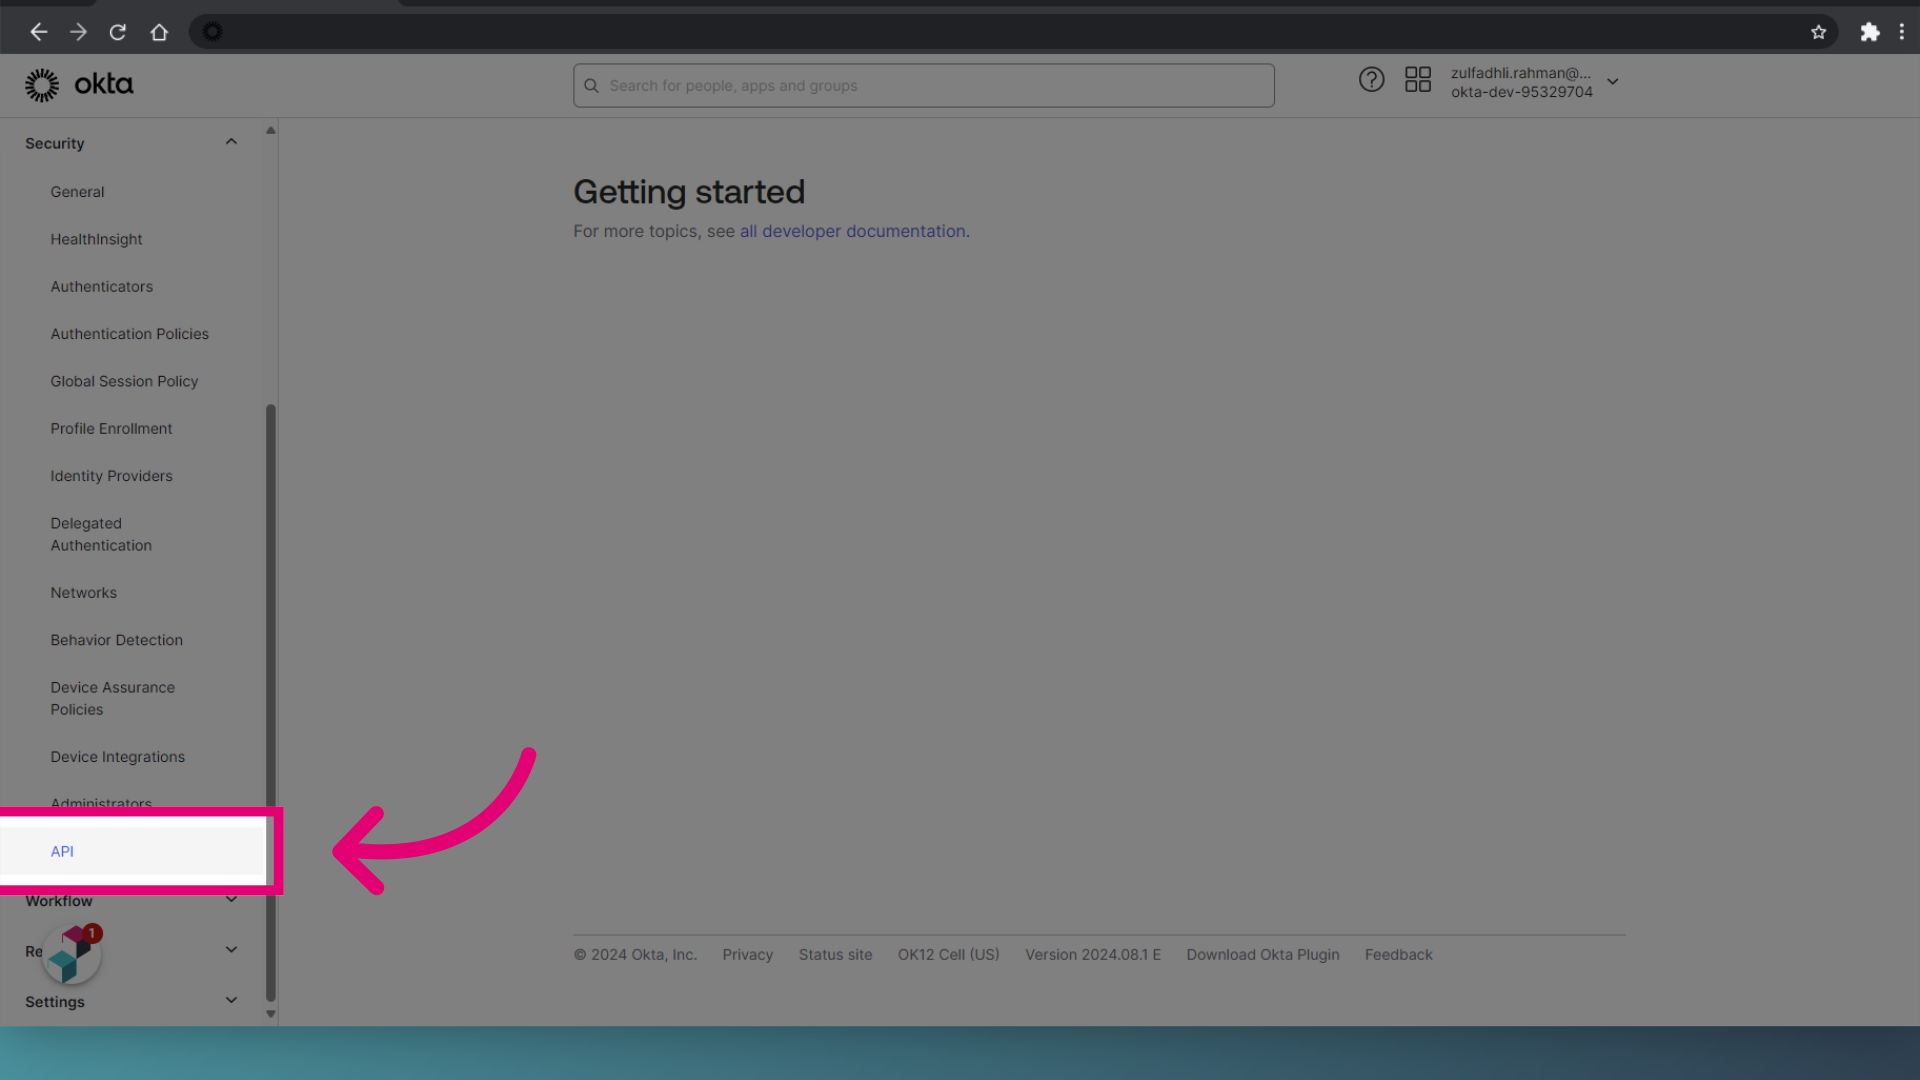
- Navigate to API settings.
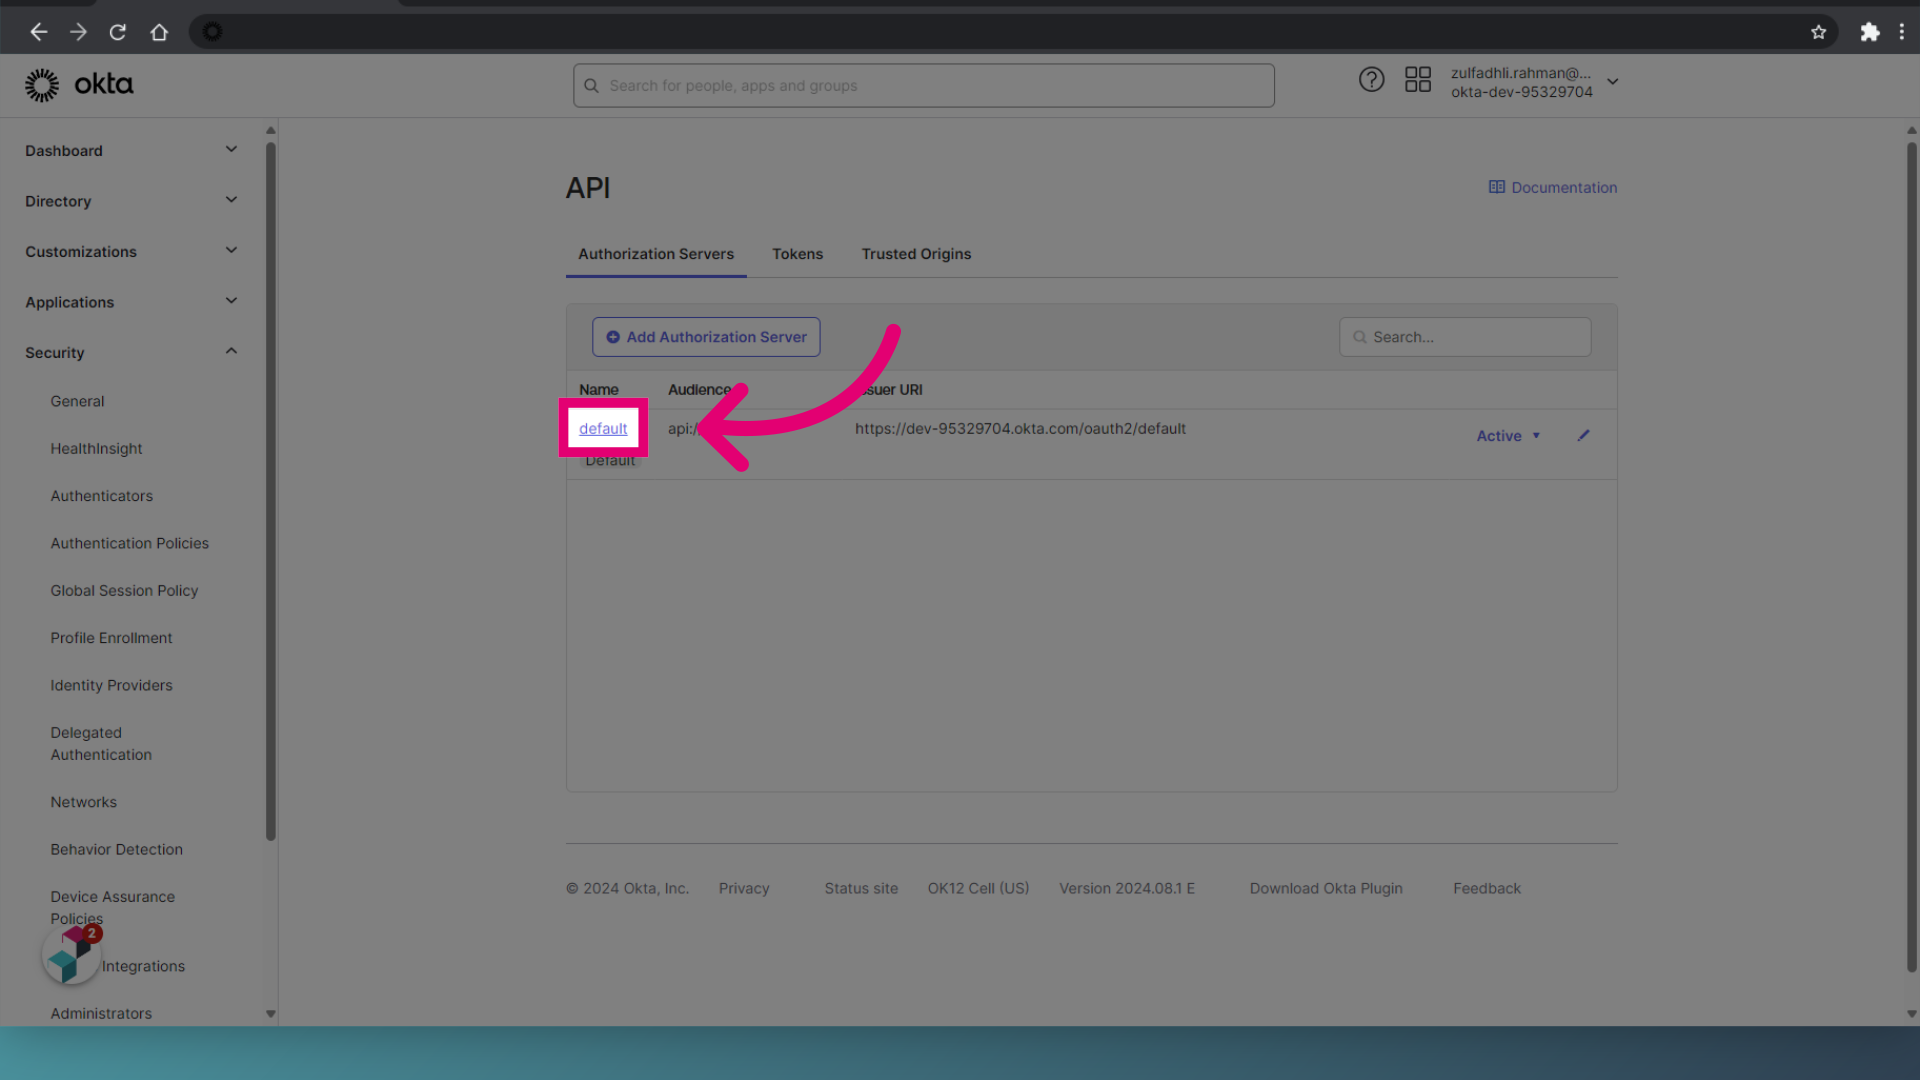
- Select the Default option.
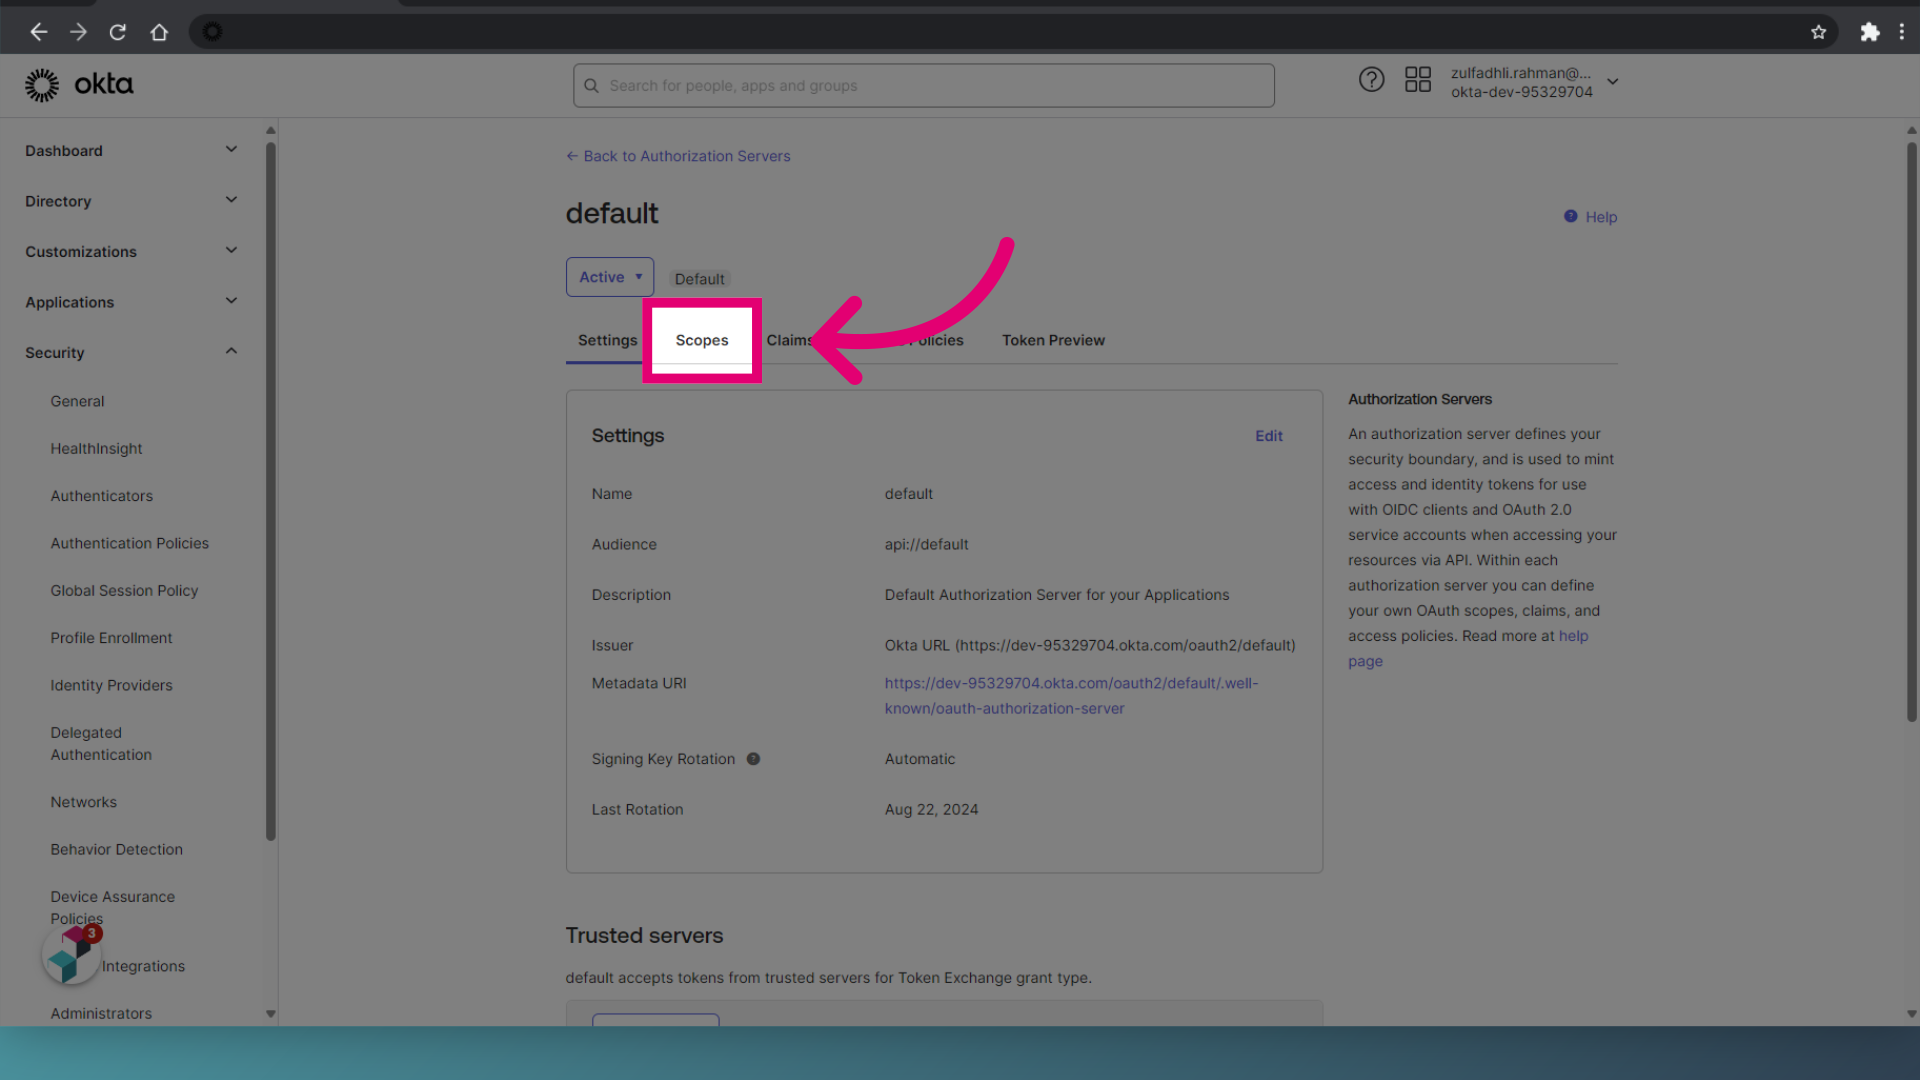
- Switch to the Scopes tab.
- Click Add Scope.

- Enter a Name, Display Phrase, and Description.
In this example, we used userinfo.
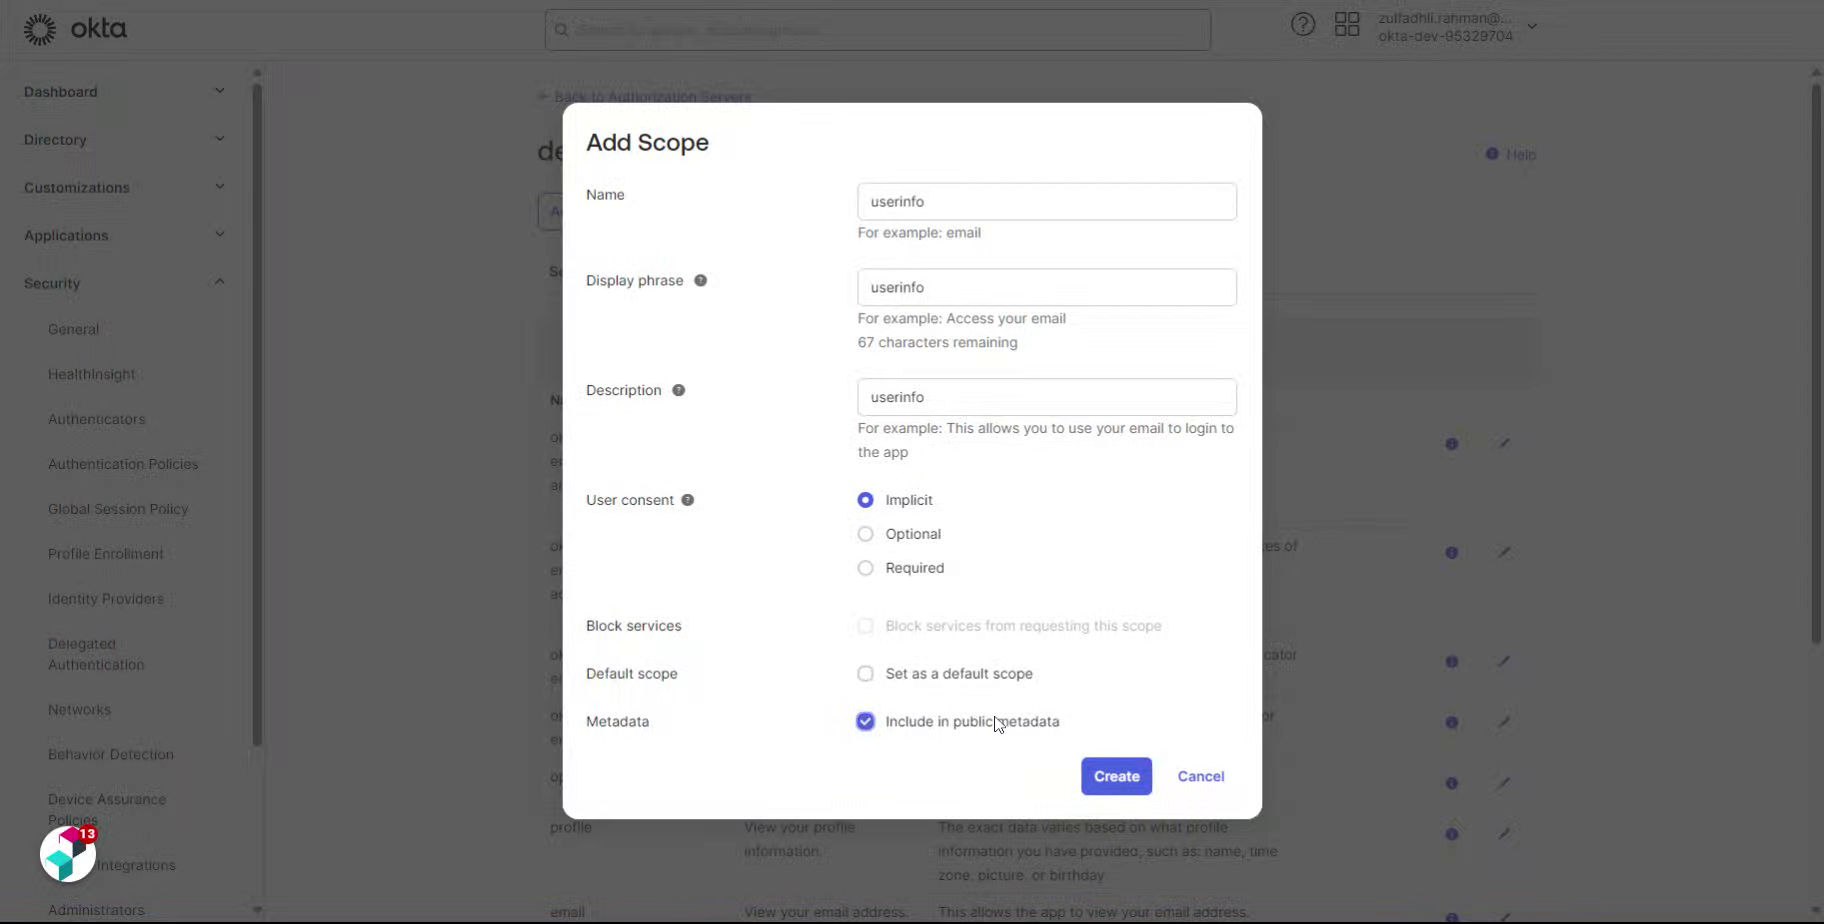
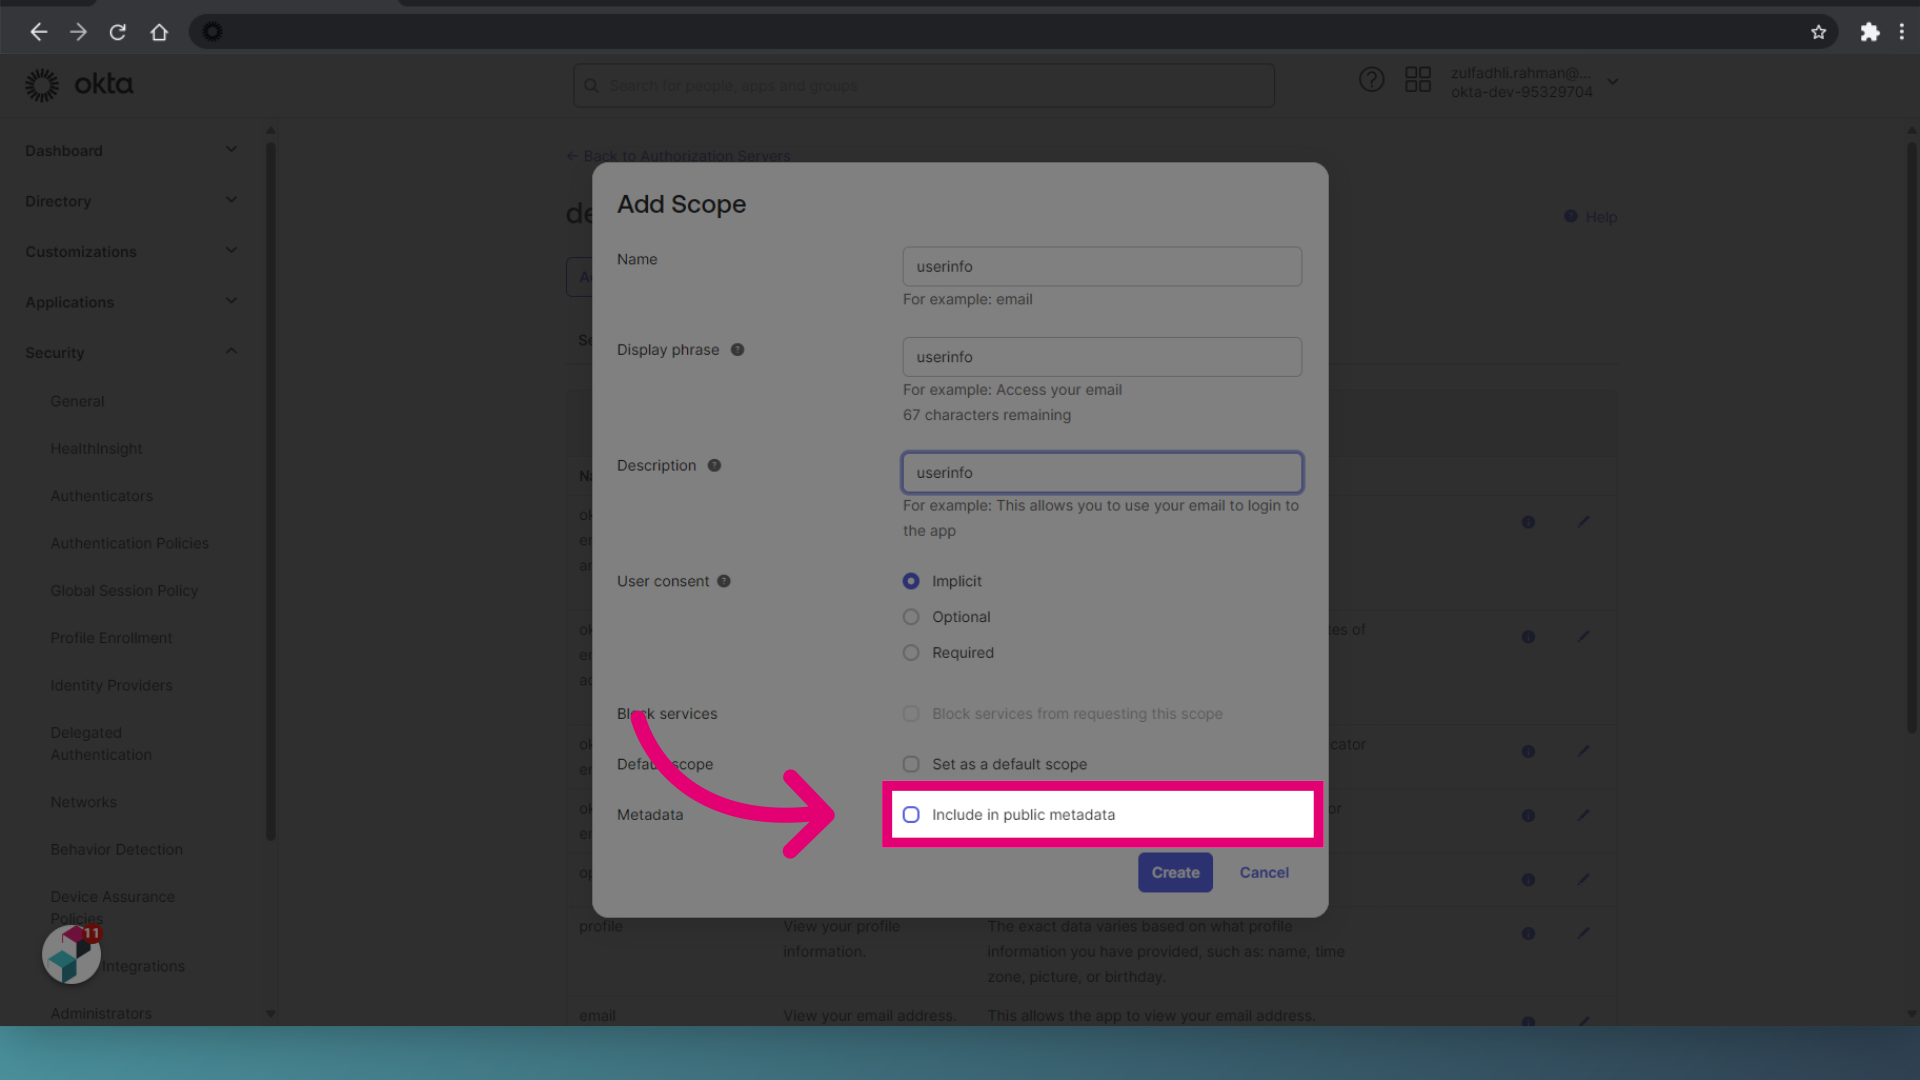
- Tick Include in public metadata.
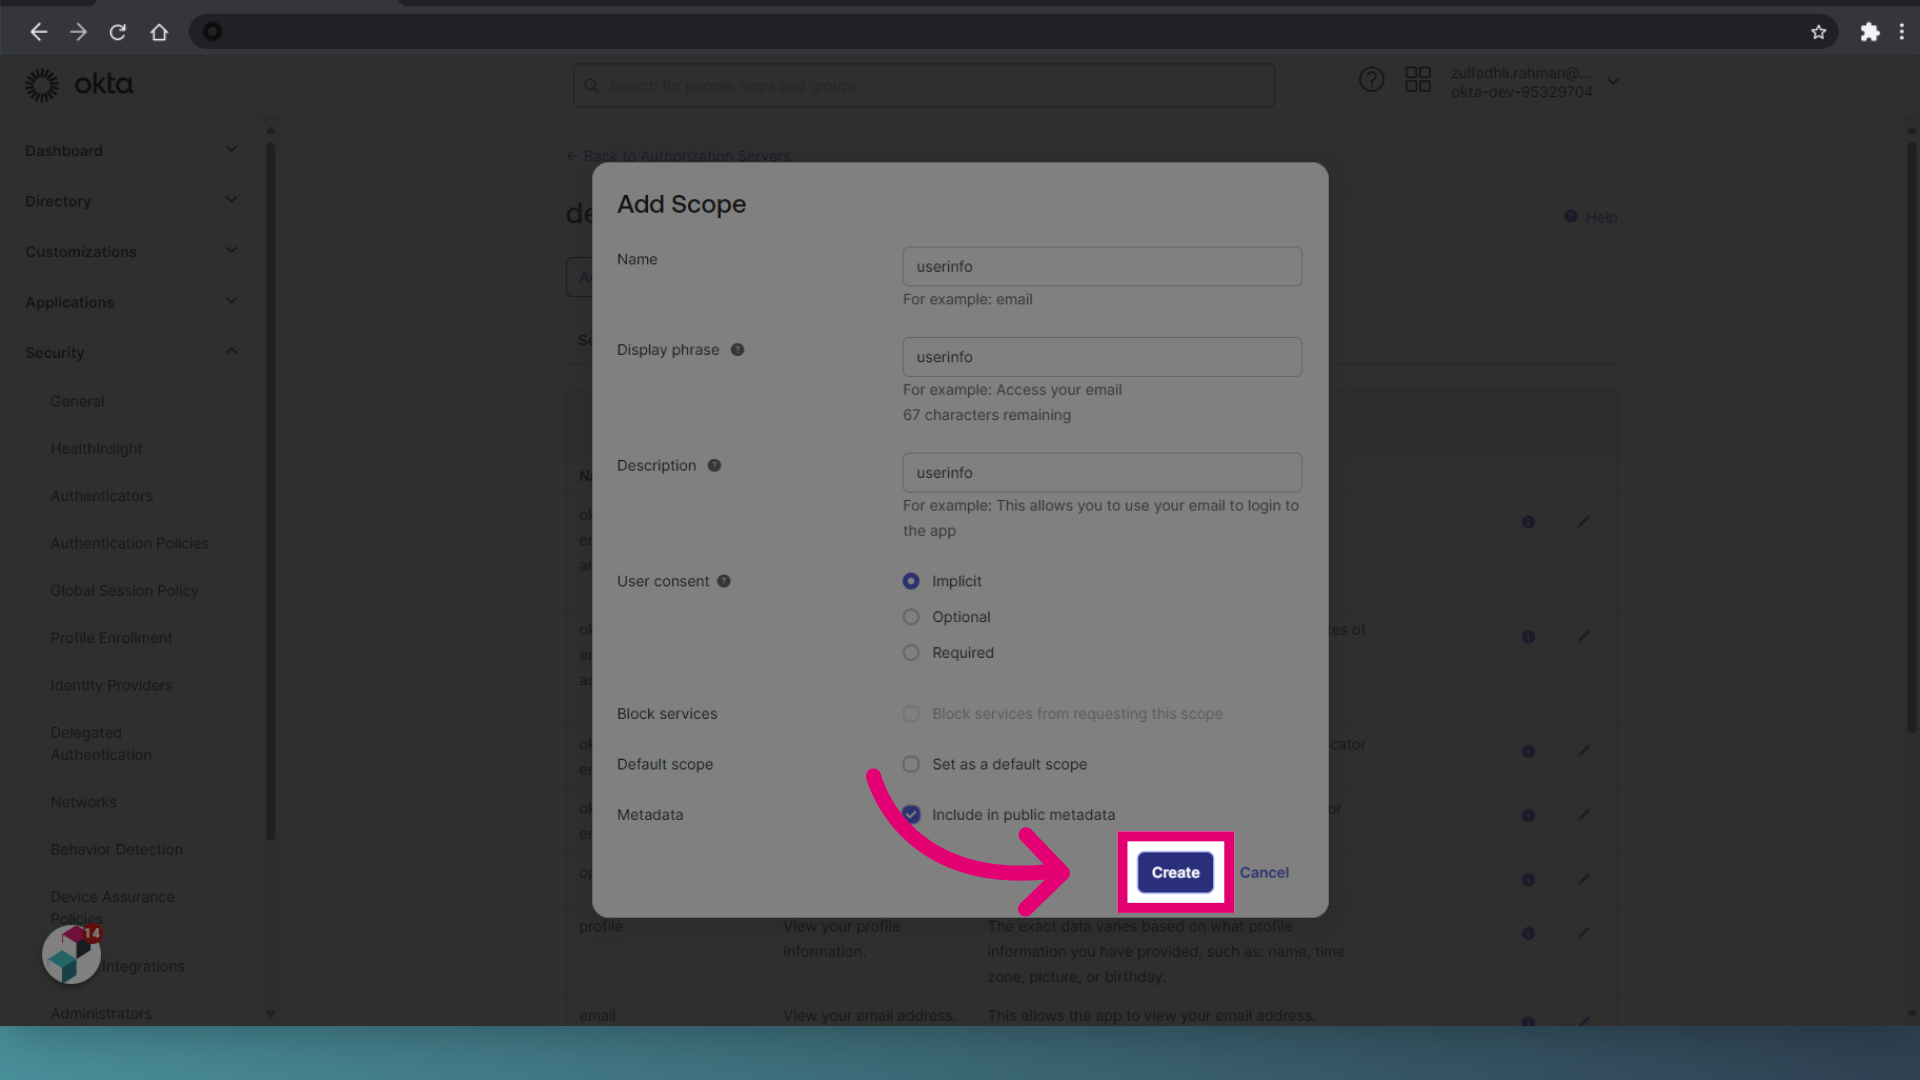
- Click Create.
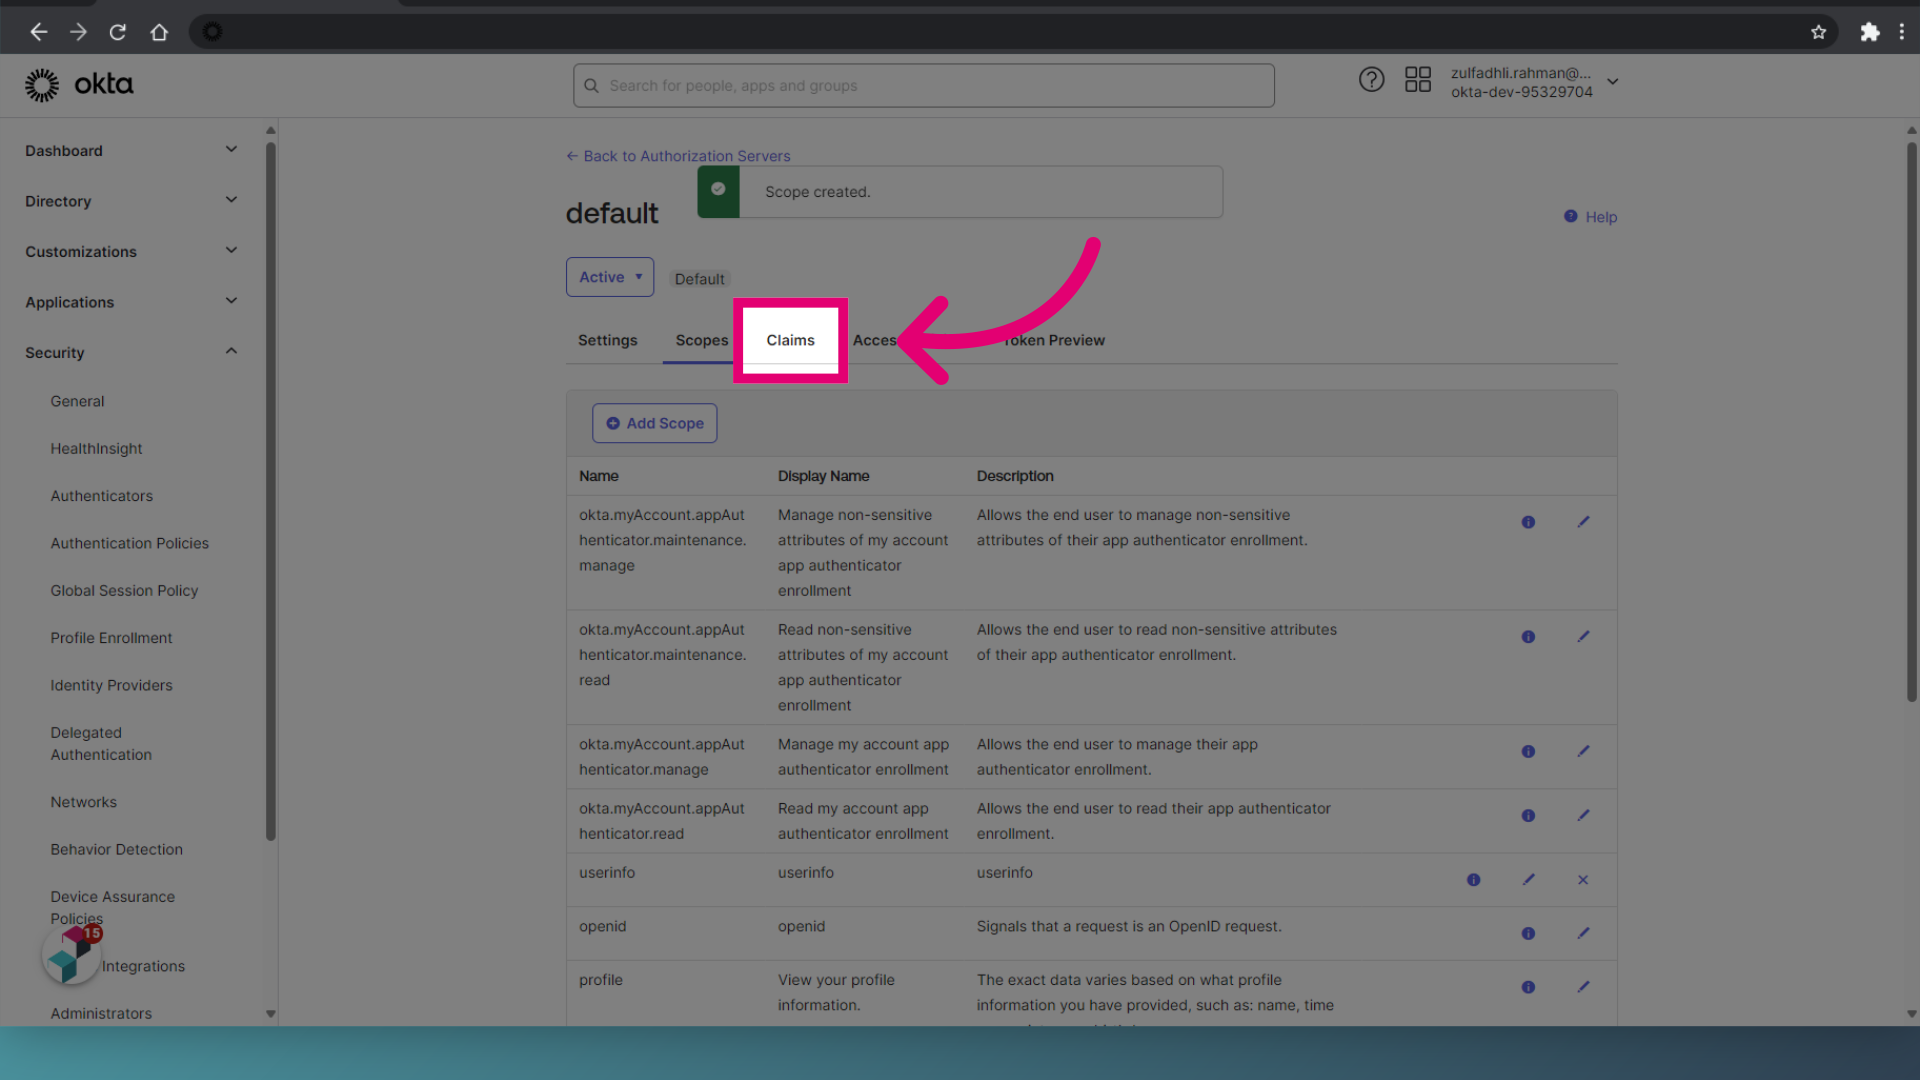
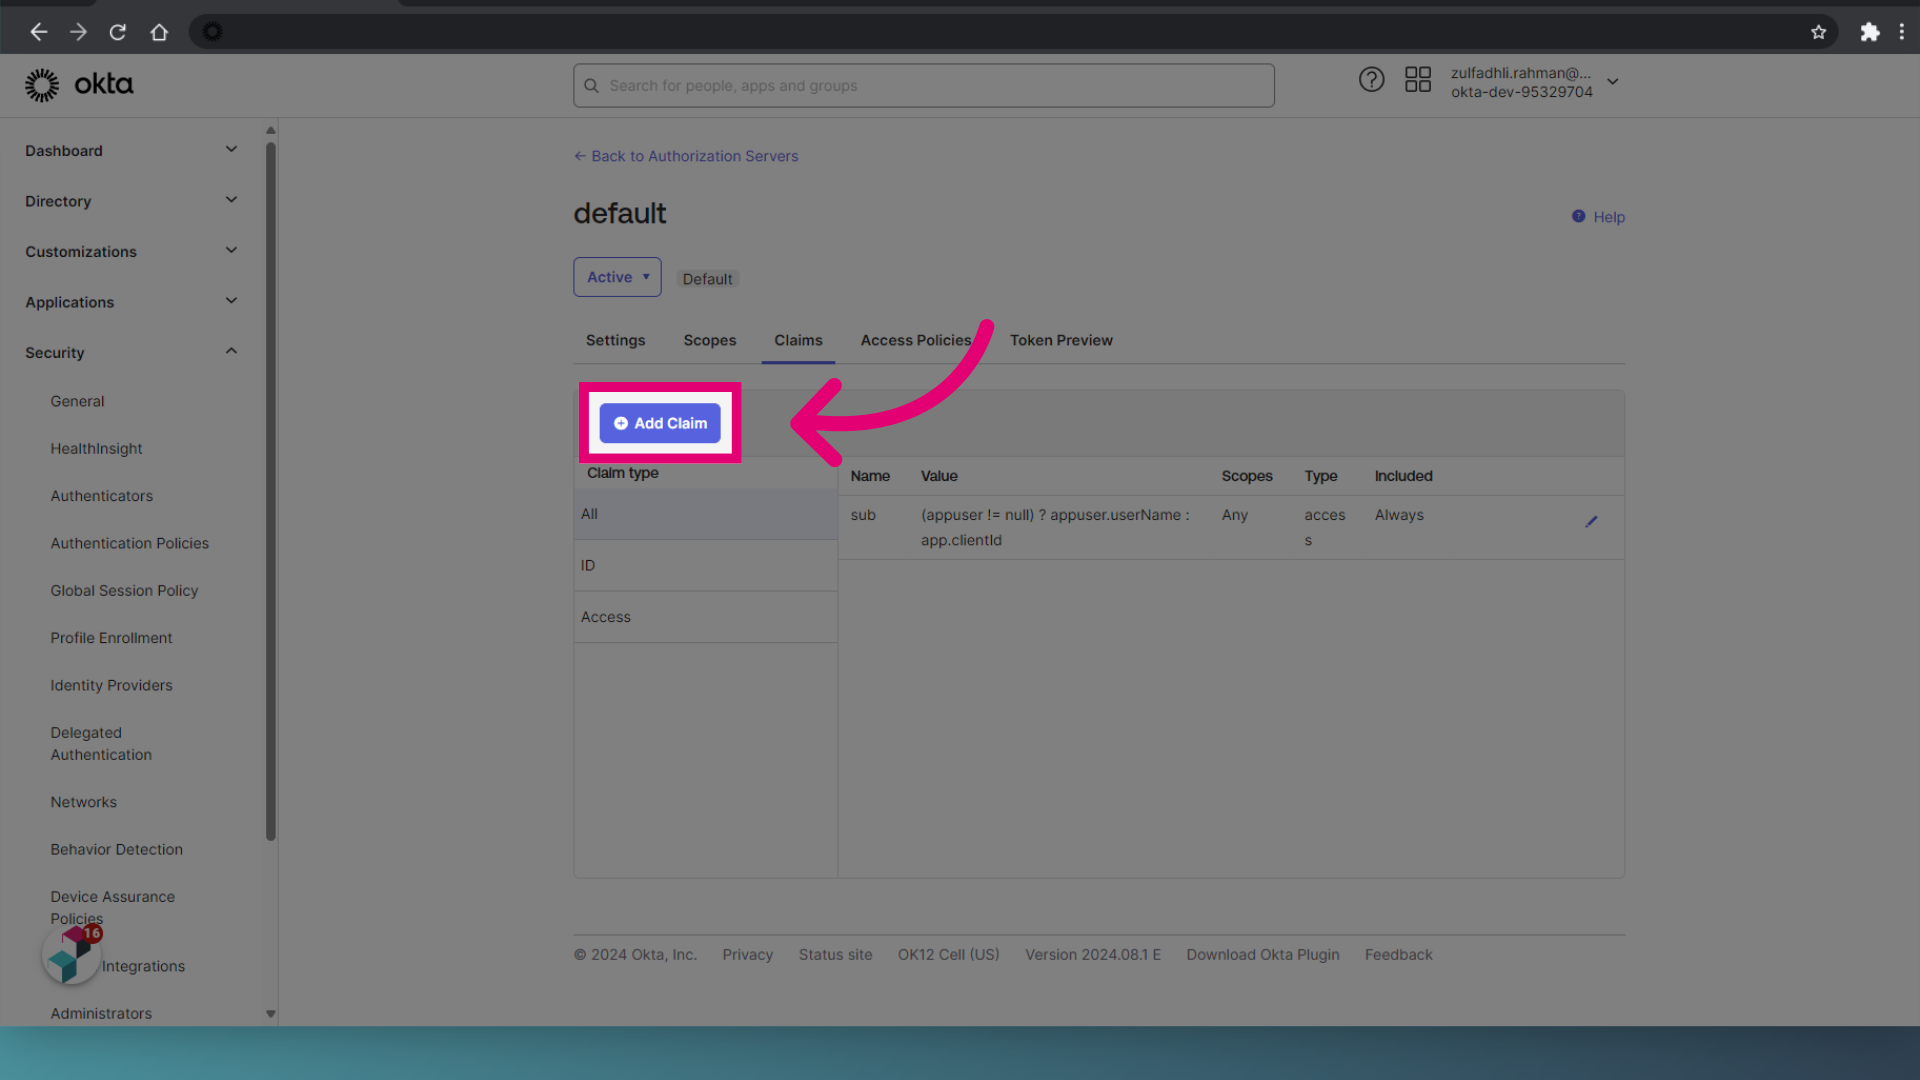
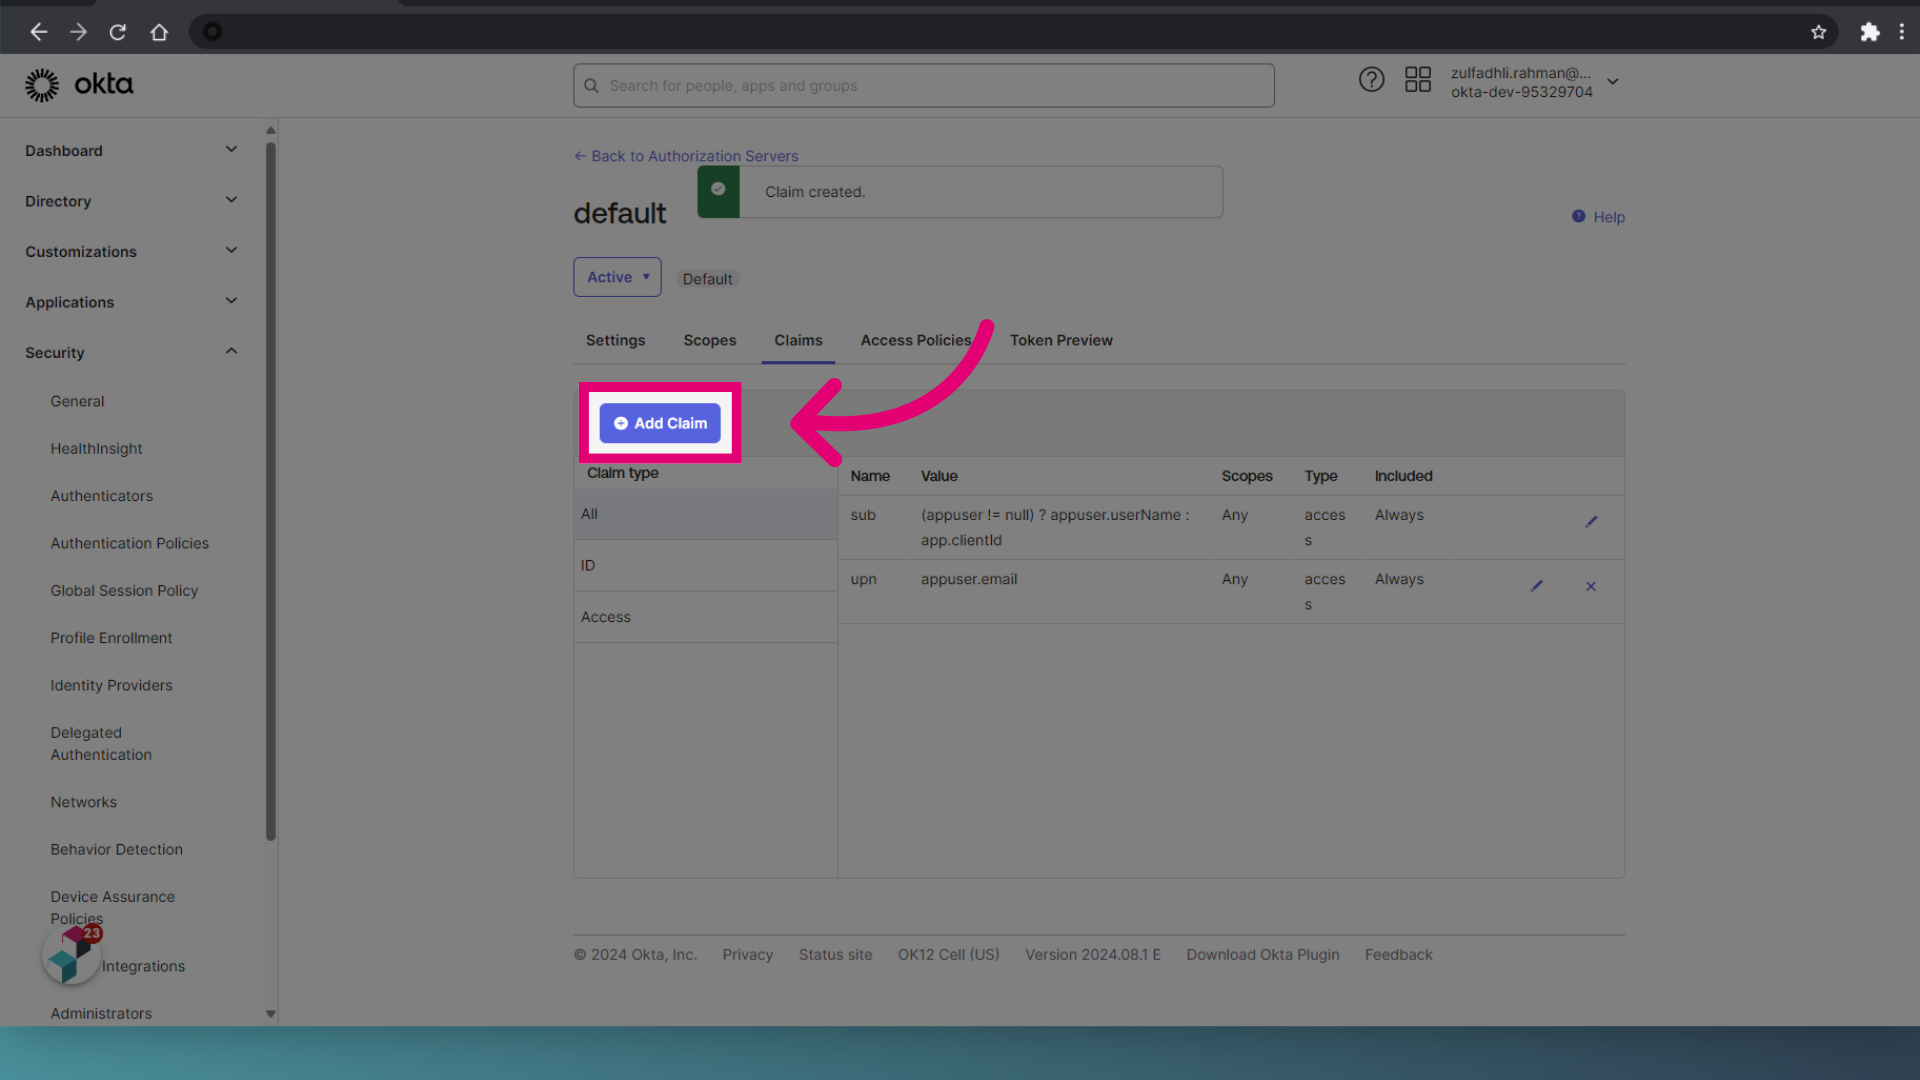
- Switch to the Claims tab.
- Click Add Claim.
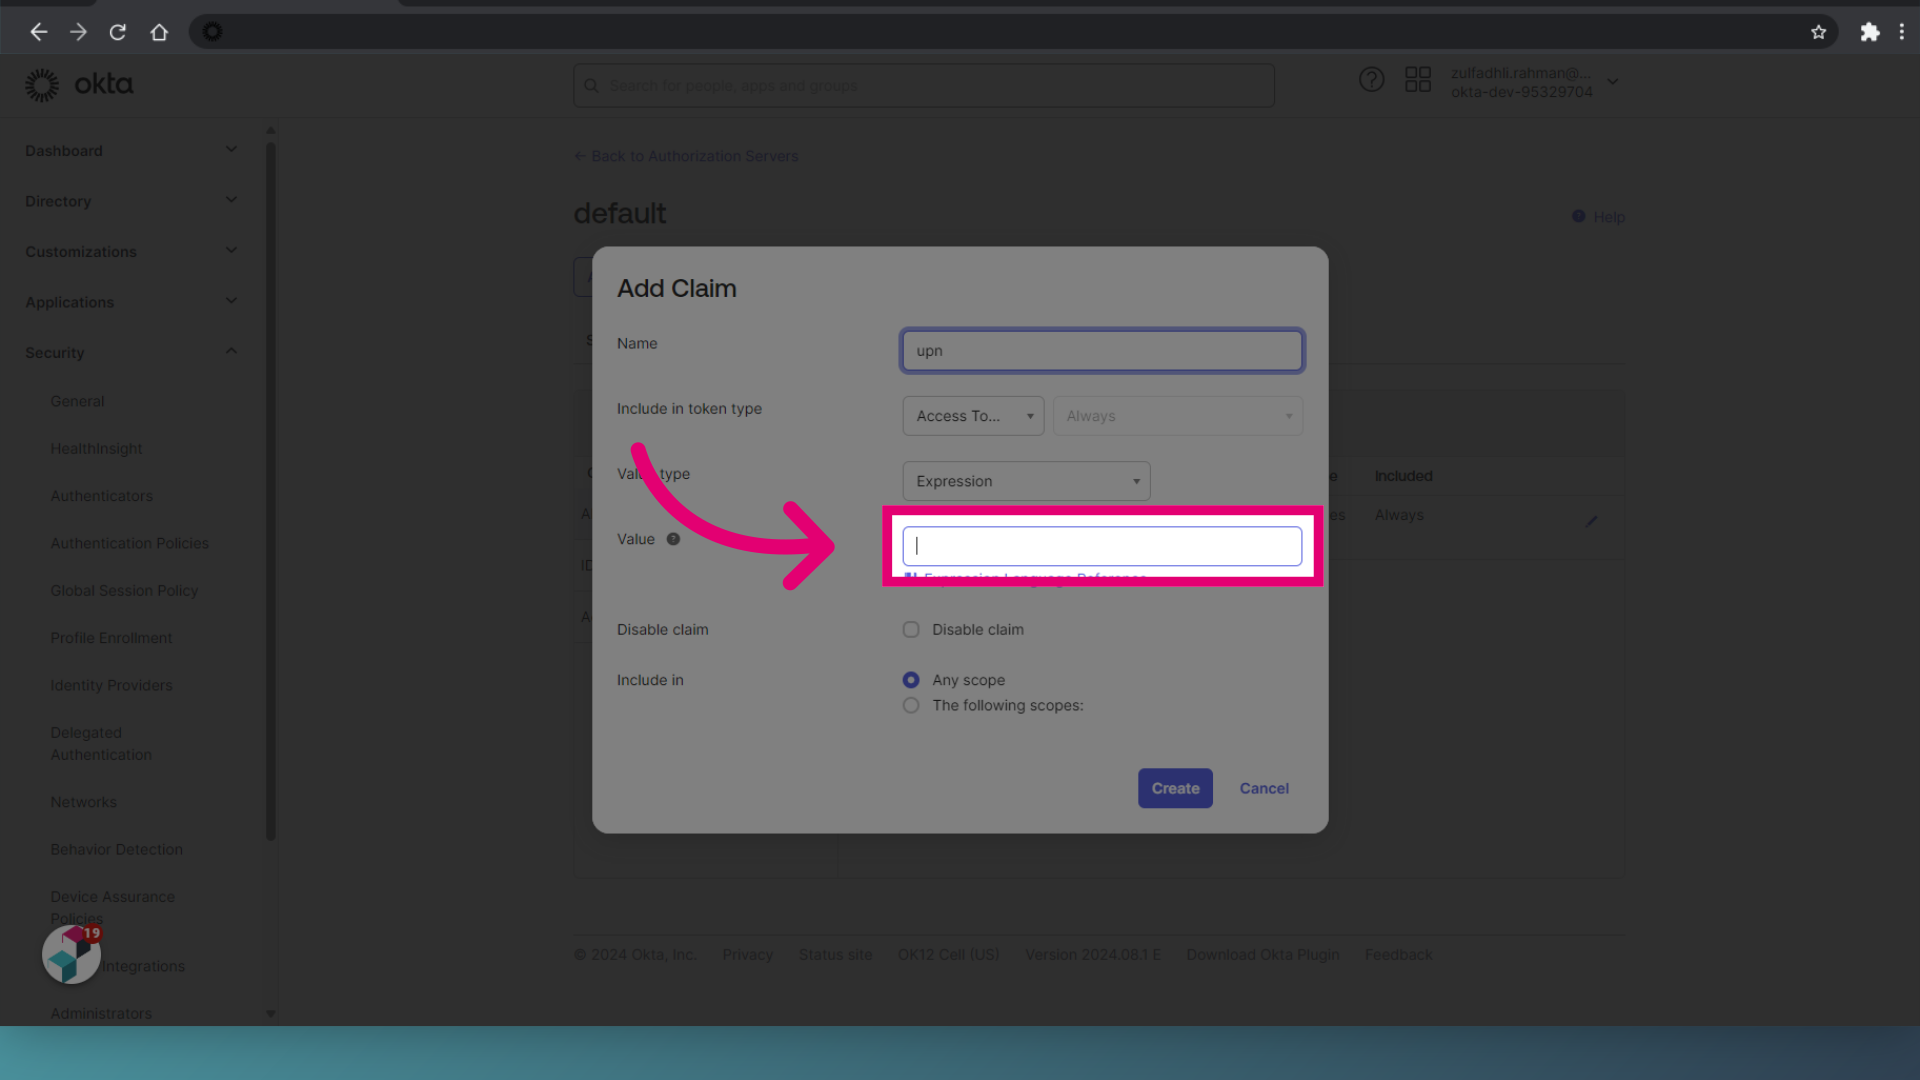
- Enter the Name as upn.
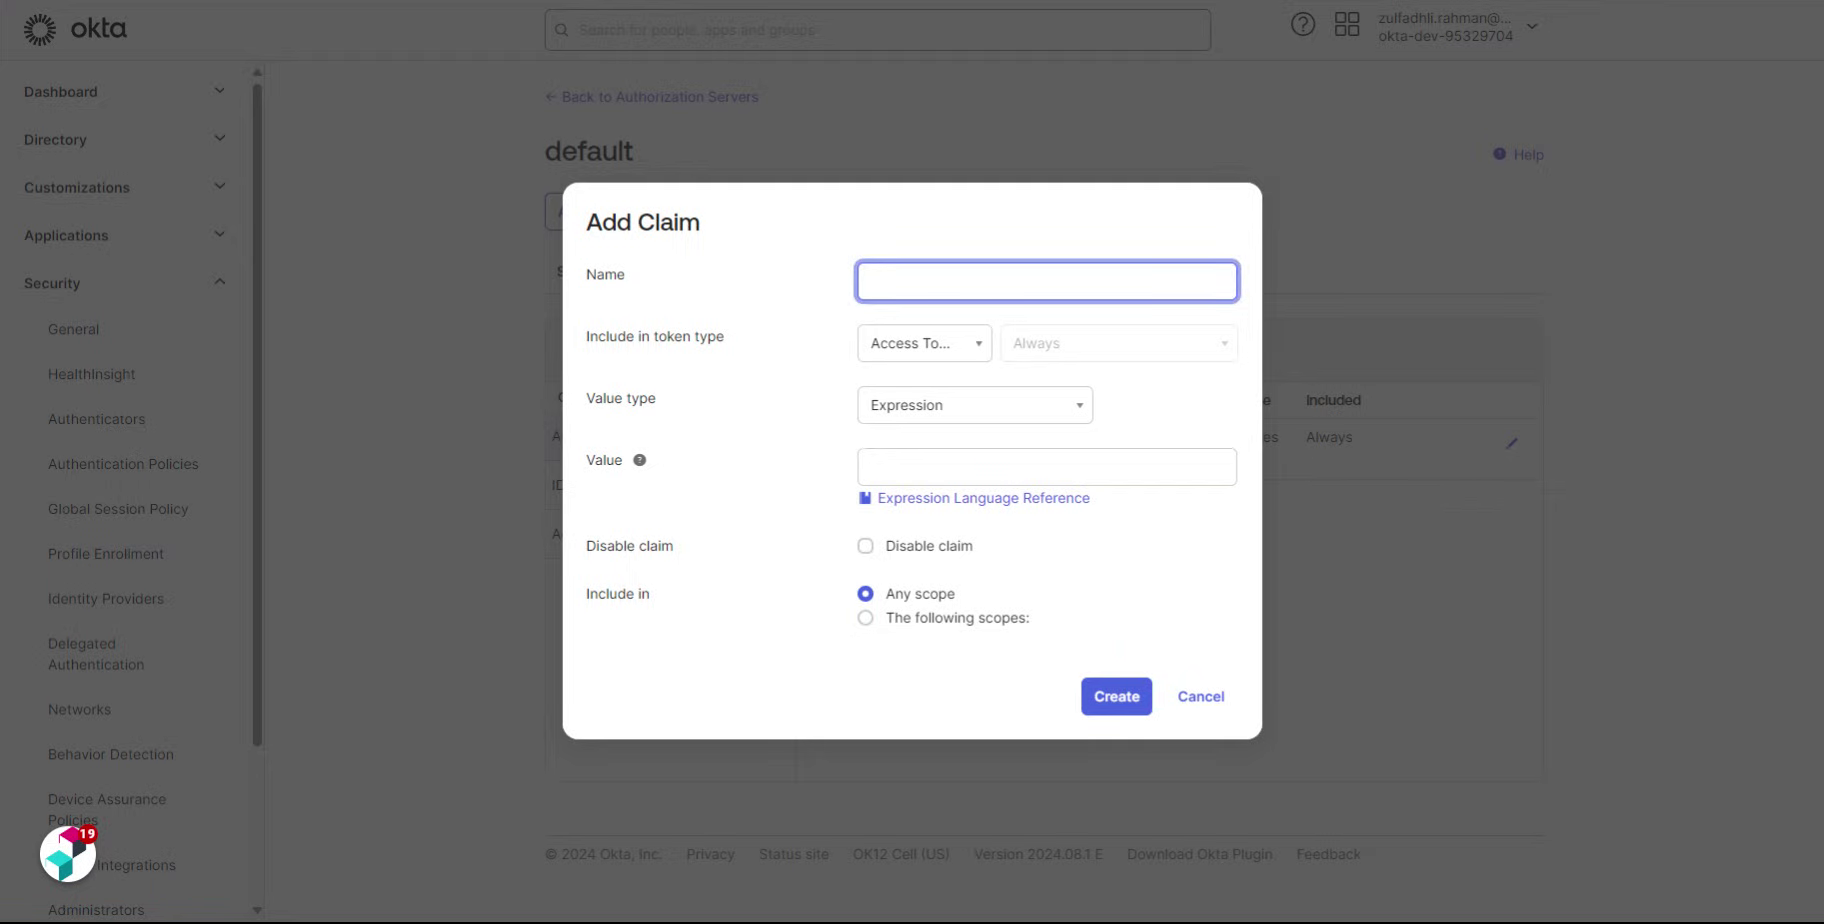
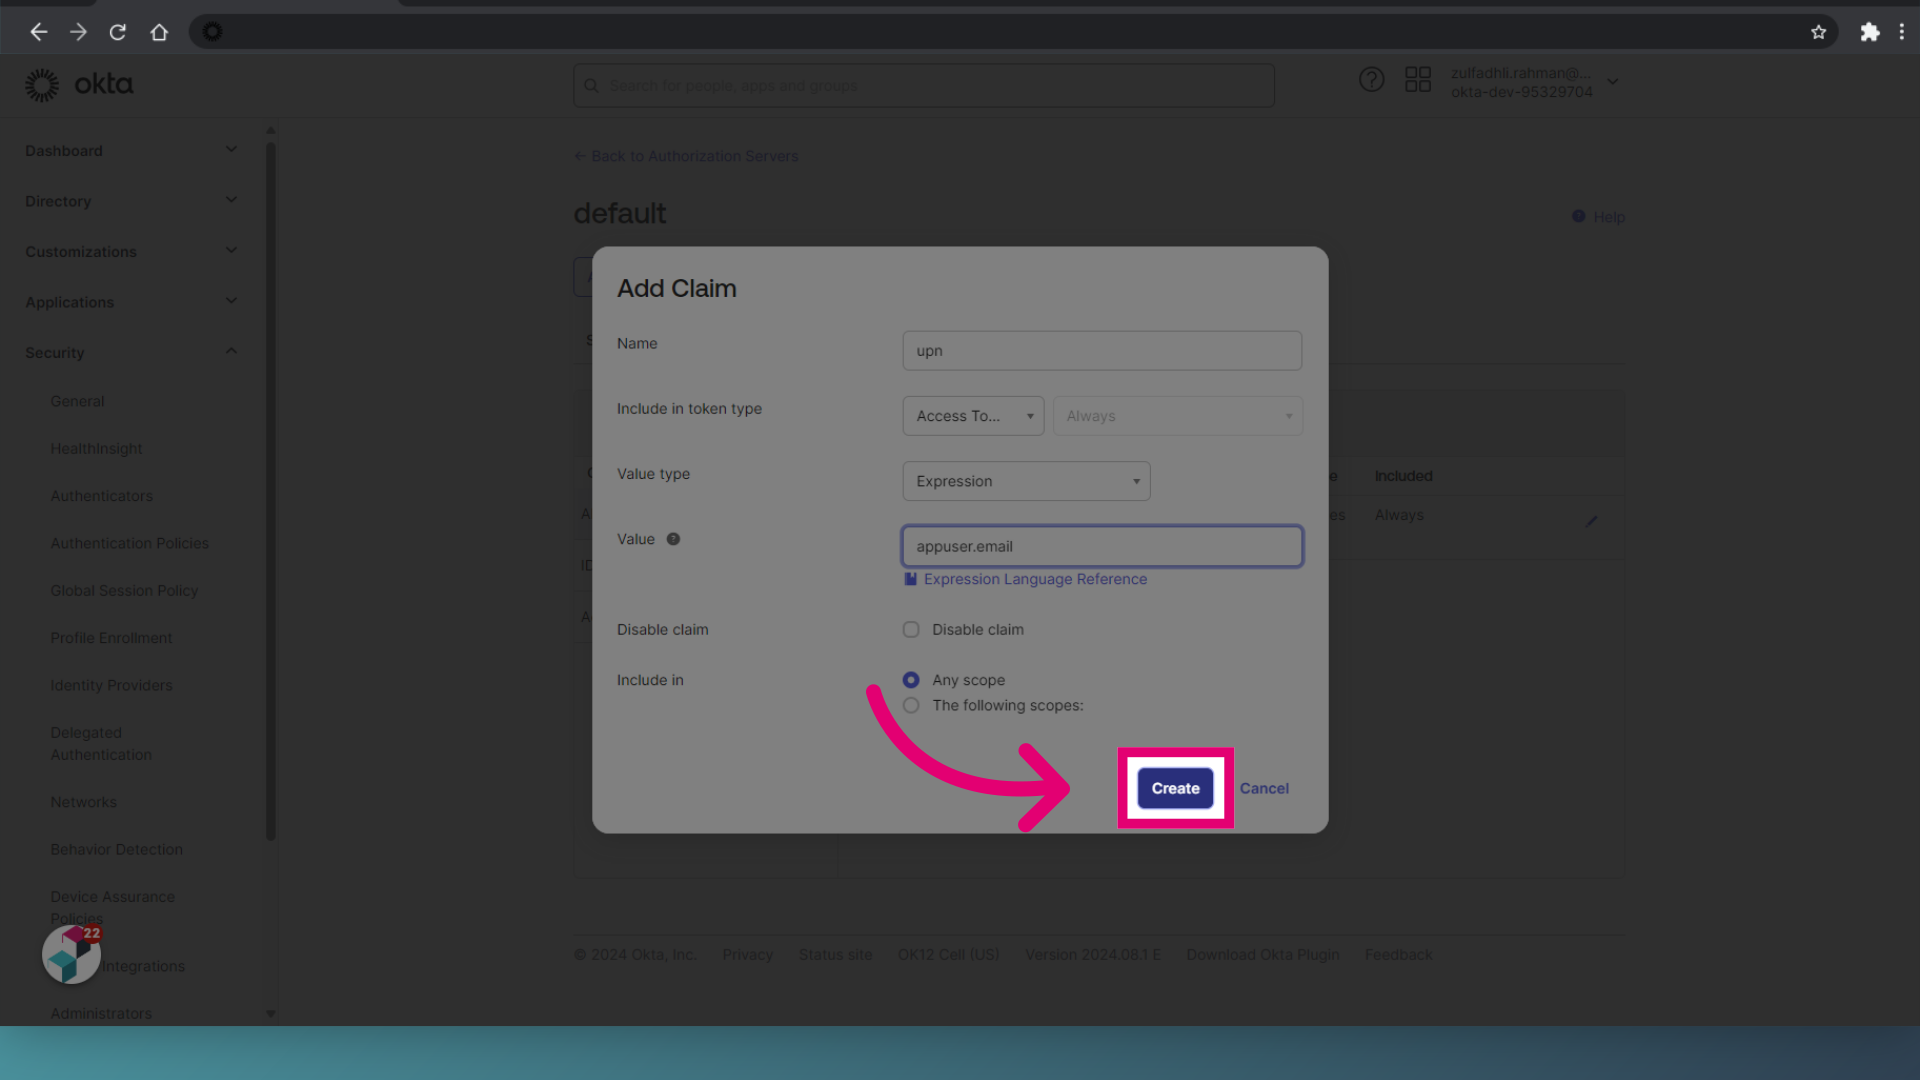
- Set the Value to appuser.email.
- Click Create.
-
Click Add Claim.
- Enter the Name as email.
- Set the Value to appuser.email.
- Click Create.

- Click Add Claim.

- Enter the Name as given_name.
- Set the Value to appuser.given_name.
- Click Create.
- Click Add Claim.
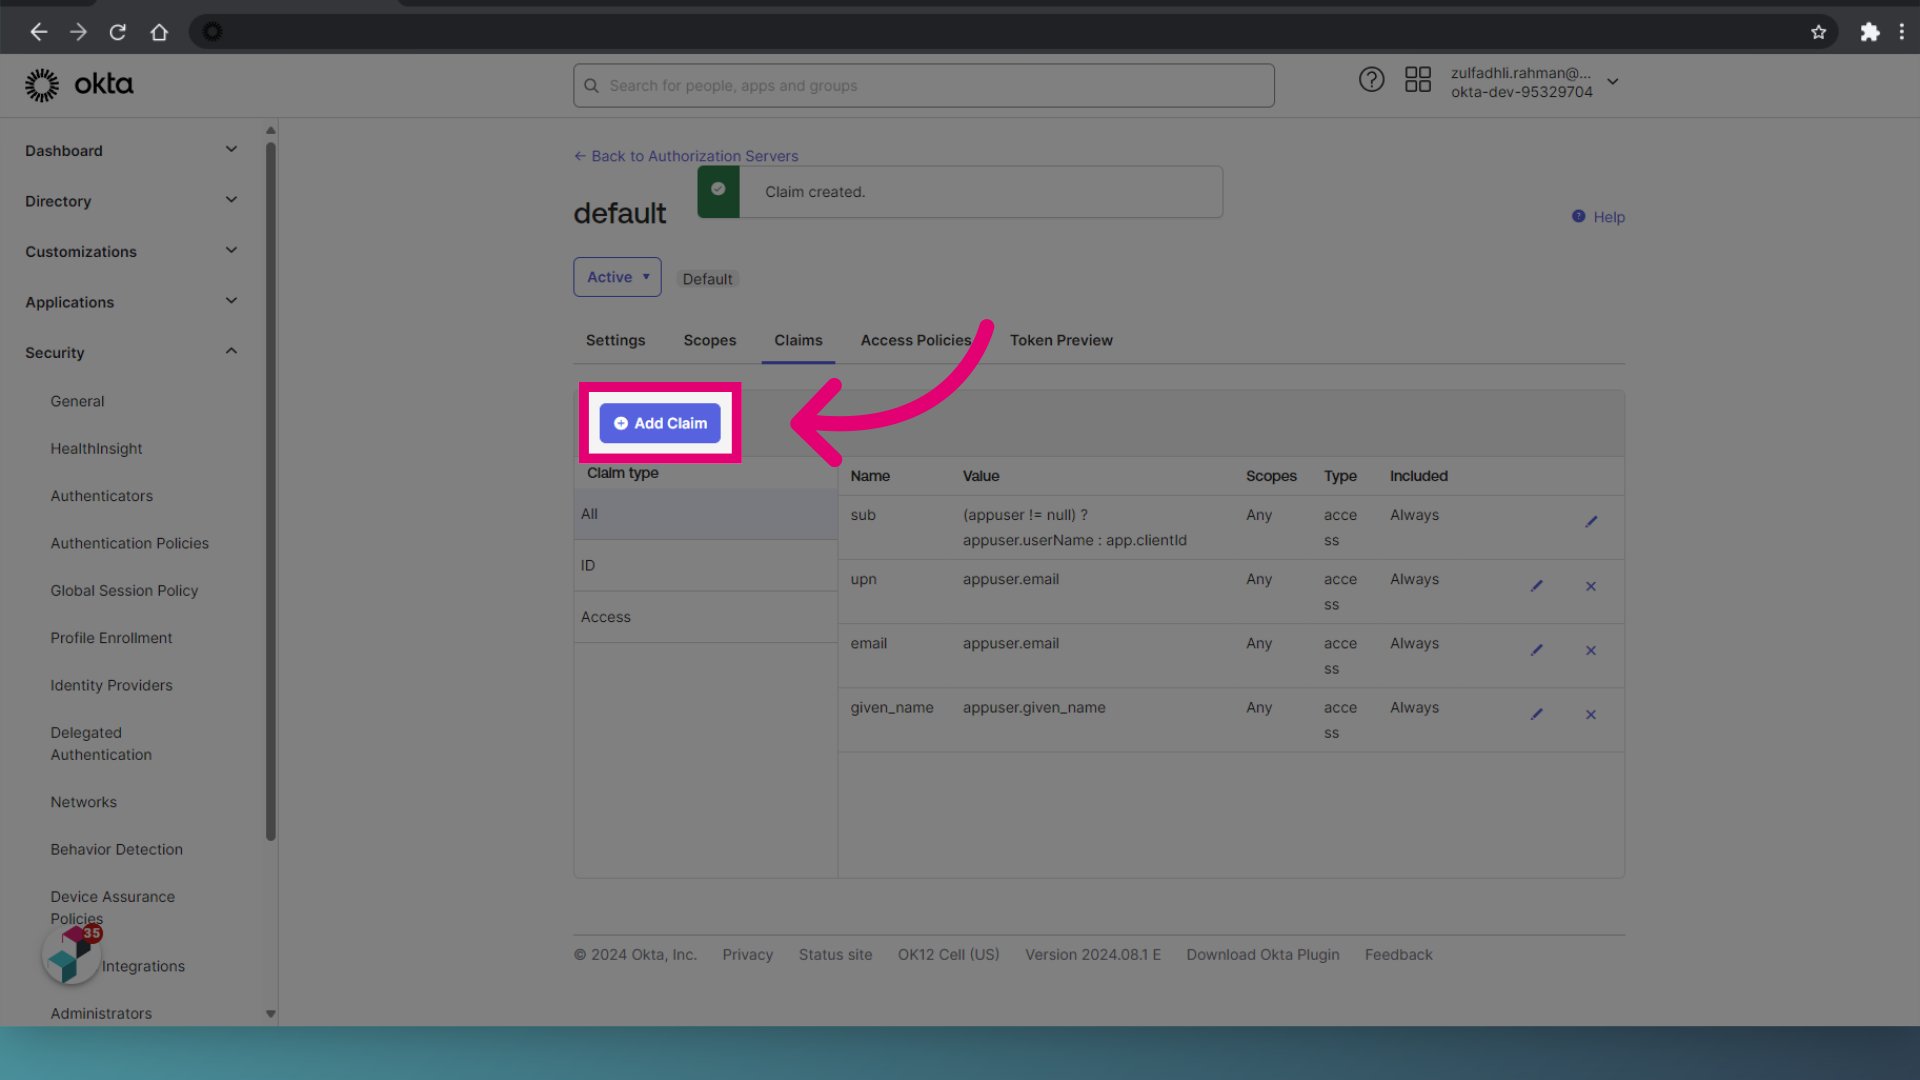
- Enter the Name as family_name.
- Set the Value to appuser.family_name.
- Click Create.
1. Integrating for Web
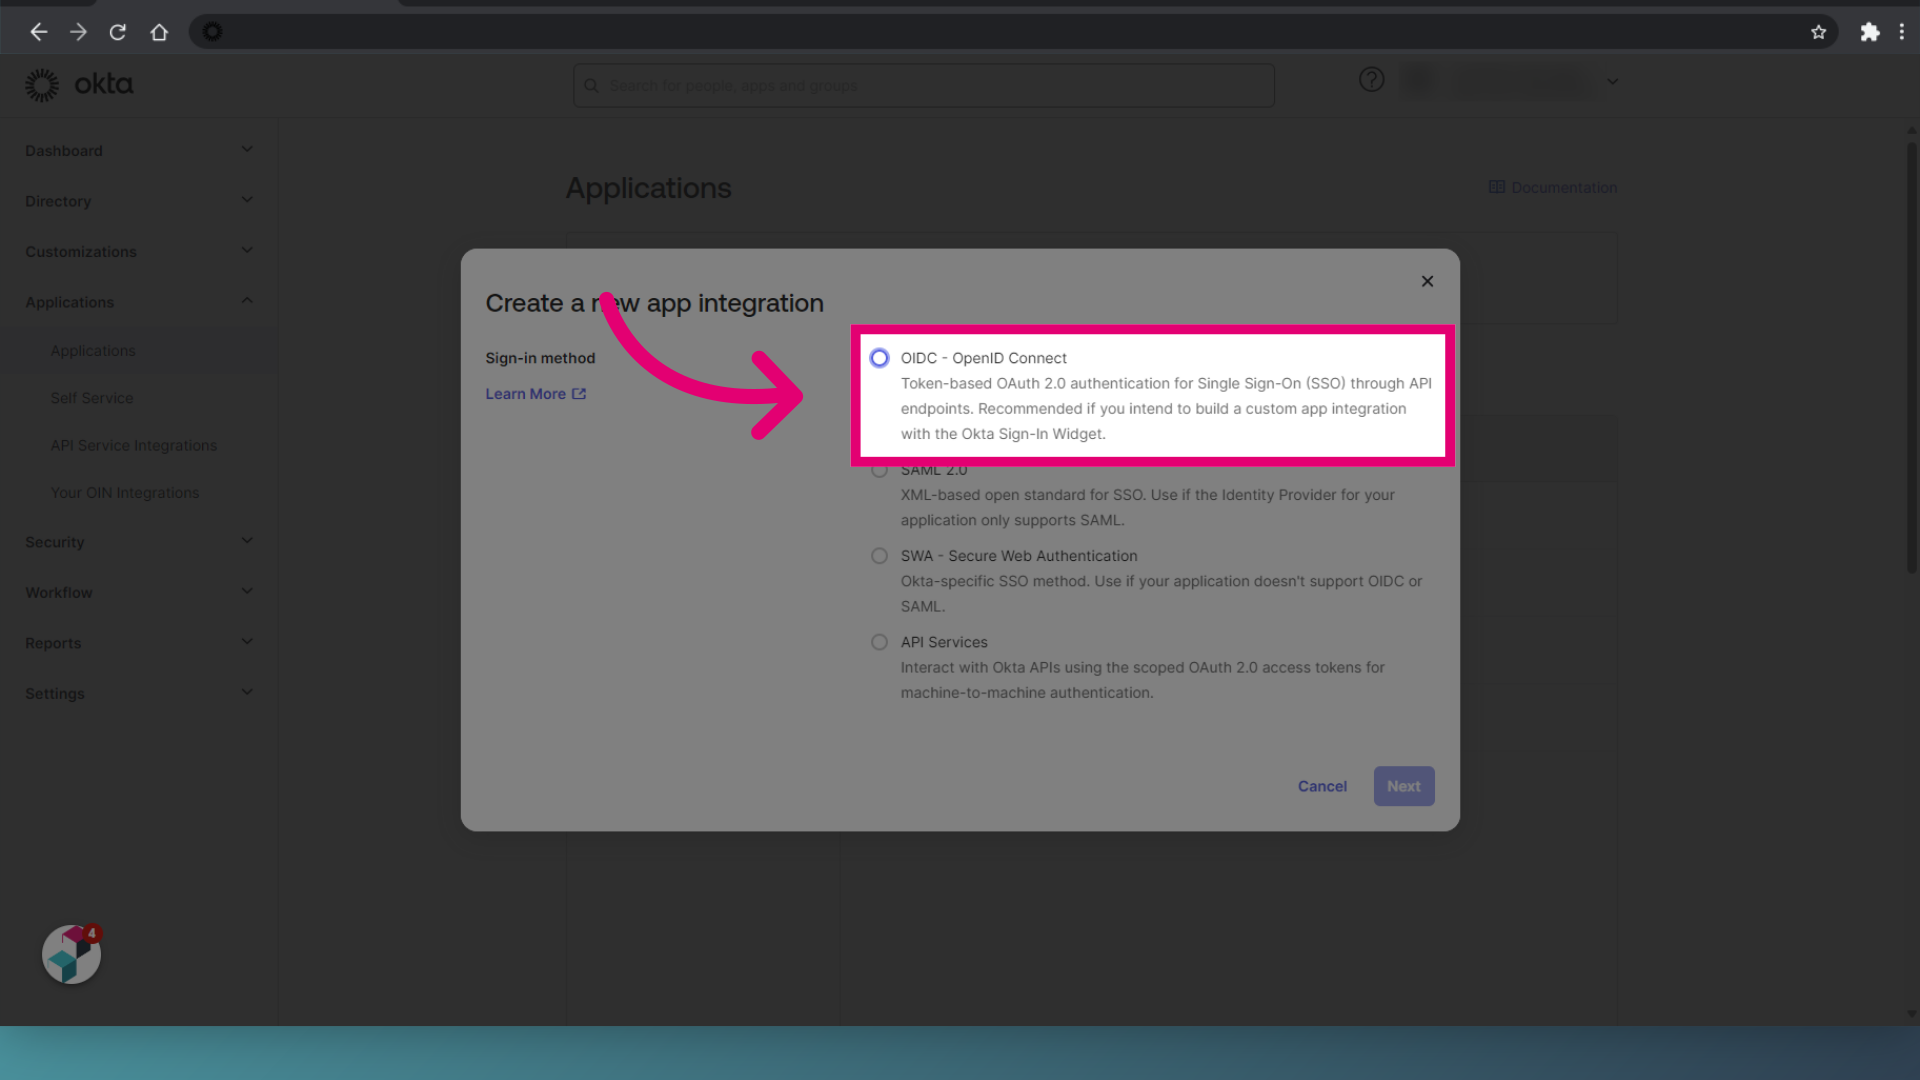
To integrate Okta for Web:
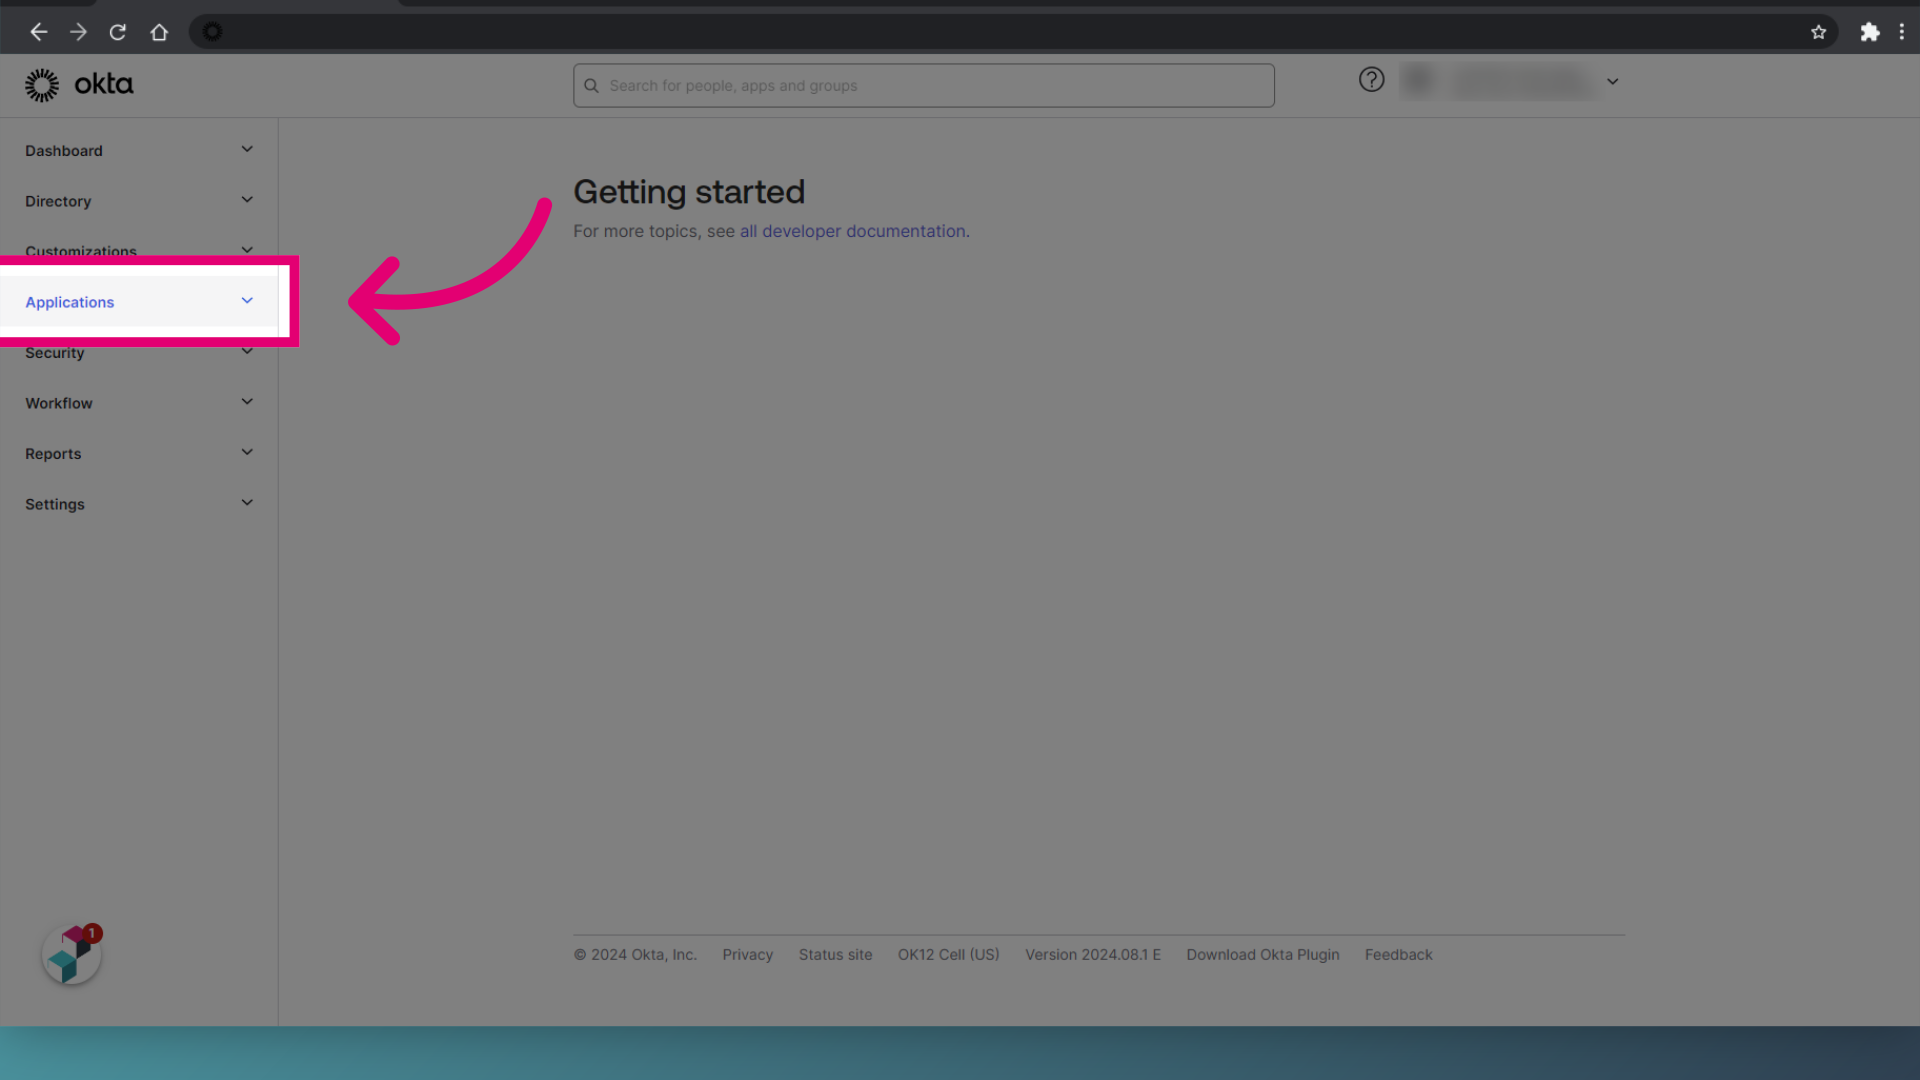
- Log in to Okta.
- Select Applications.
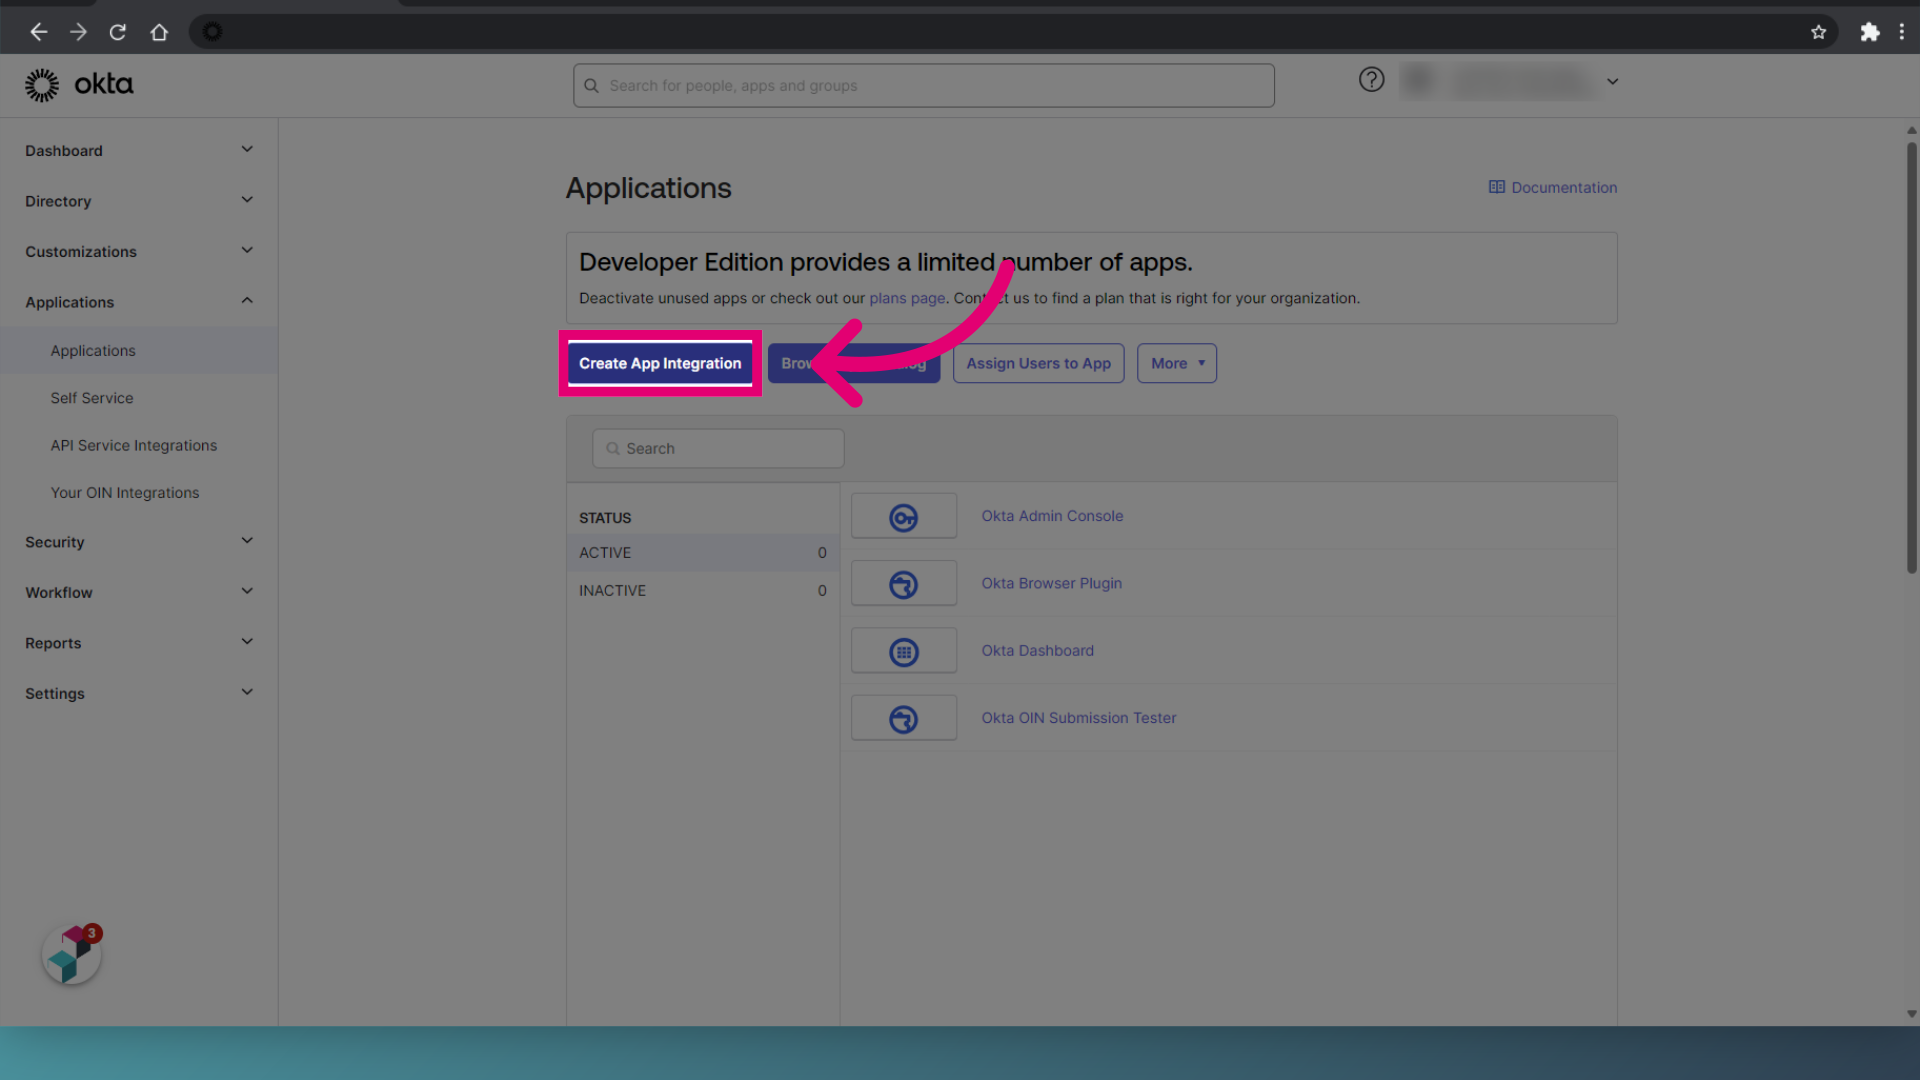
- Click Create App Integration.
- Select OIDC - Open ID Connect.
- Choose Web Application for the Application type for server-side handling of authentication.
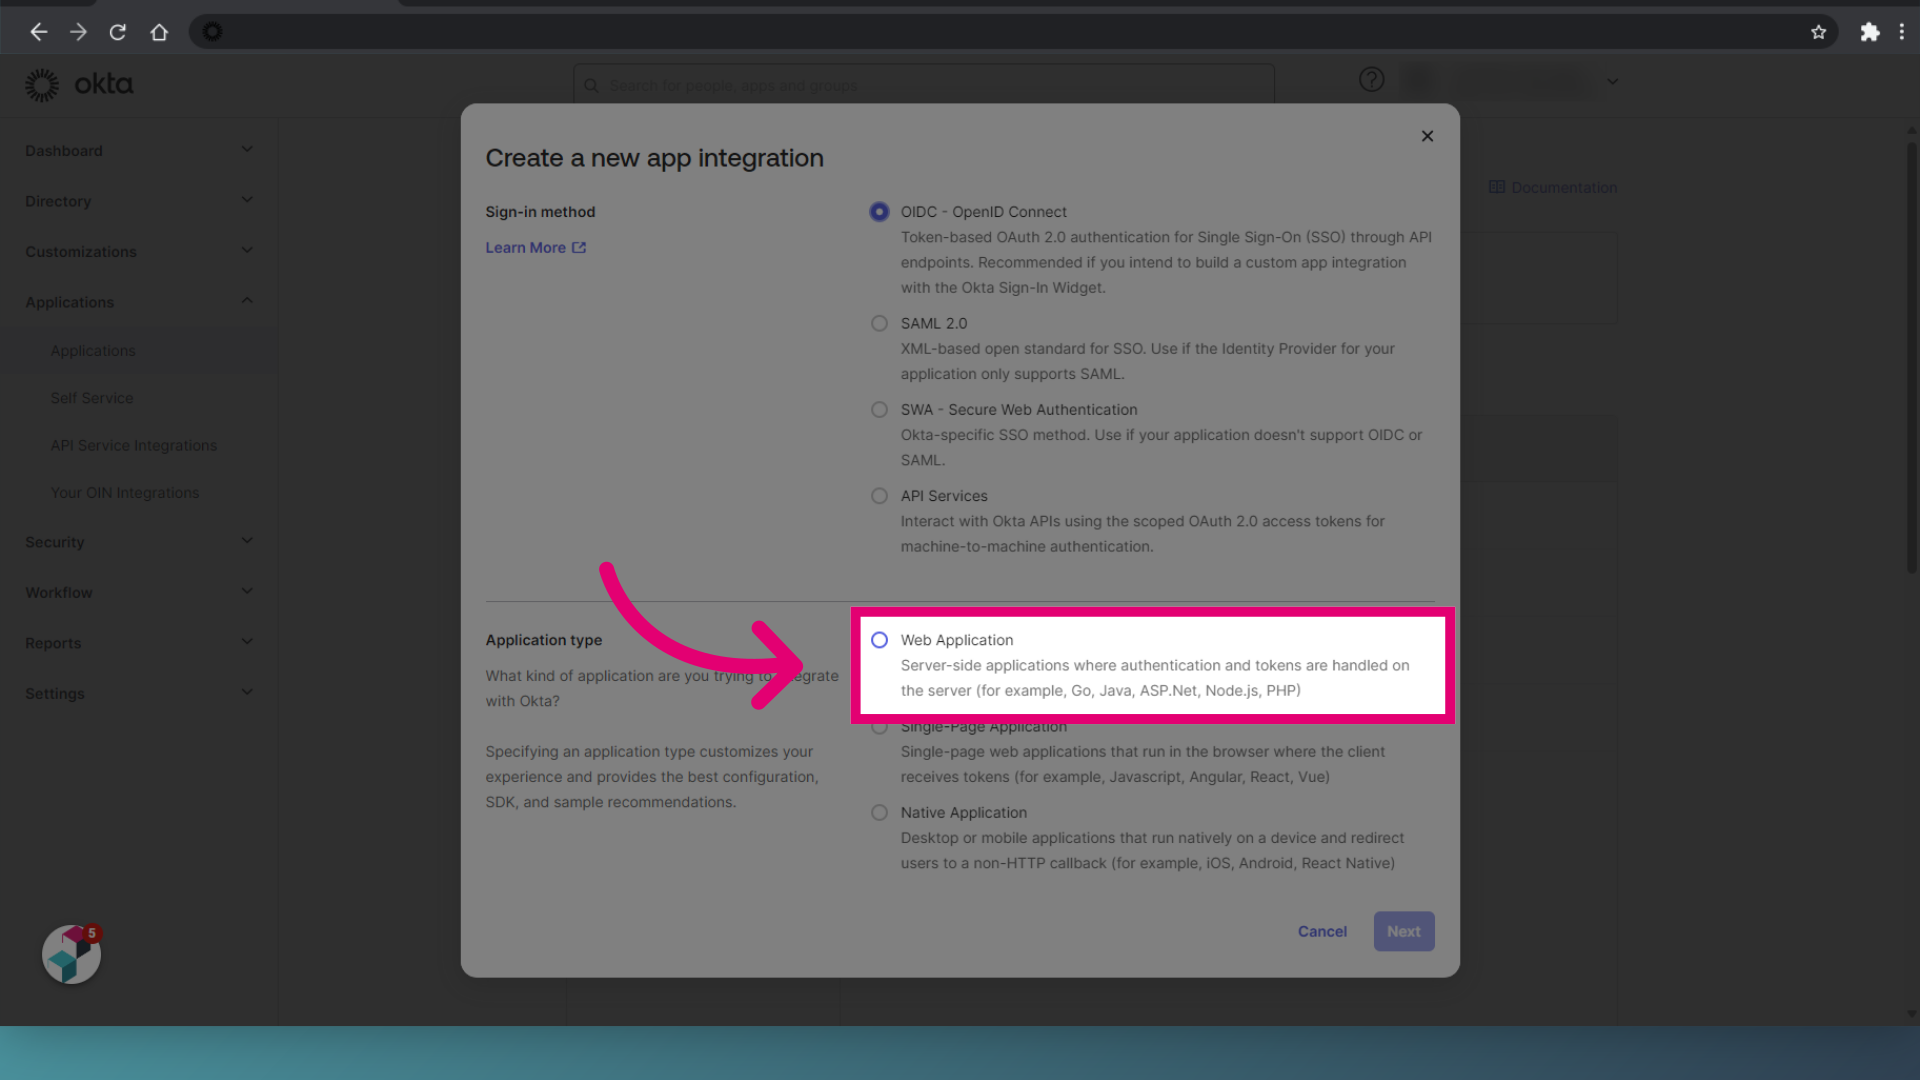
- Click Next.
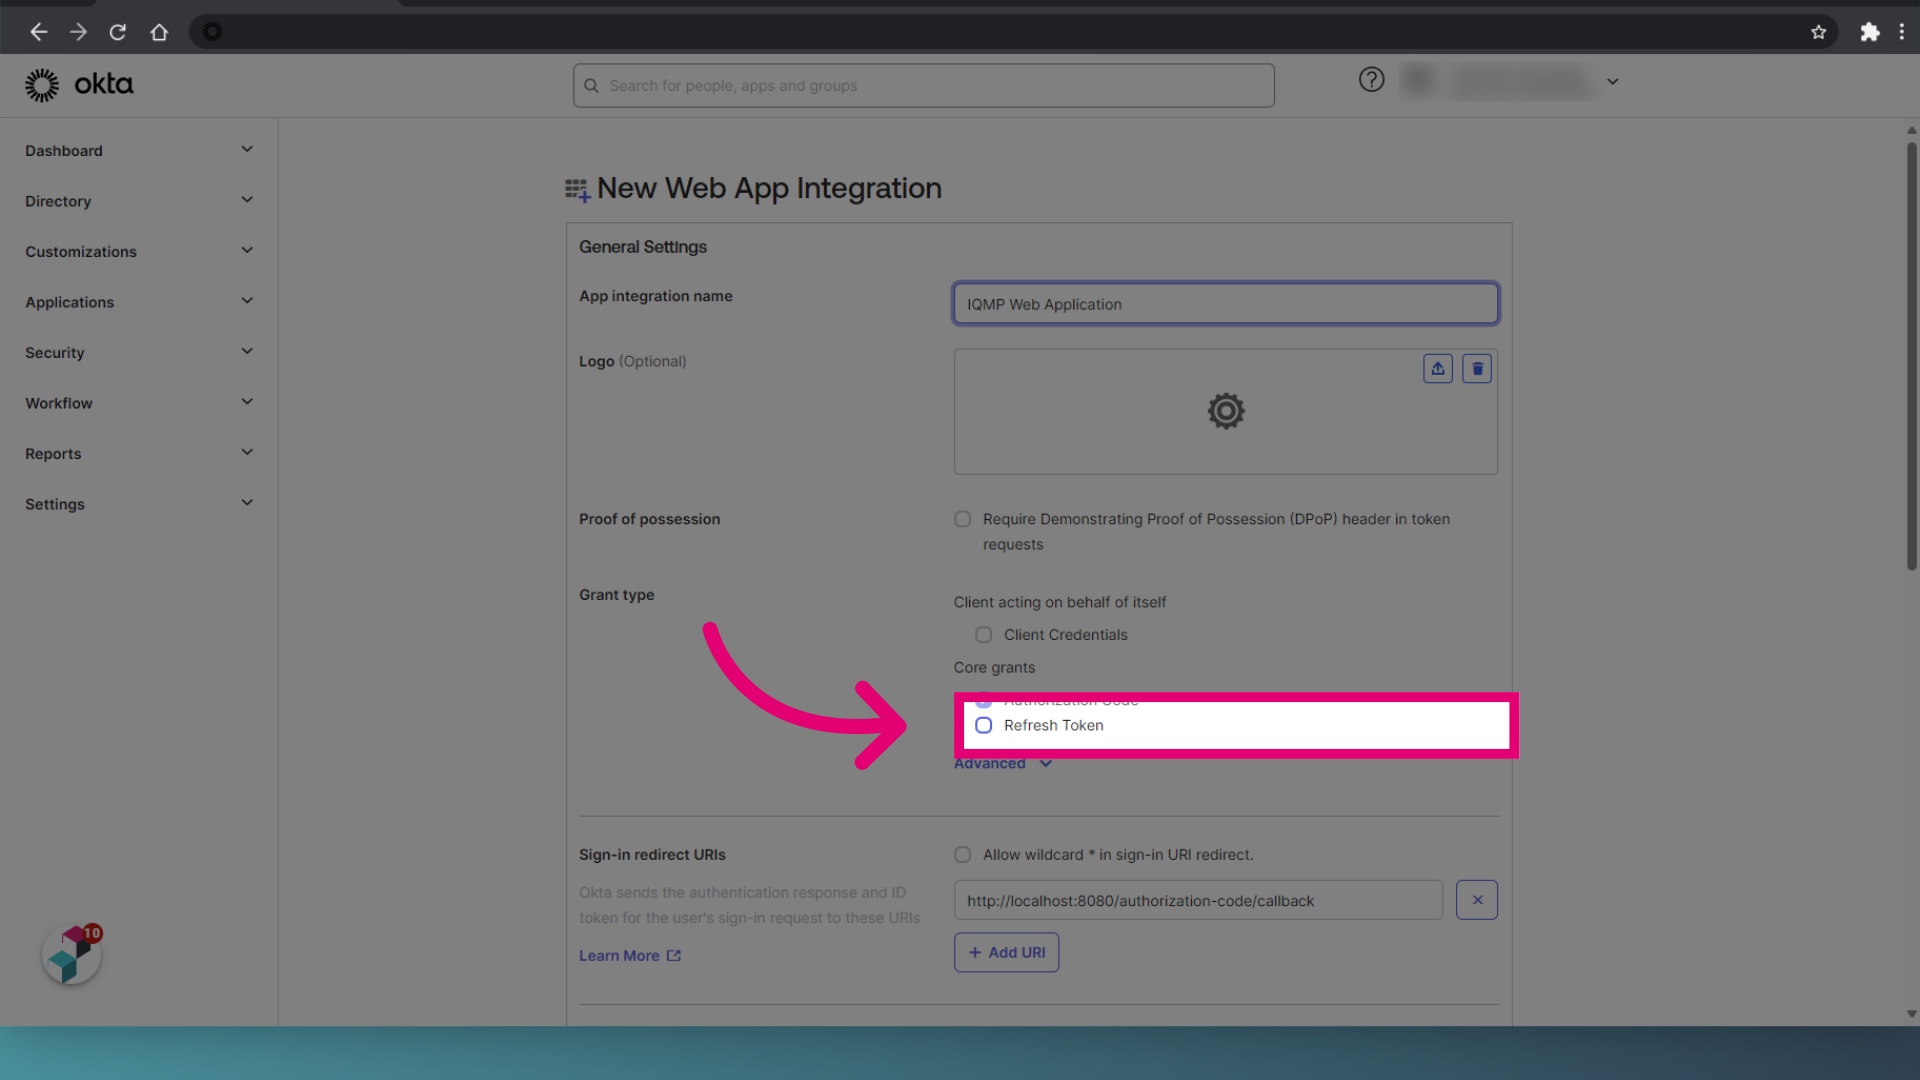
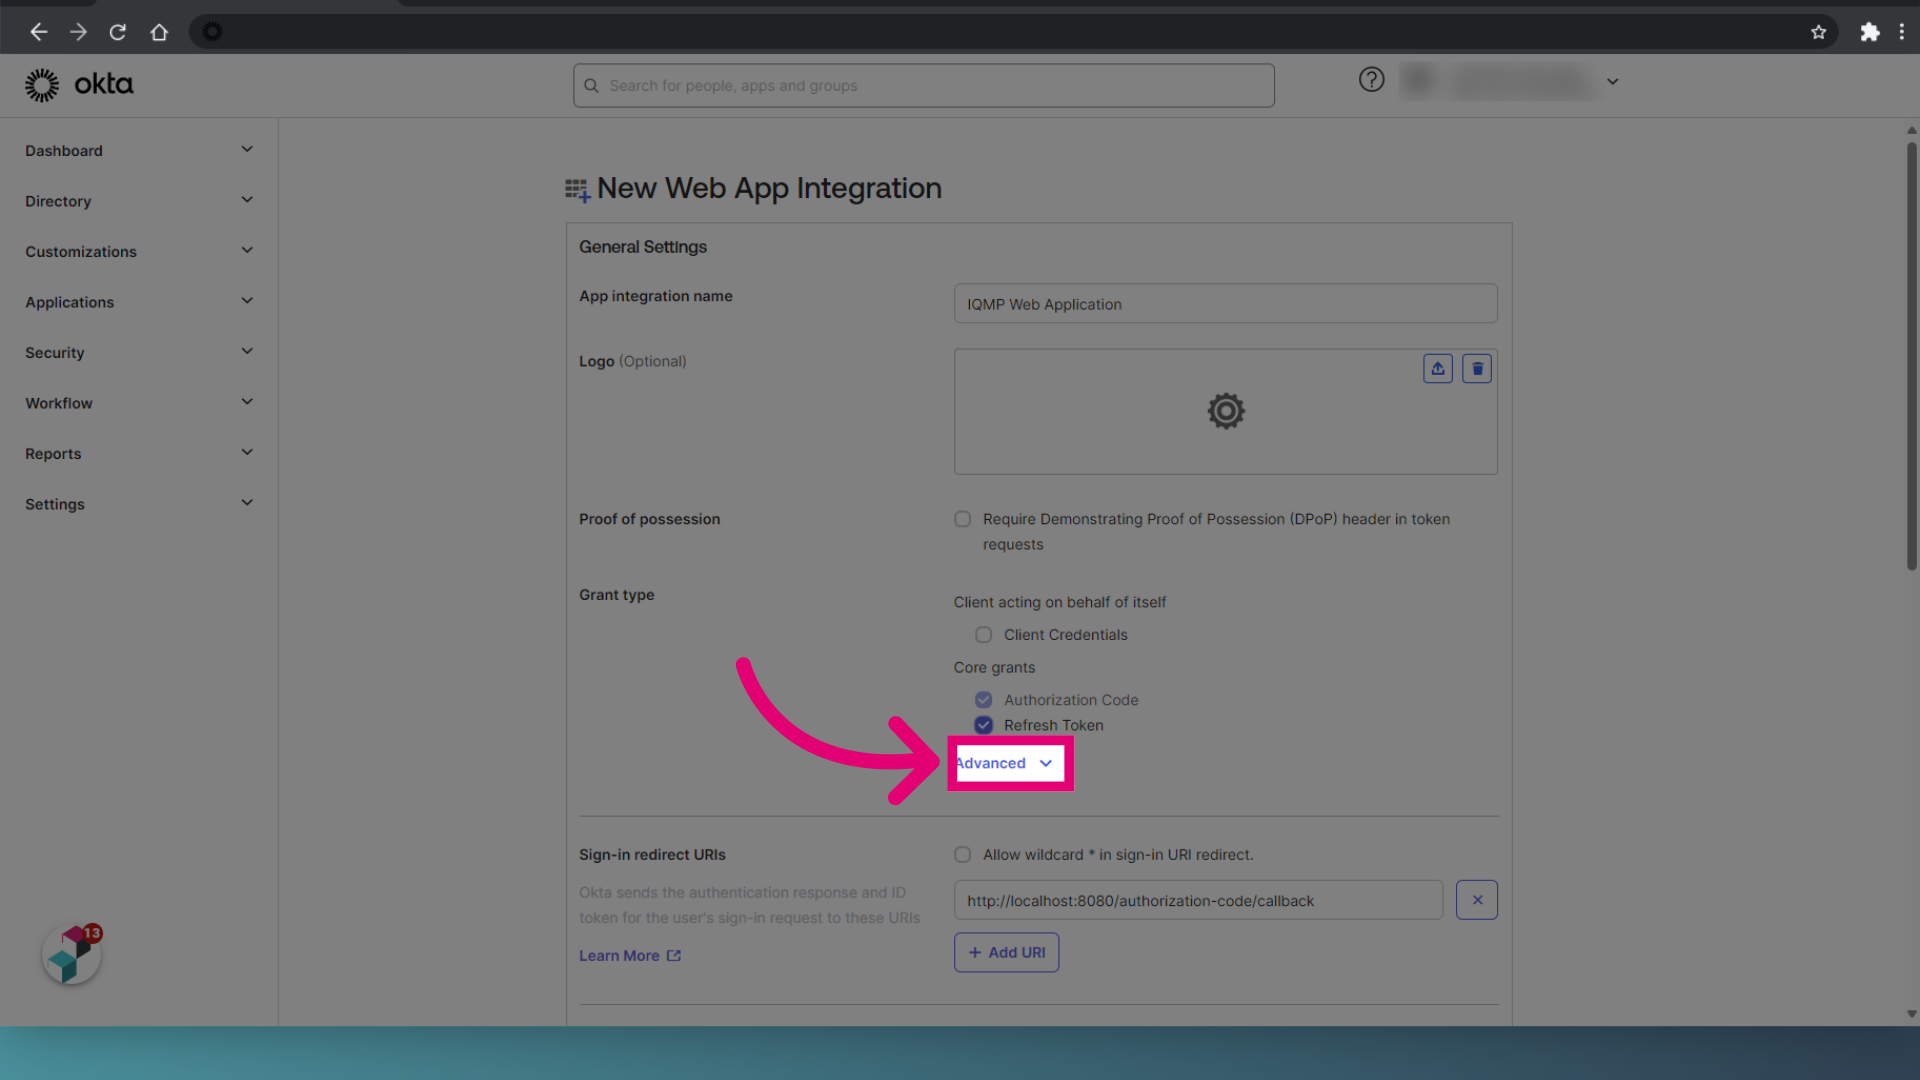
- Enter App integration name as IQMP Web Application.
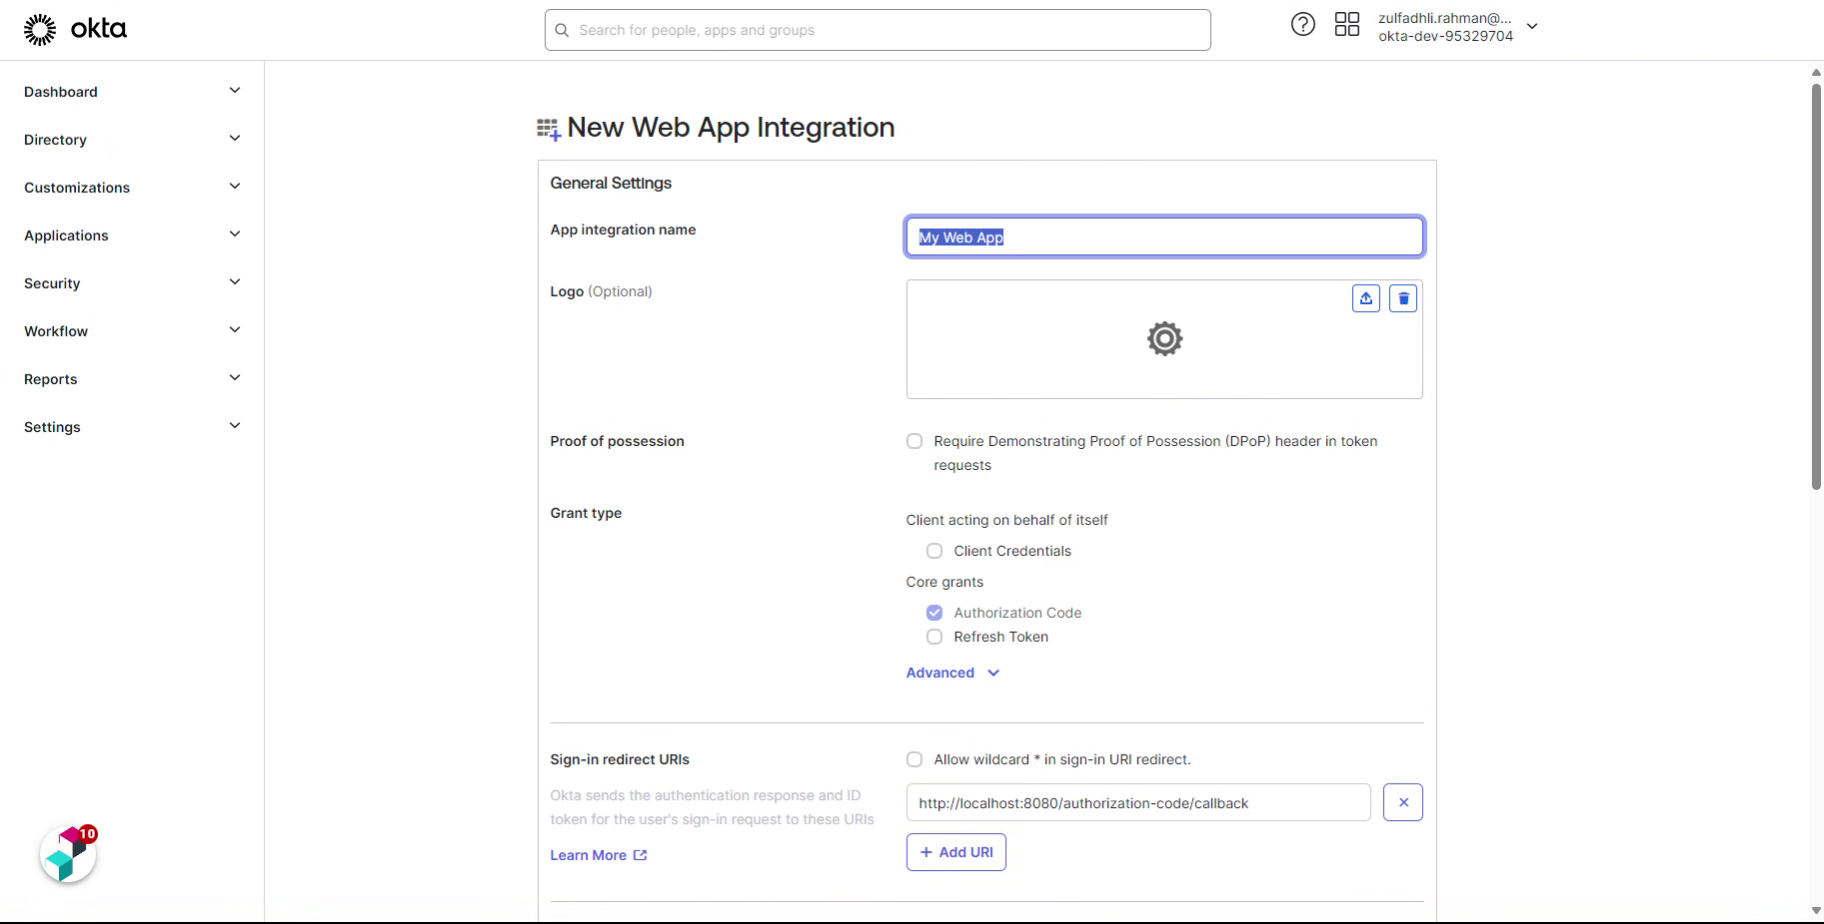
- Tick Refresh Token under Grant type.
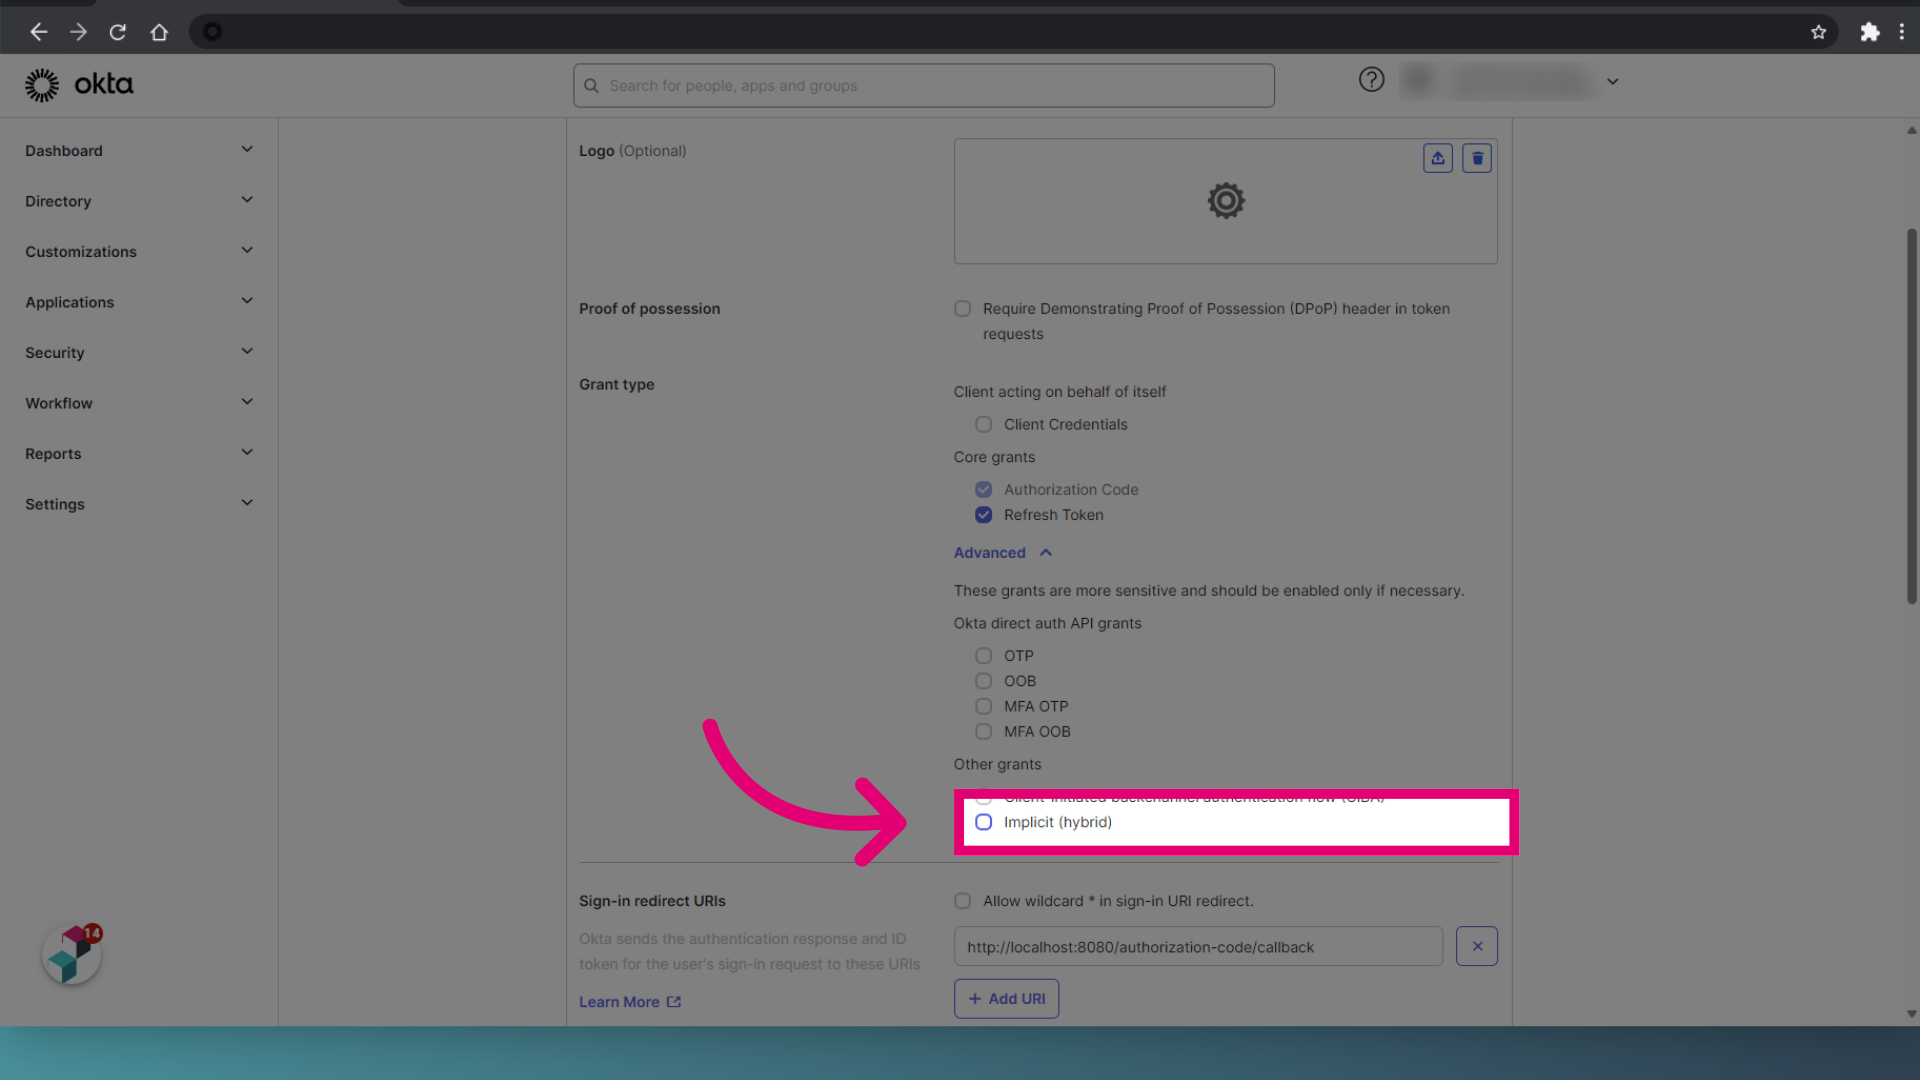
- Expand Advanced.
- Tick Implicit (hybrid).
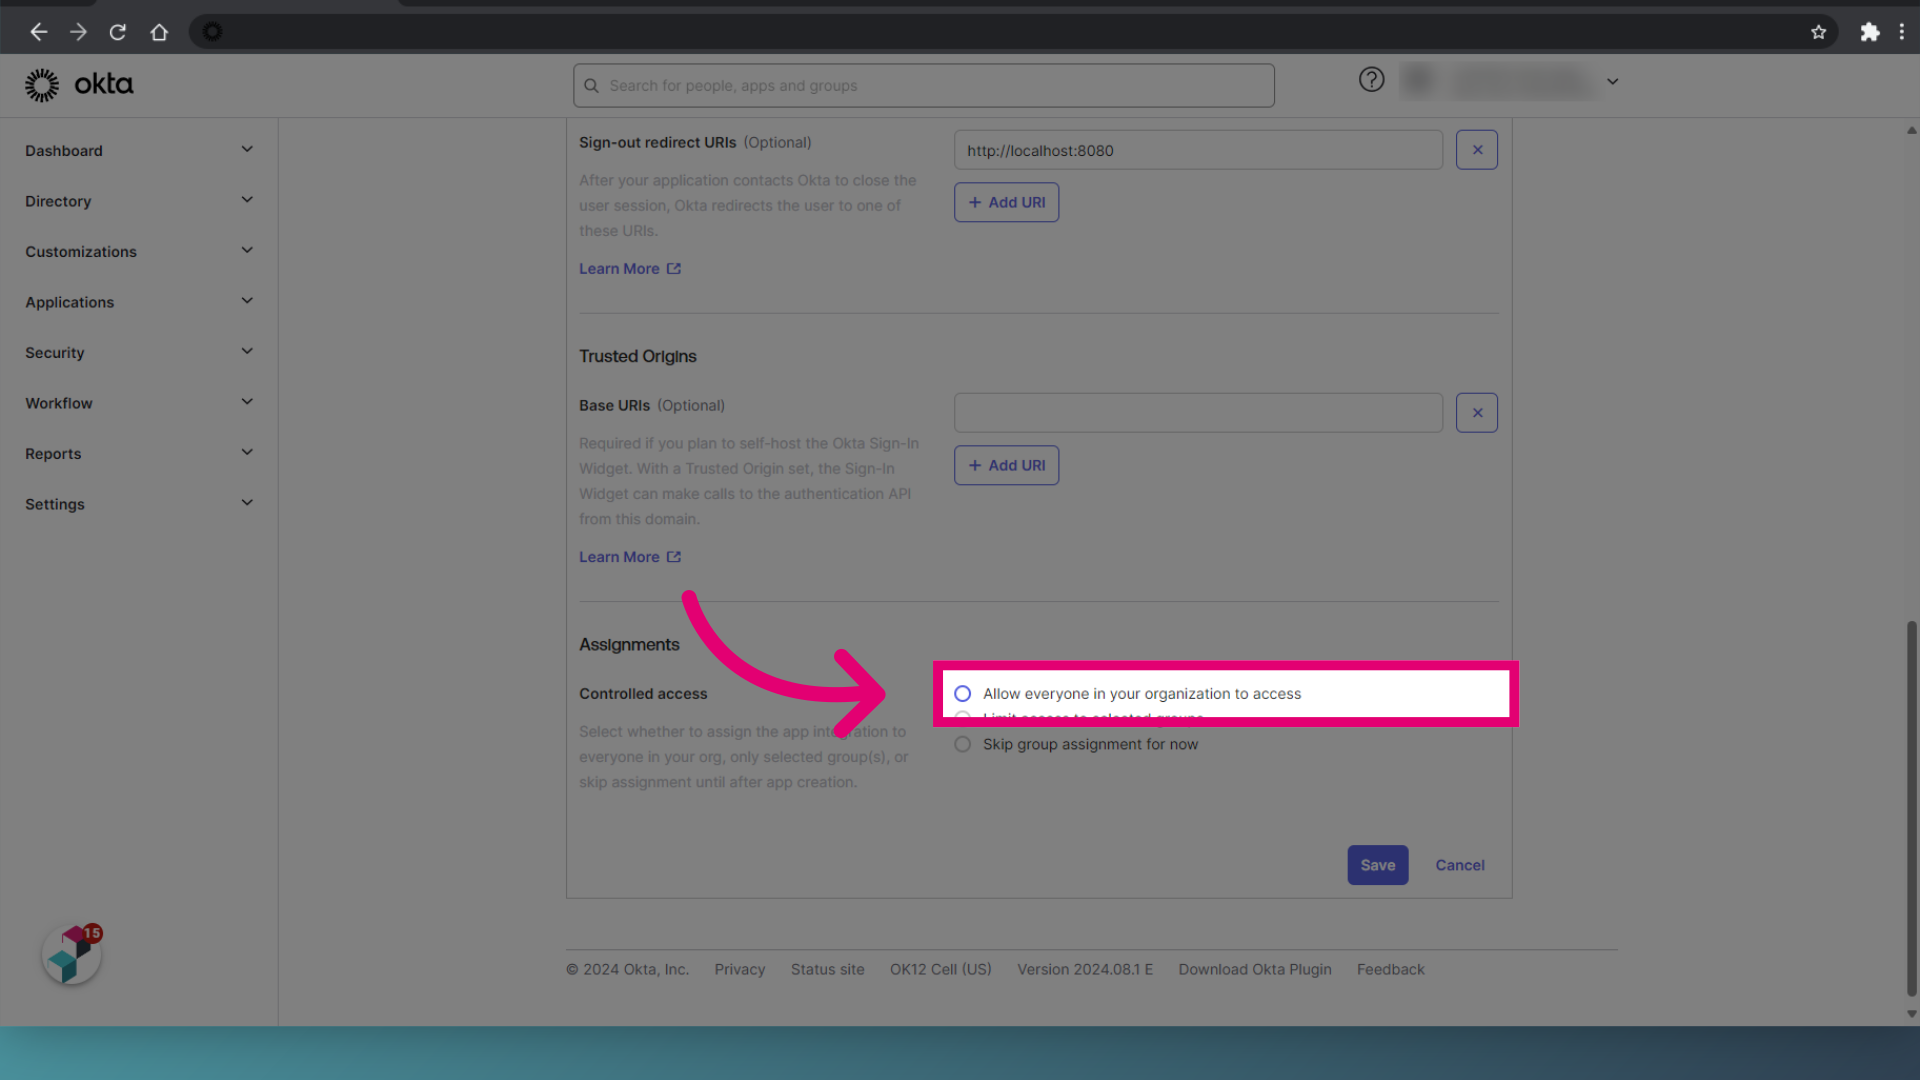
- Set Controlled access to Allow everyone in your organization to access.
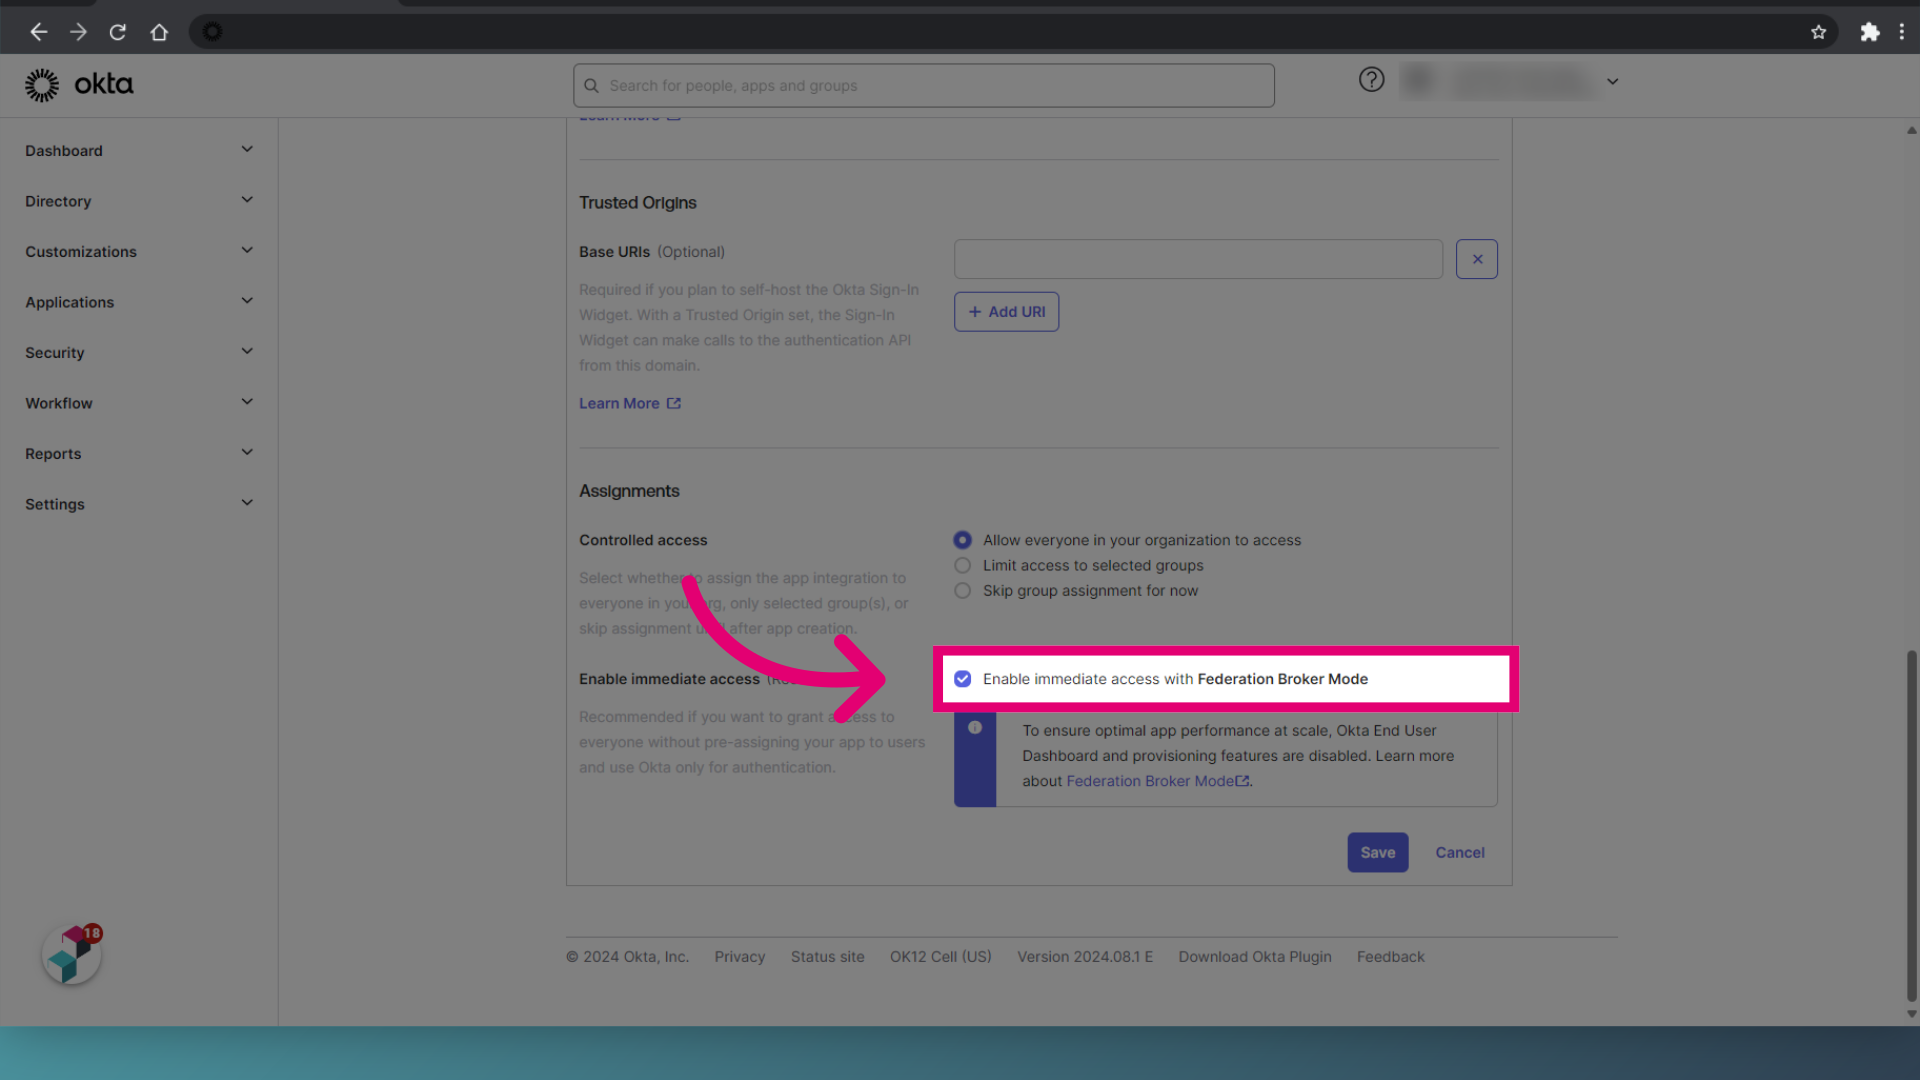
- Tick Enable immediate access with Federation Broker Mode.
- Click Save.
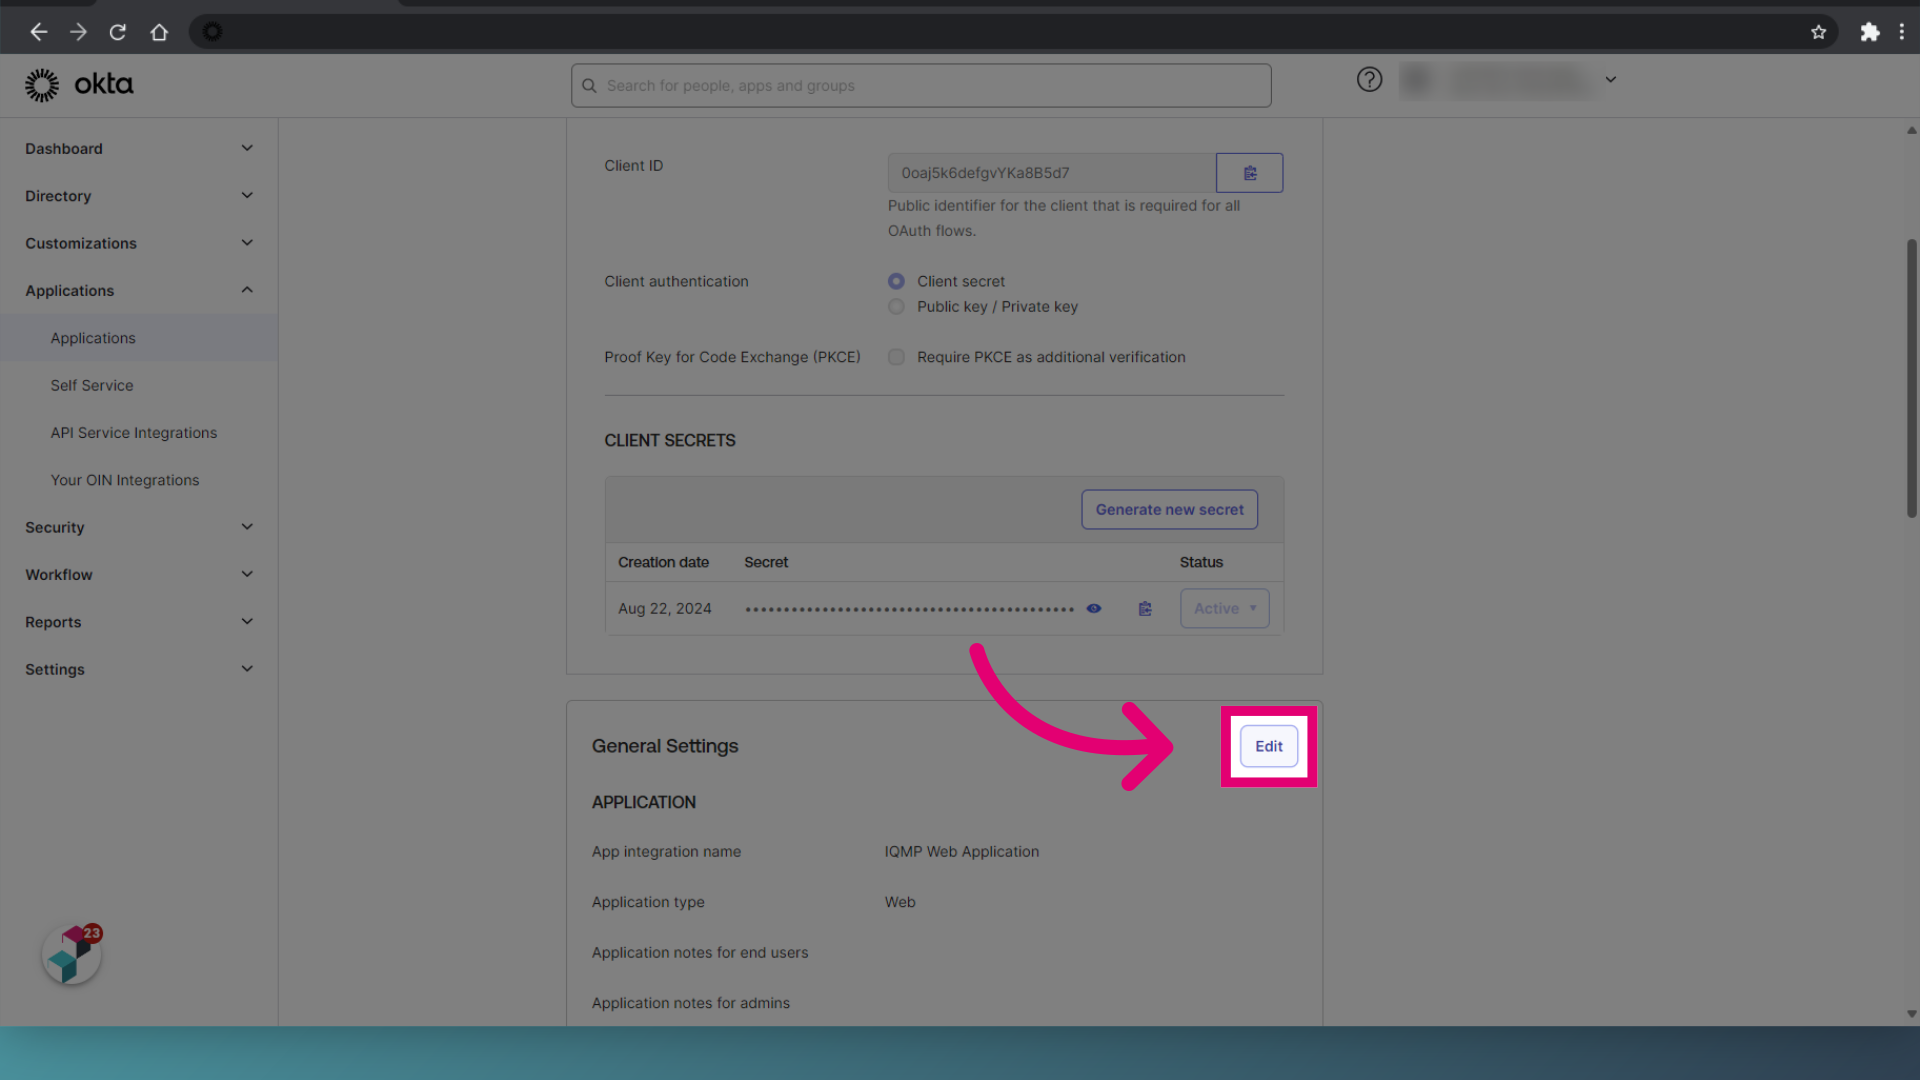
- Access General Settings.
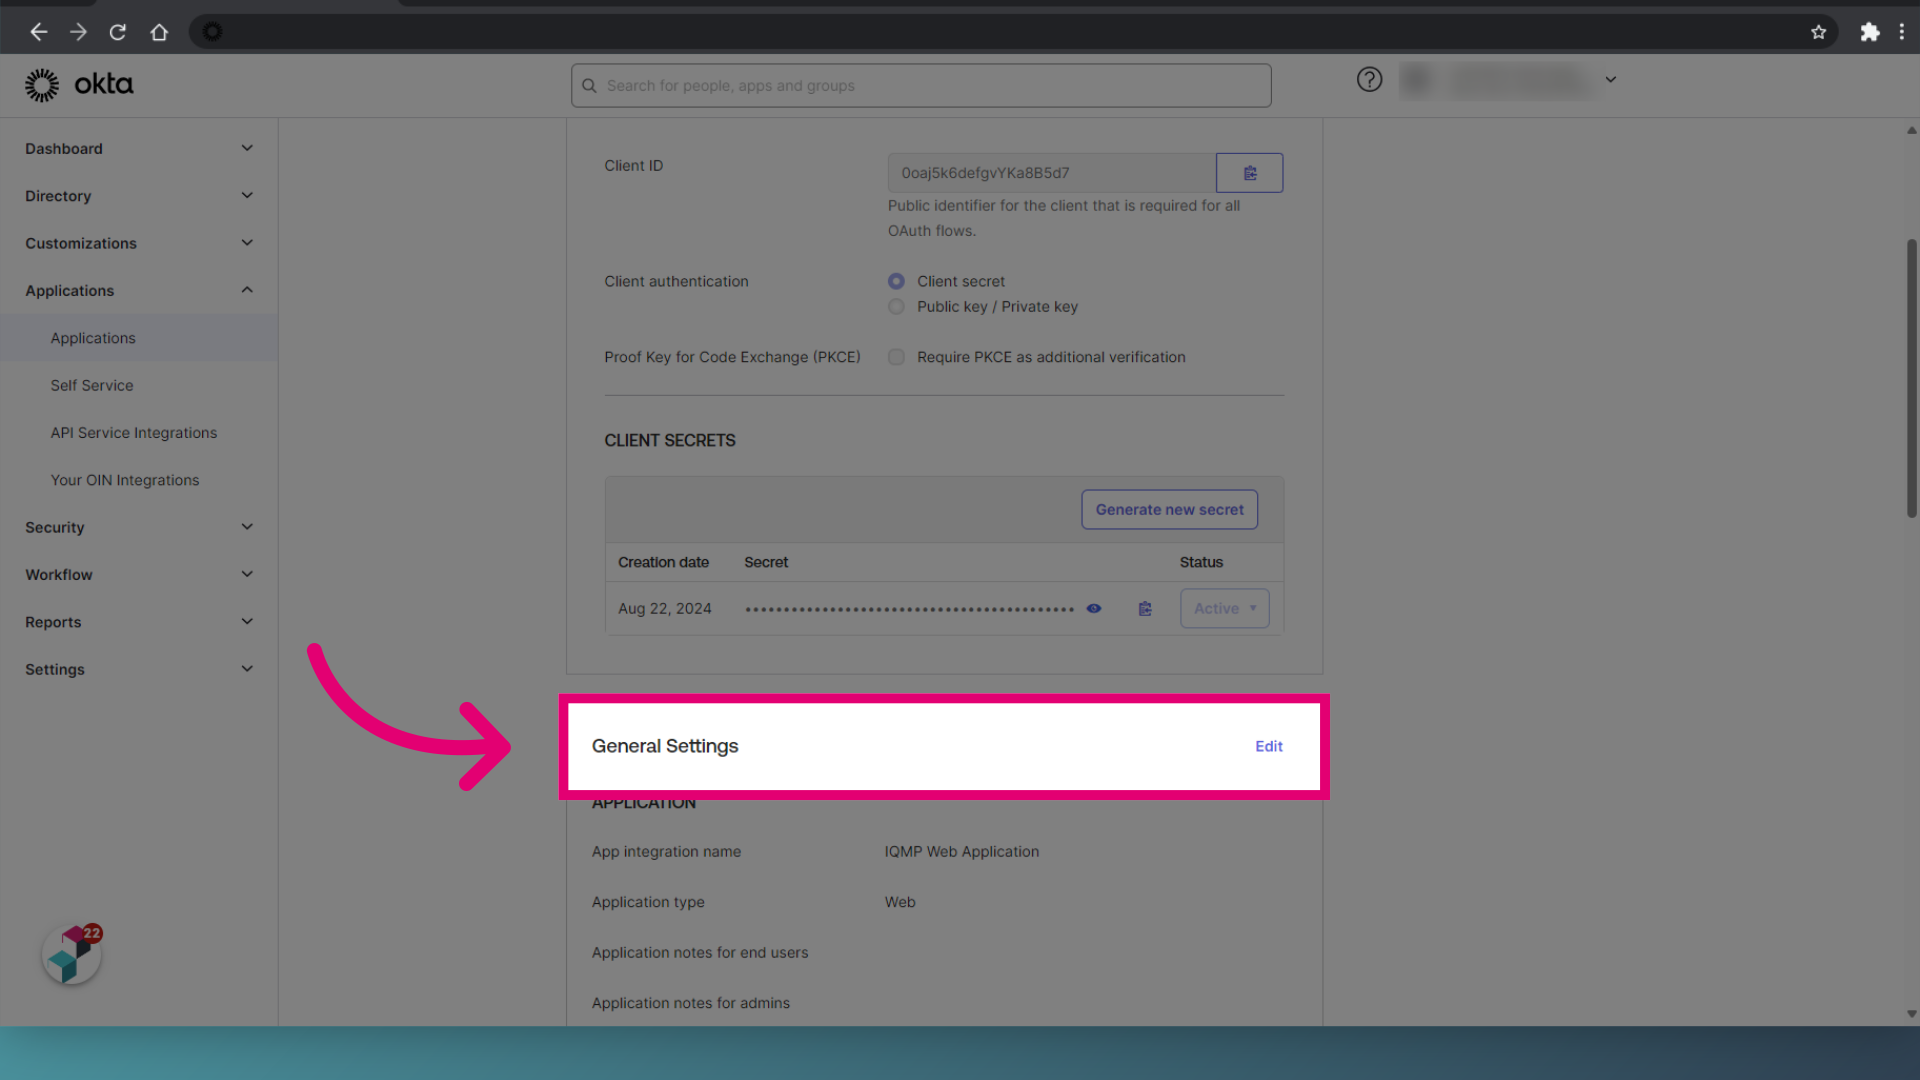
- Click Edit.
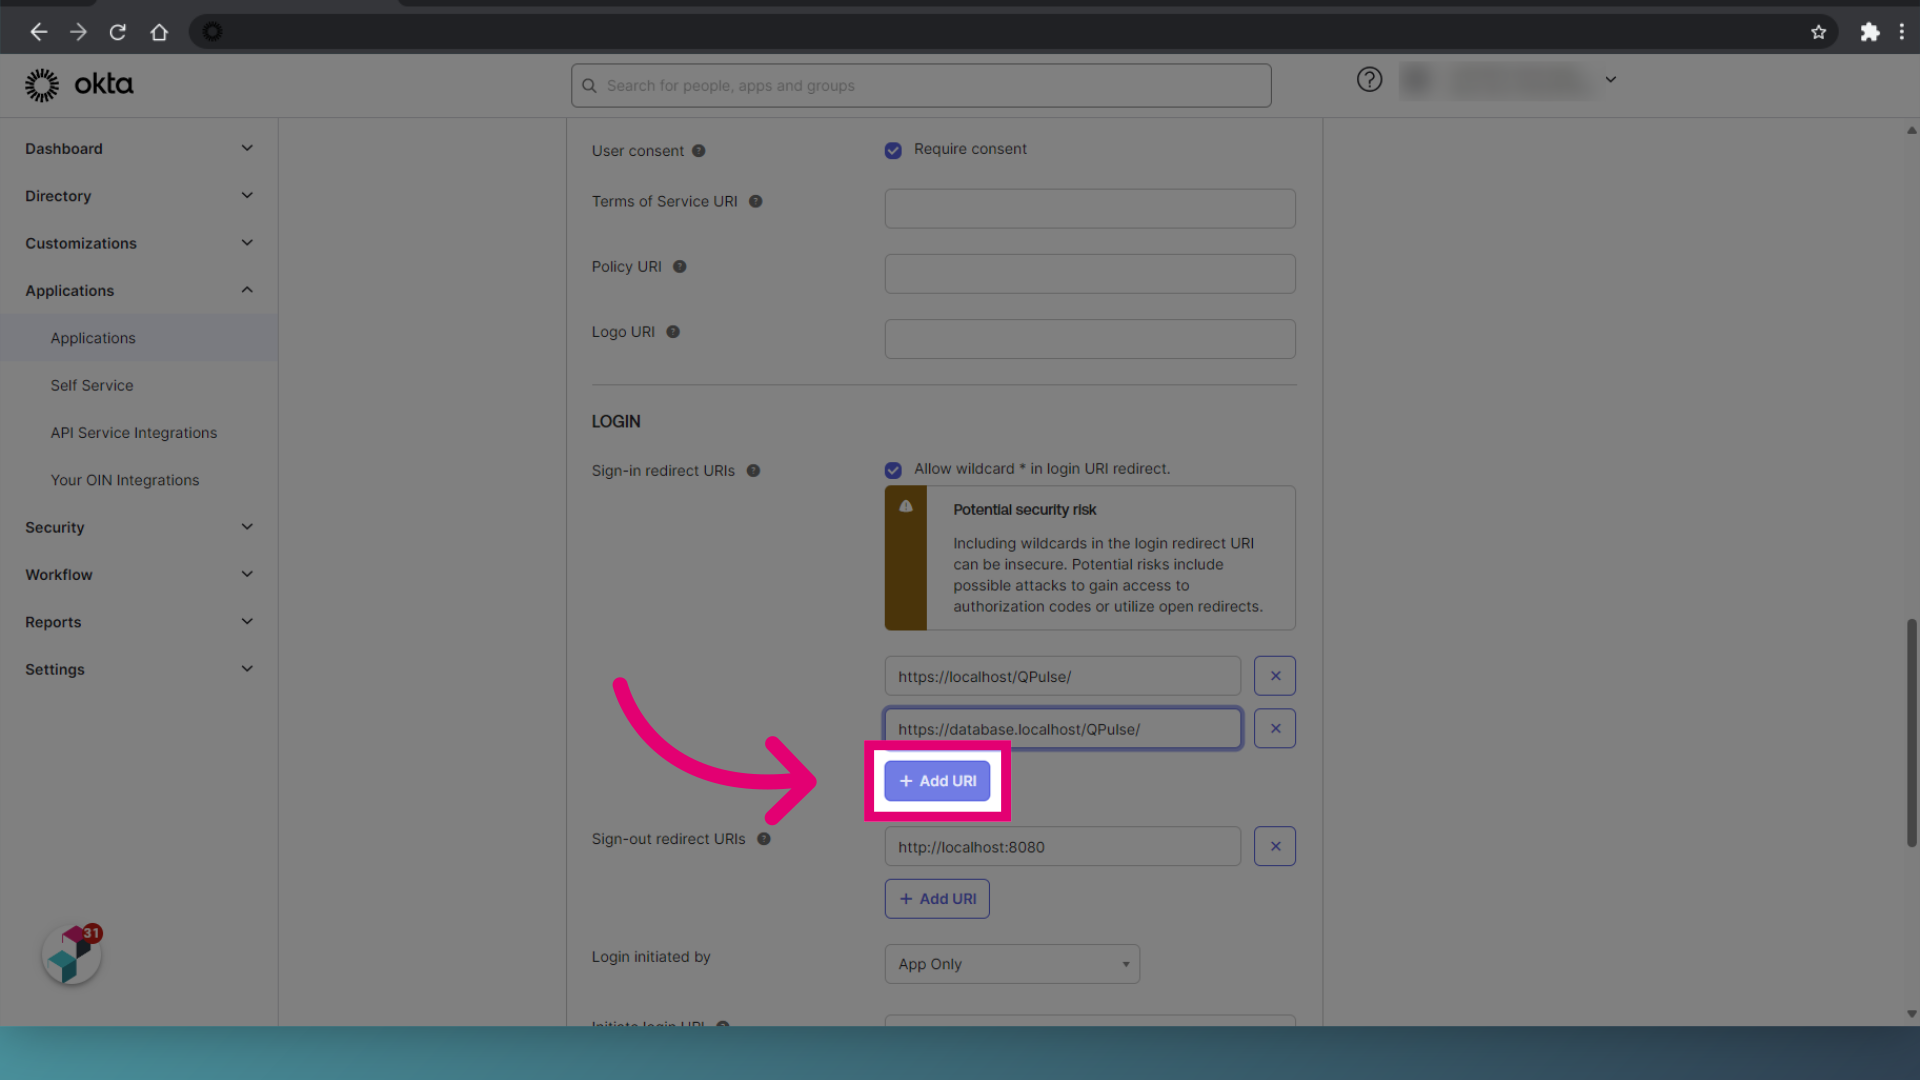
- Tick Allow wildcard in login URI redirect.

- Set the Sign-in redirect URIs to the address of your Web interface.
This is usually in the format of http://servername/qpulse.

- Click Add URI.
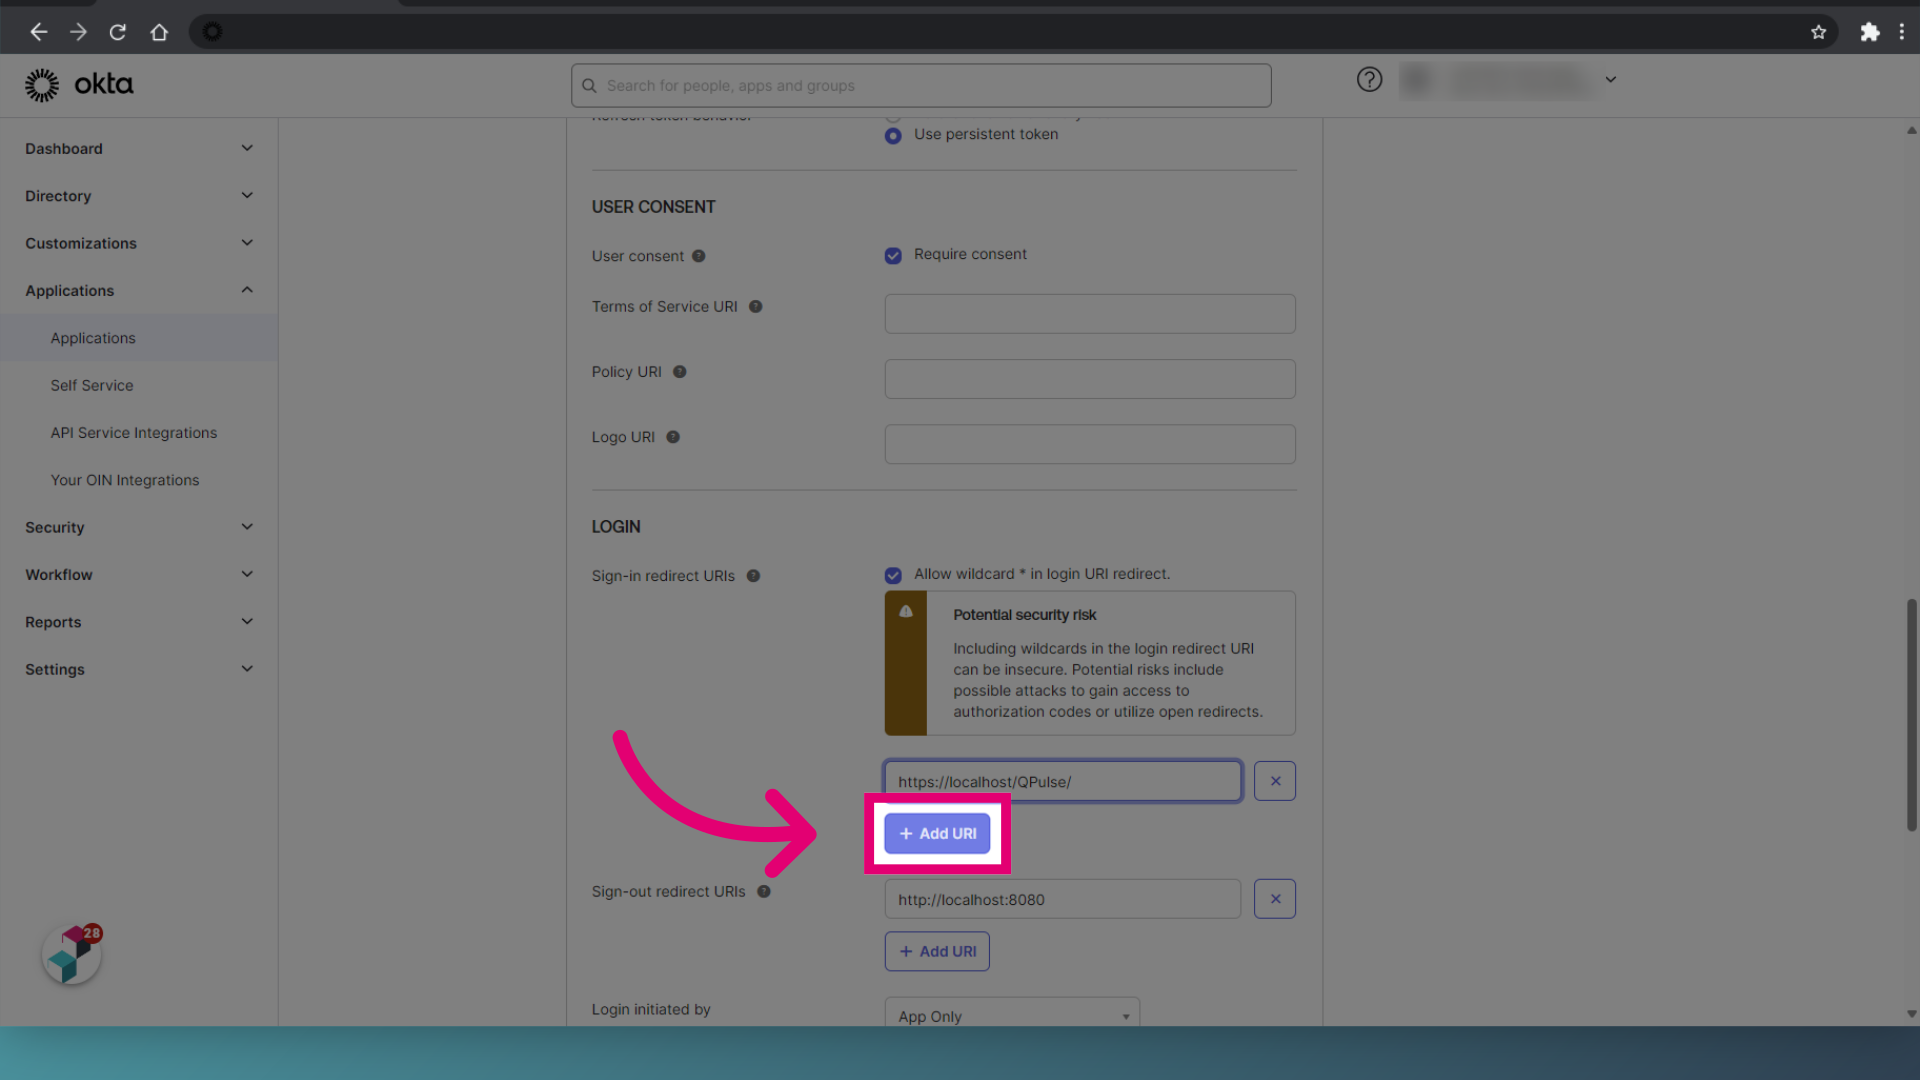
- Enter the Web interface address with the name of your database as a sub-domain.
It should look like http://default.servername/qpulse.
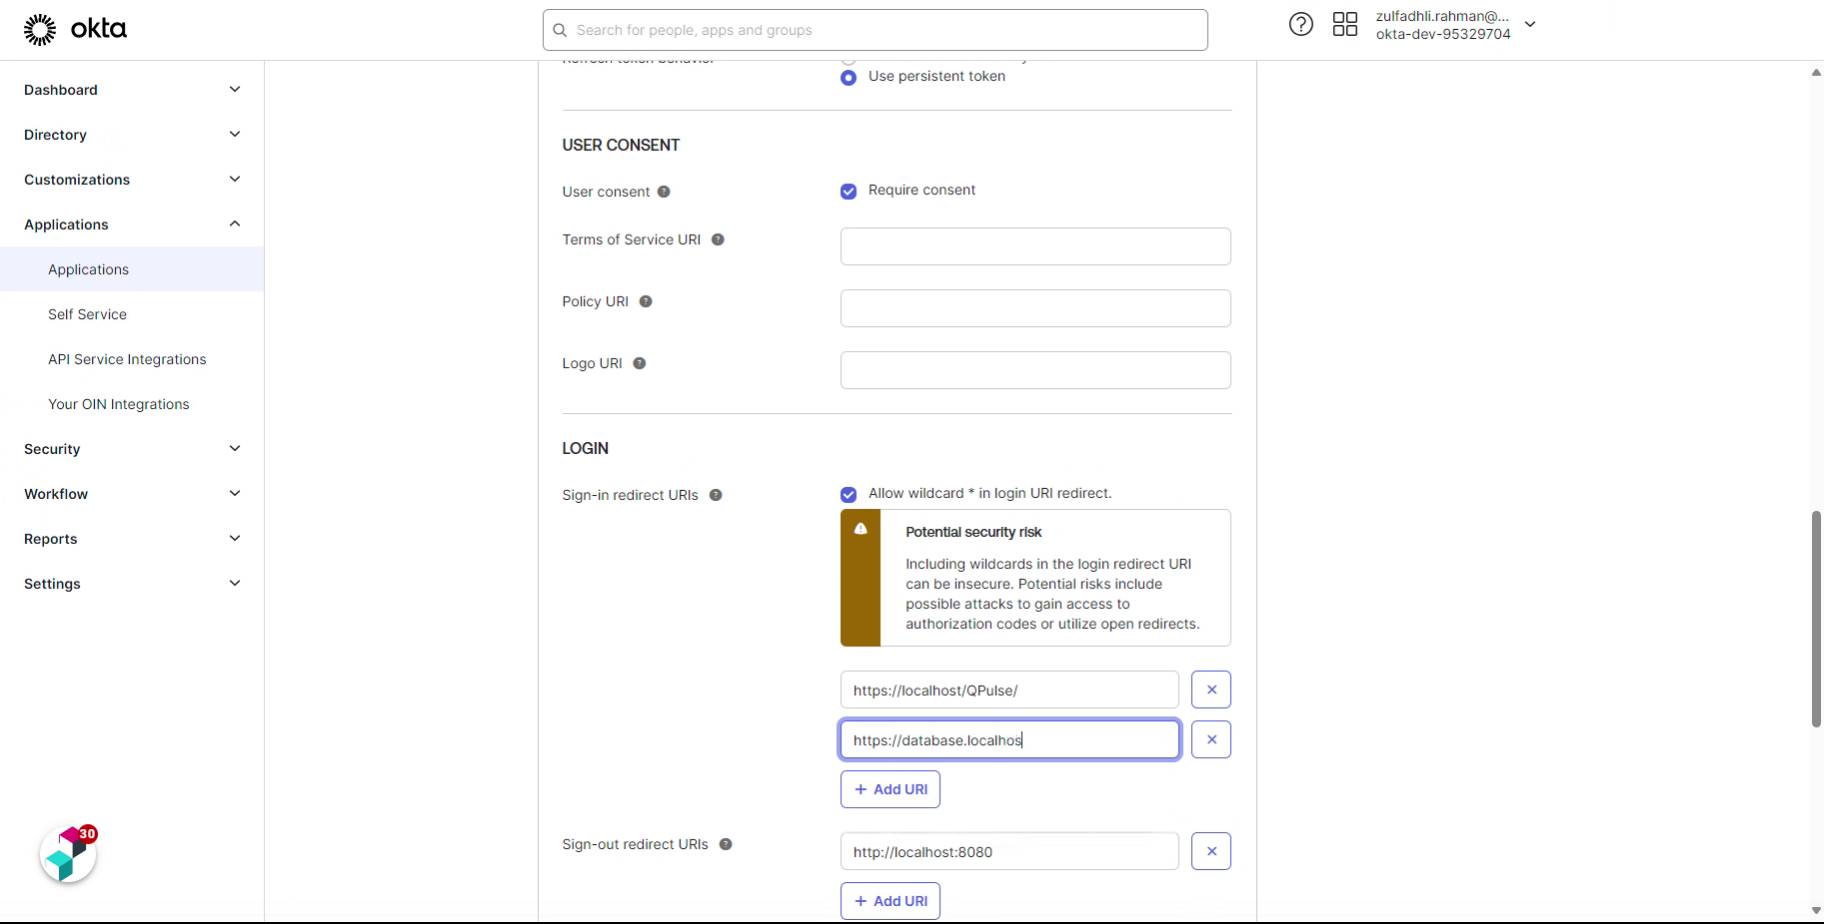
- Click Add URI.
- Enter the Web interface base URI with Authenticate.aspx appended at the end.
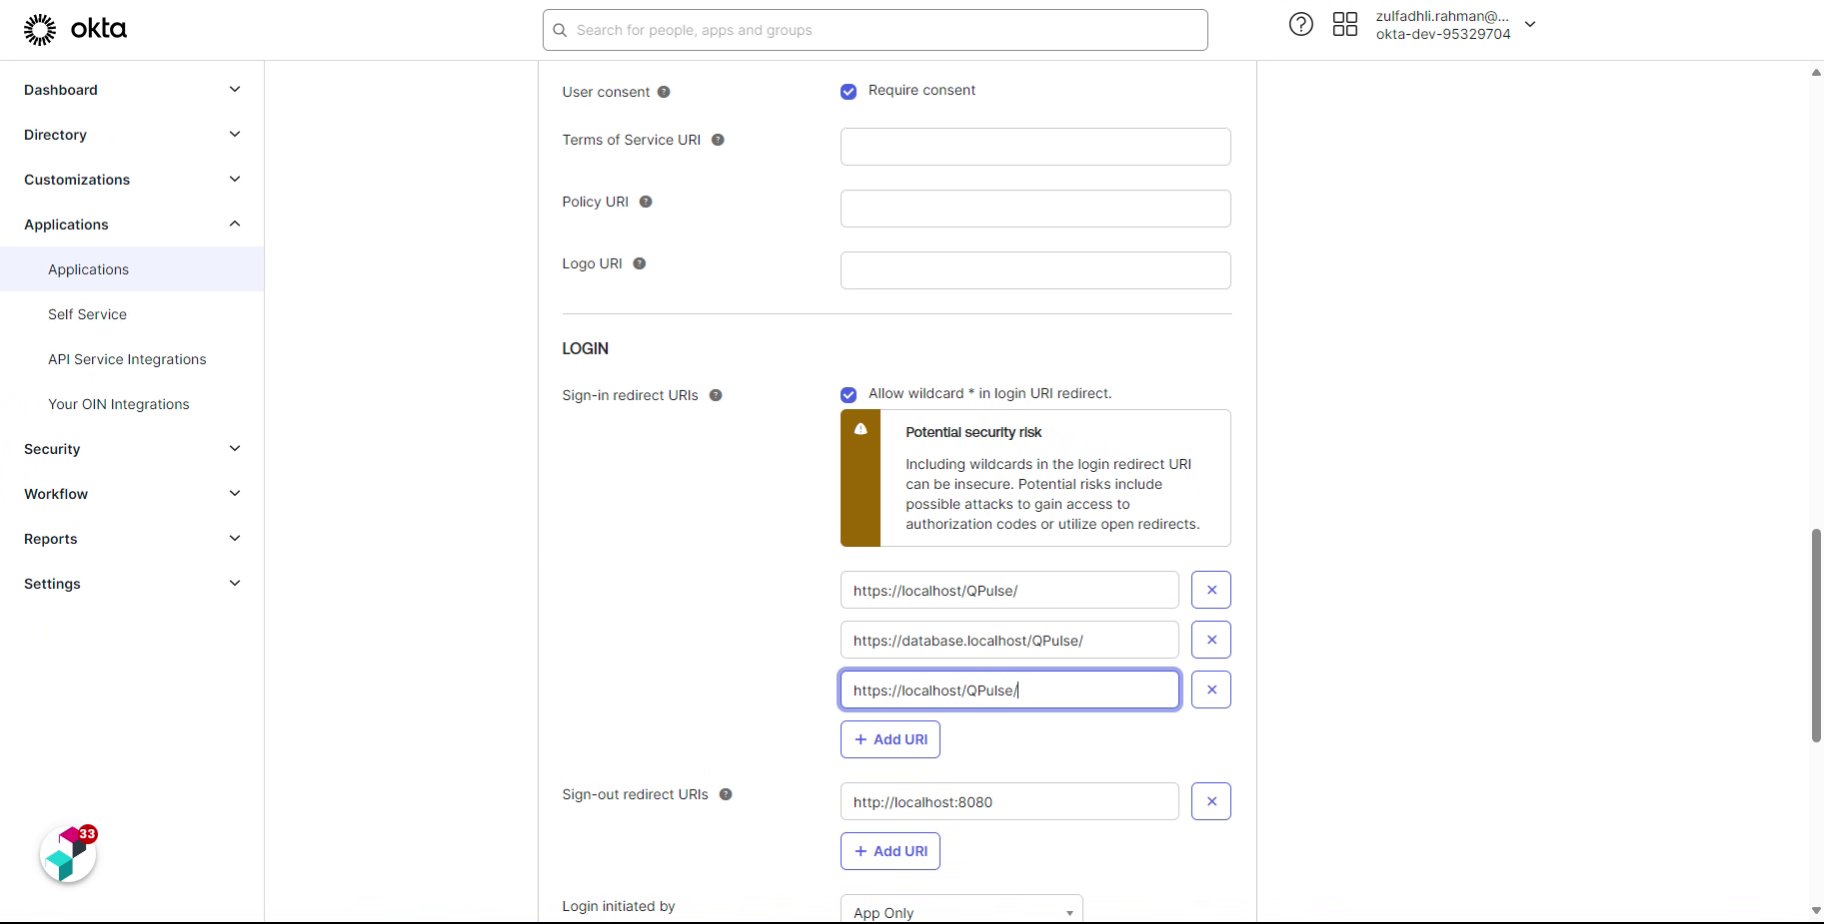
- Set the Sign out redirect URI to the following, replacing value where necessary: https://{domainName}/QPulseIdentityServer/identity/auth/databaseselection?langCd={langCode}.

- Click Save.
1. Integrating for Windows
To integrate Okta for Windows:
- Log in to Okta.
- Select Applications.
- Click Create App Integration.
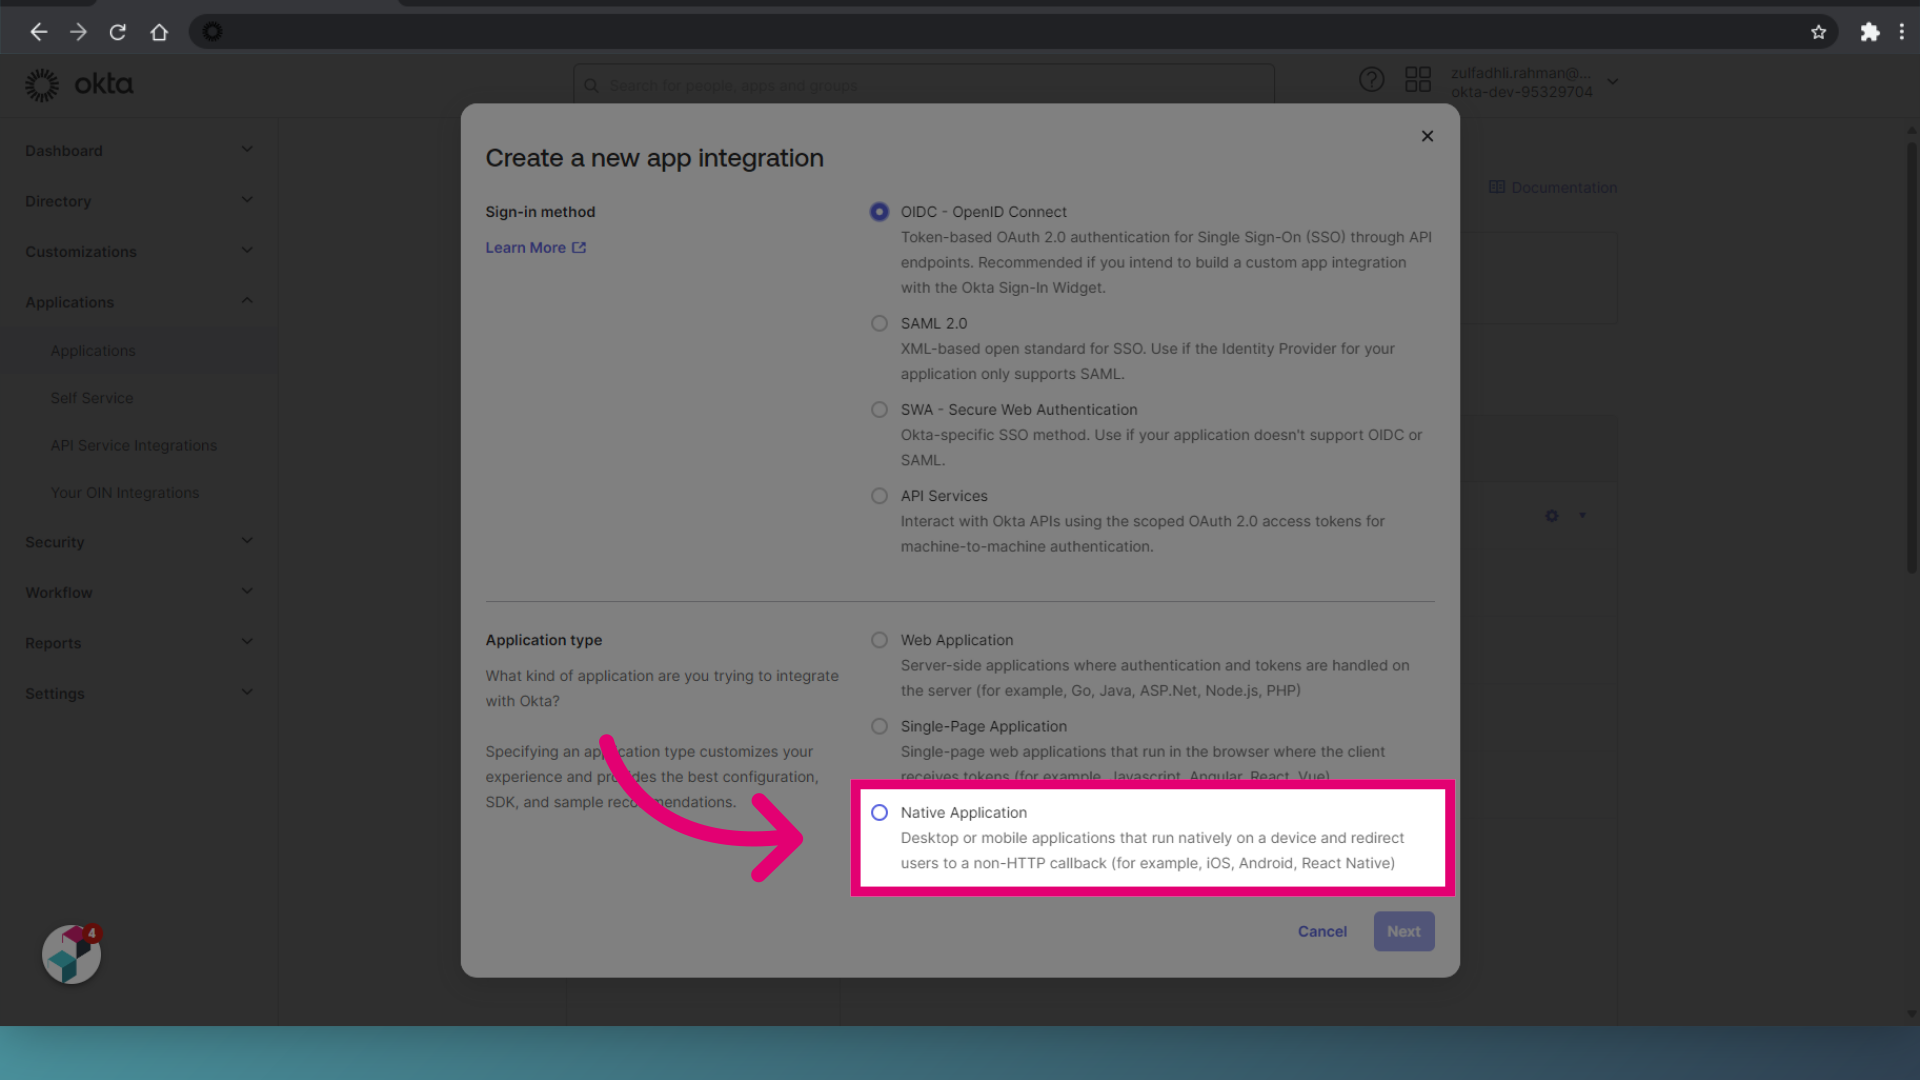
- Select OIDC - Open ID Connect.
- Choose Native Application for the Application type.
- Click Next.
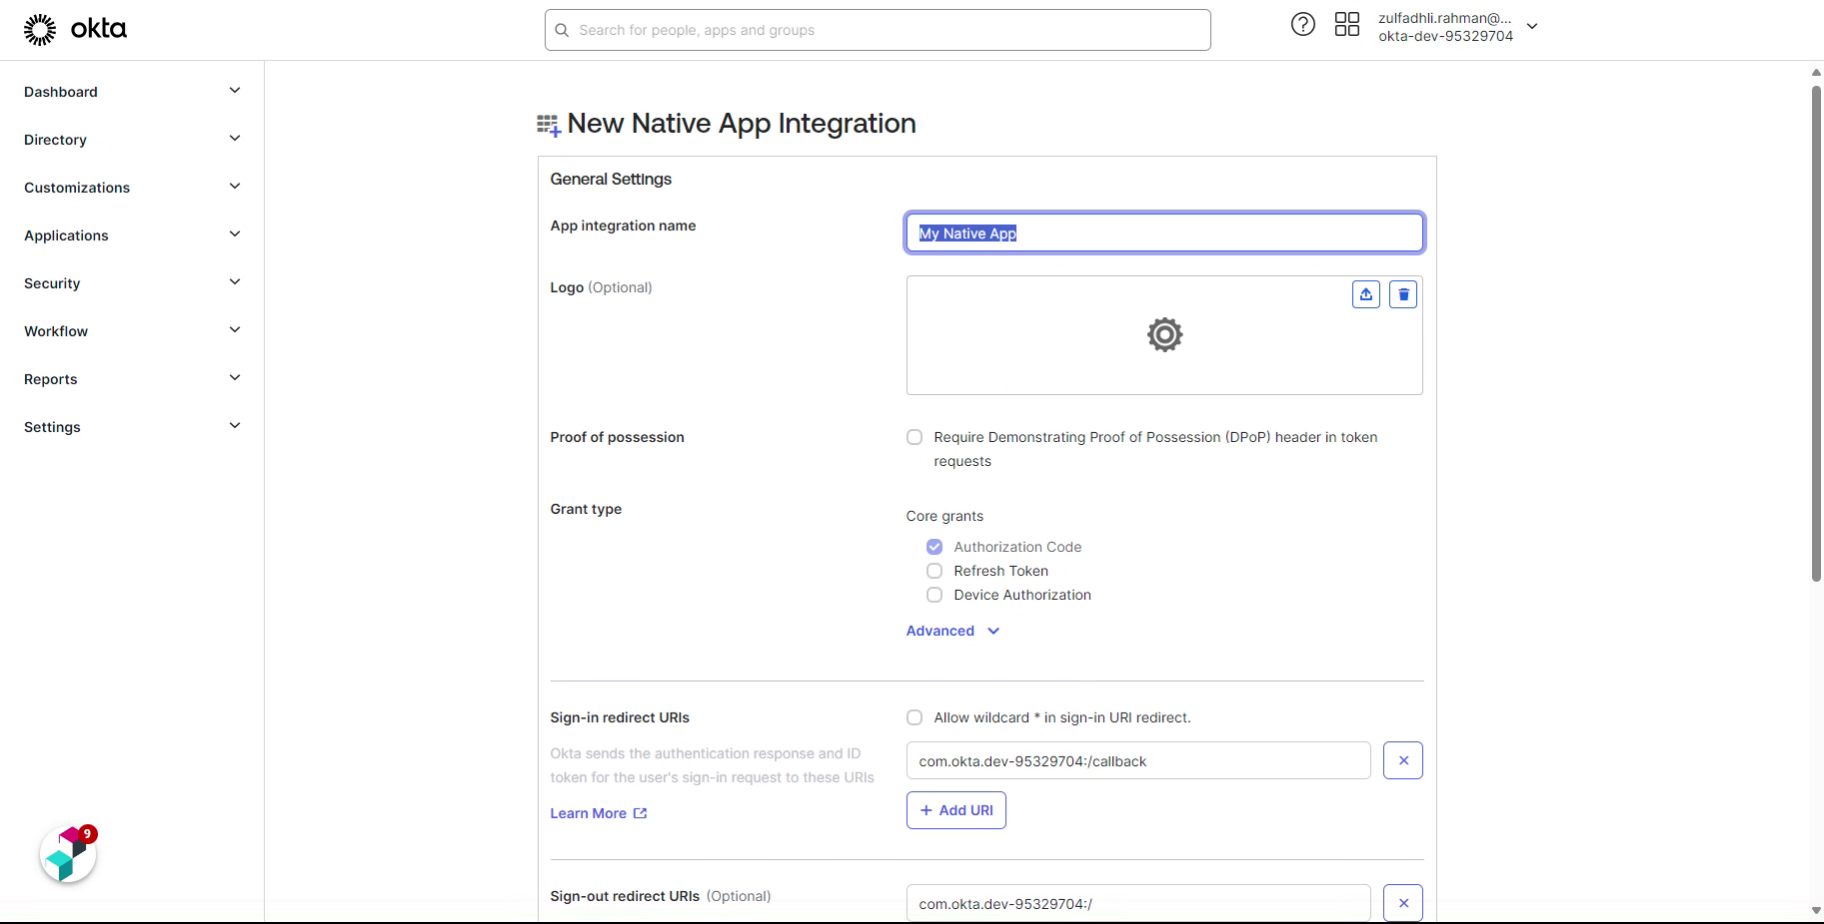
- Enter App integration name as IQMP Native Application.
- Tick Refresh Token under Grant type.
- Expand Advanced.
- Tick Implicit (hybrid).
- Set Controlled access to Allow everyone in your organization to access.
- Tick Enable immediate access with Federation Broker Mode.
- Click Save.
- Access General Settings.
- Click Edit.
- Tick Allow wildcard in login URI redirect.
- Enter the Sign-in and Sign out URIs.
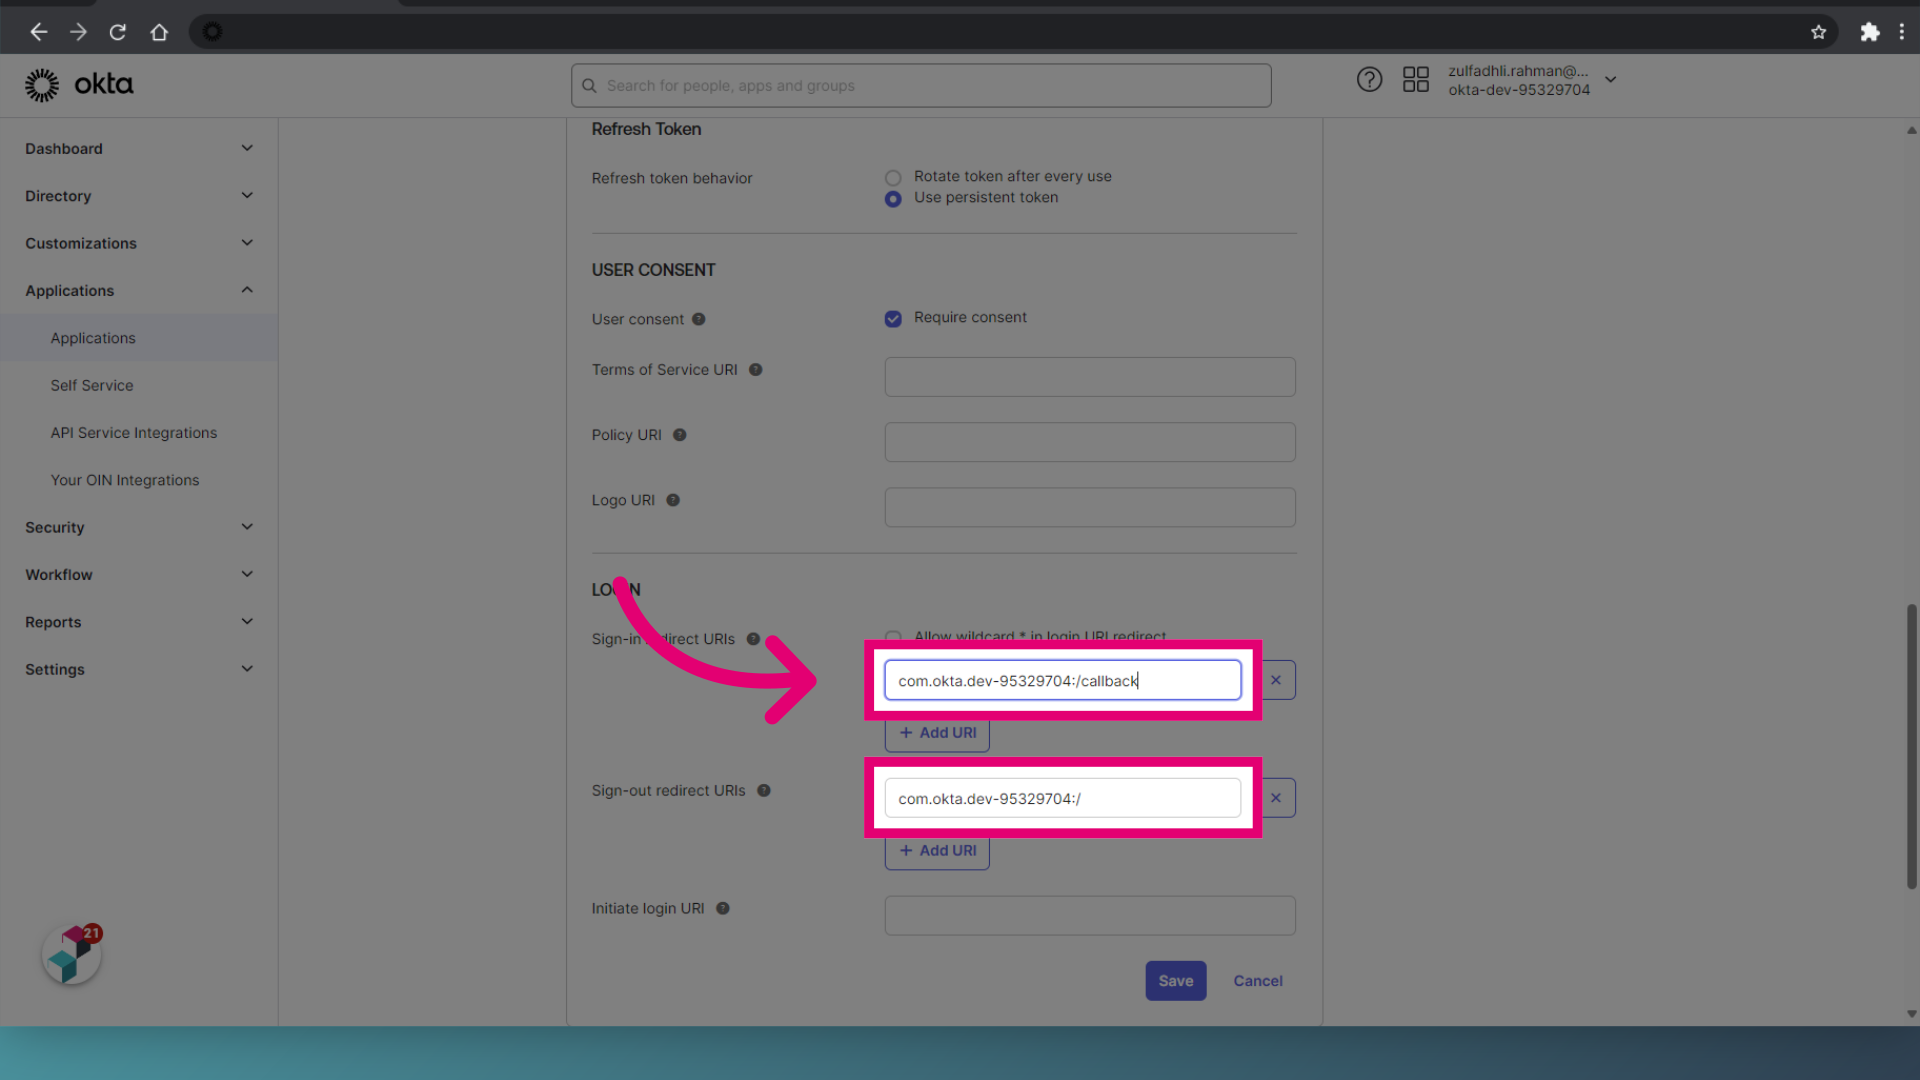
- Click Save.