New article
Recently updated
[Example] Configuring PingOne for Single Sign-On (SSO)

Who is this article for?IT Personnel implementing Single Sign-On (SSO).
IQM v7.5 and IQM Mobile v2.5.0 are required.
Ideagen Quality Management Single Sign-On (SSO) allows end users to authenticate with Windows and Web clients via Single Sign-On with PingOne
This article outlines the steps required to configure PingOne for Ideagen Quality Management Single Sign-On (SSO).
We do not directly support the PingOne. These steps are provided as a guide only to assist in the configuration. Before you begin please ensure your Ideagen Quality Management is using SSL for secure connections.
In version 7.6.1 and above, you will be asked to enter Scope information into the system when configuring the Single Sign-On options. Below is a table listing the different scopes for different parts of the application.
| Application | openid | profile | userinfo | offline_access | User.Read | |
| Web | ✓ | ✓ | ✓ | ✓ | ||
| Windows Client | ✓ | ✓ | ✓ | ✓ | ||
| Mobile | ✓ | ✓ | ✓ | ✓ |
Scopes are case sensitive and need to be separated by a space when entered into the system (e.g. openid email profile)
1. Configuring Web
To configure SSO:
- Log in to PingOne.
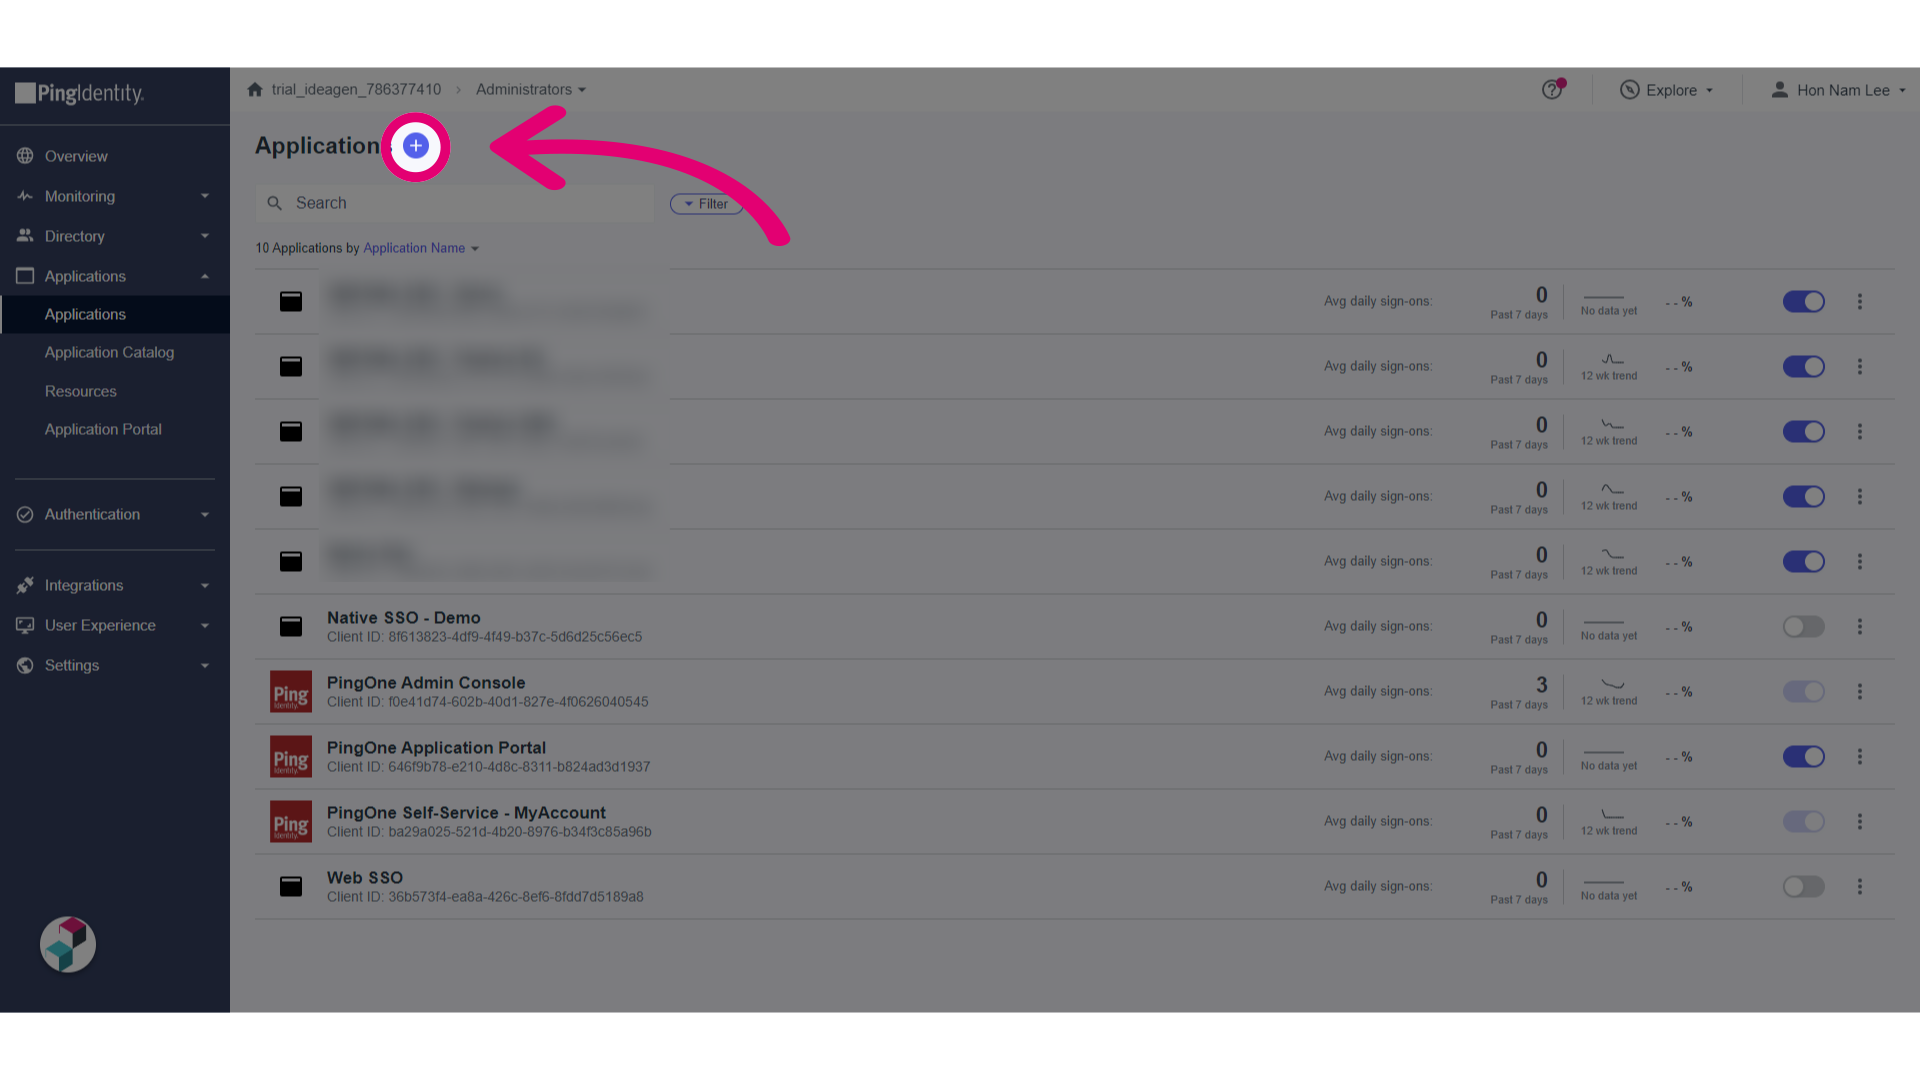
- Navigate to Applications.
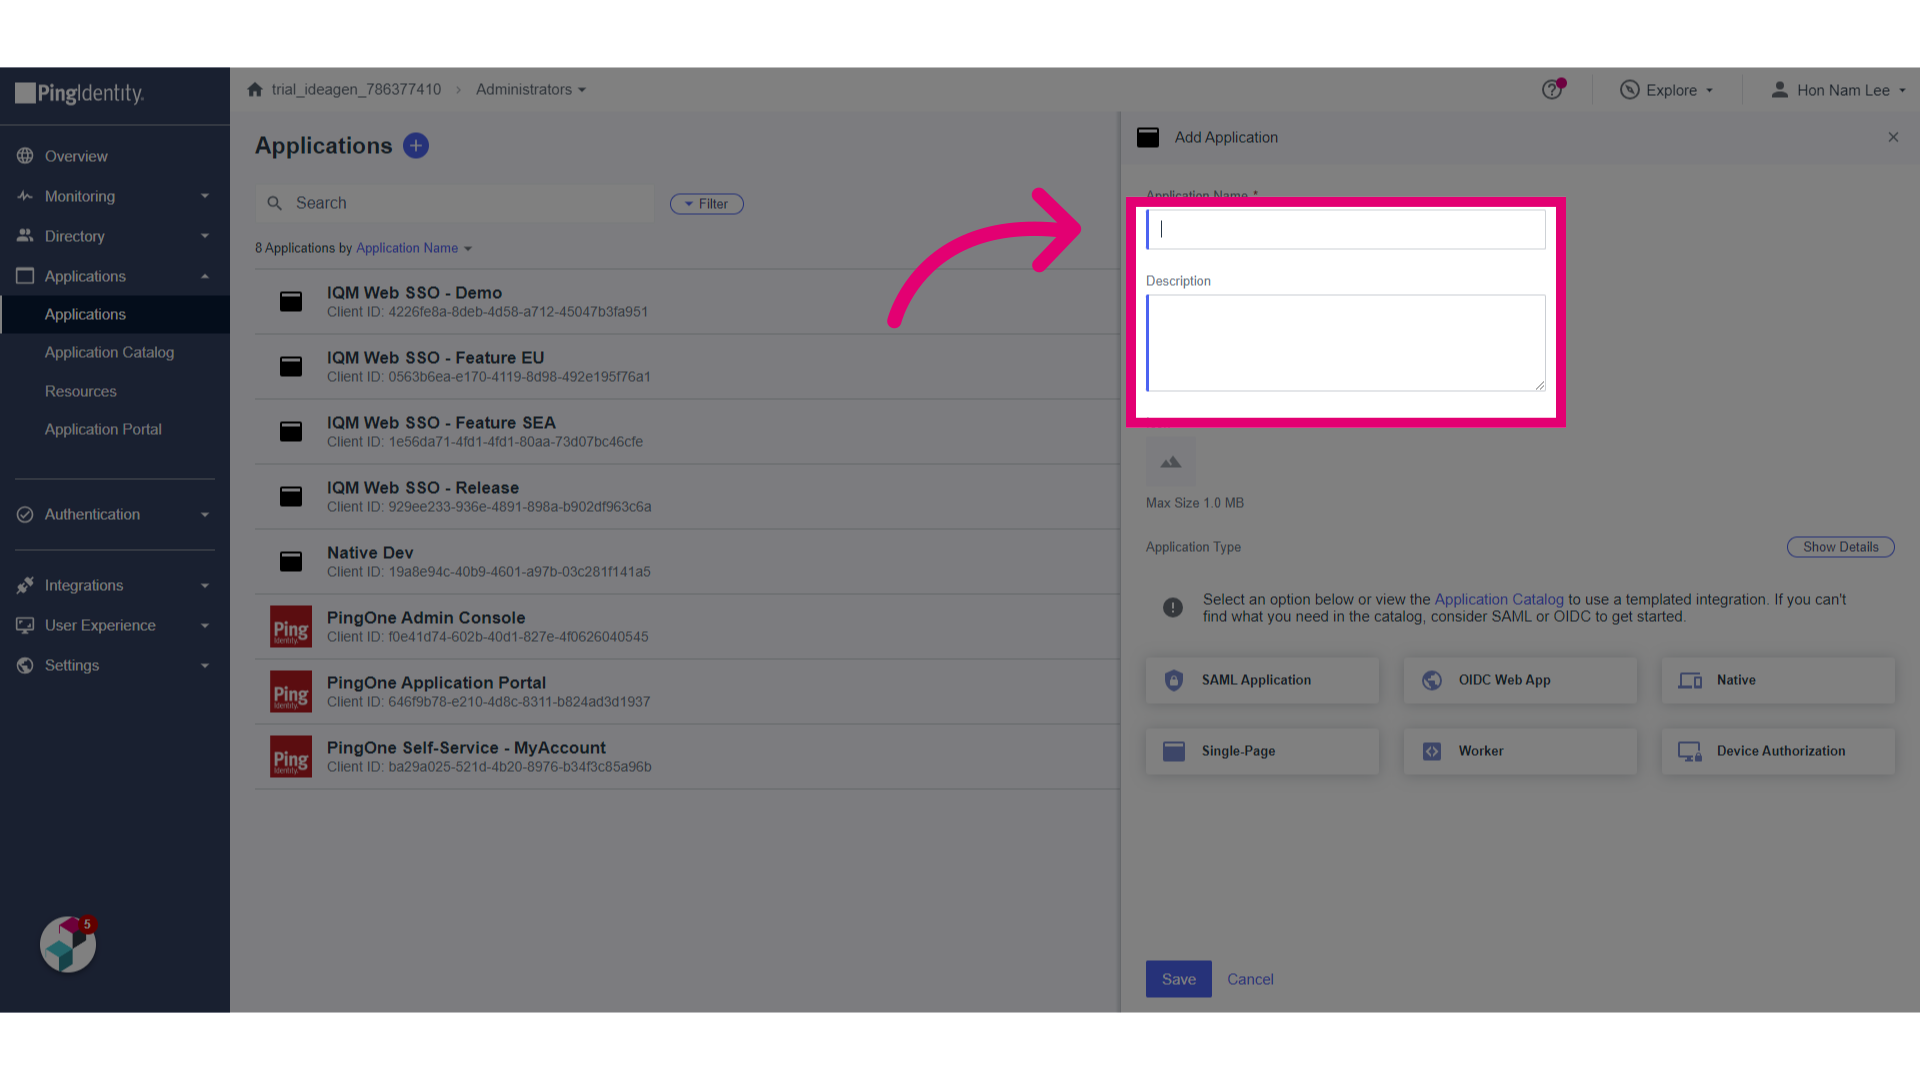
- Click Add.

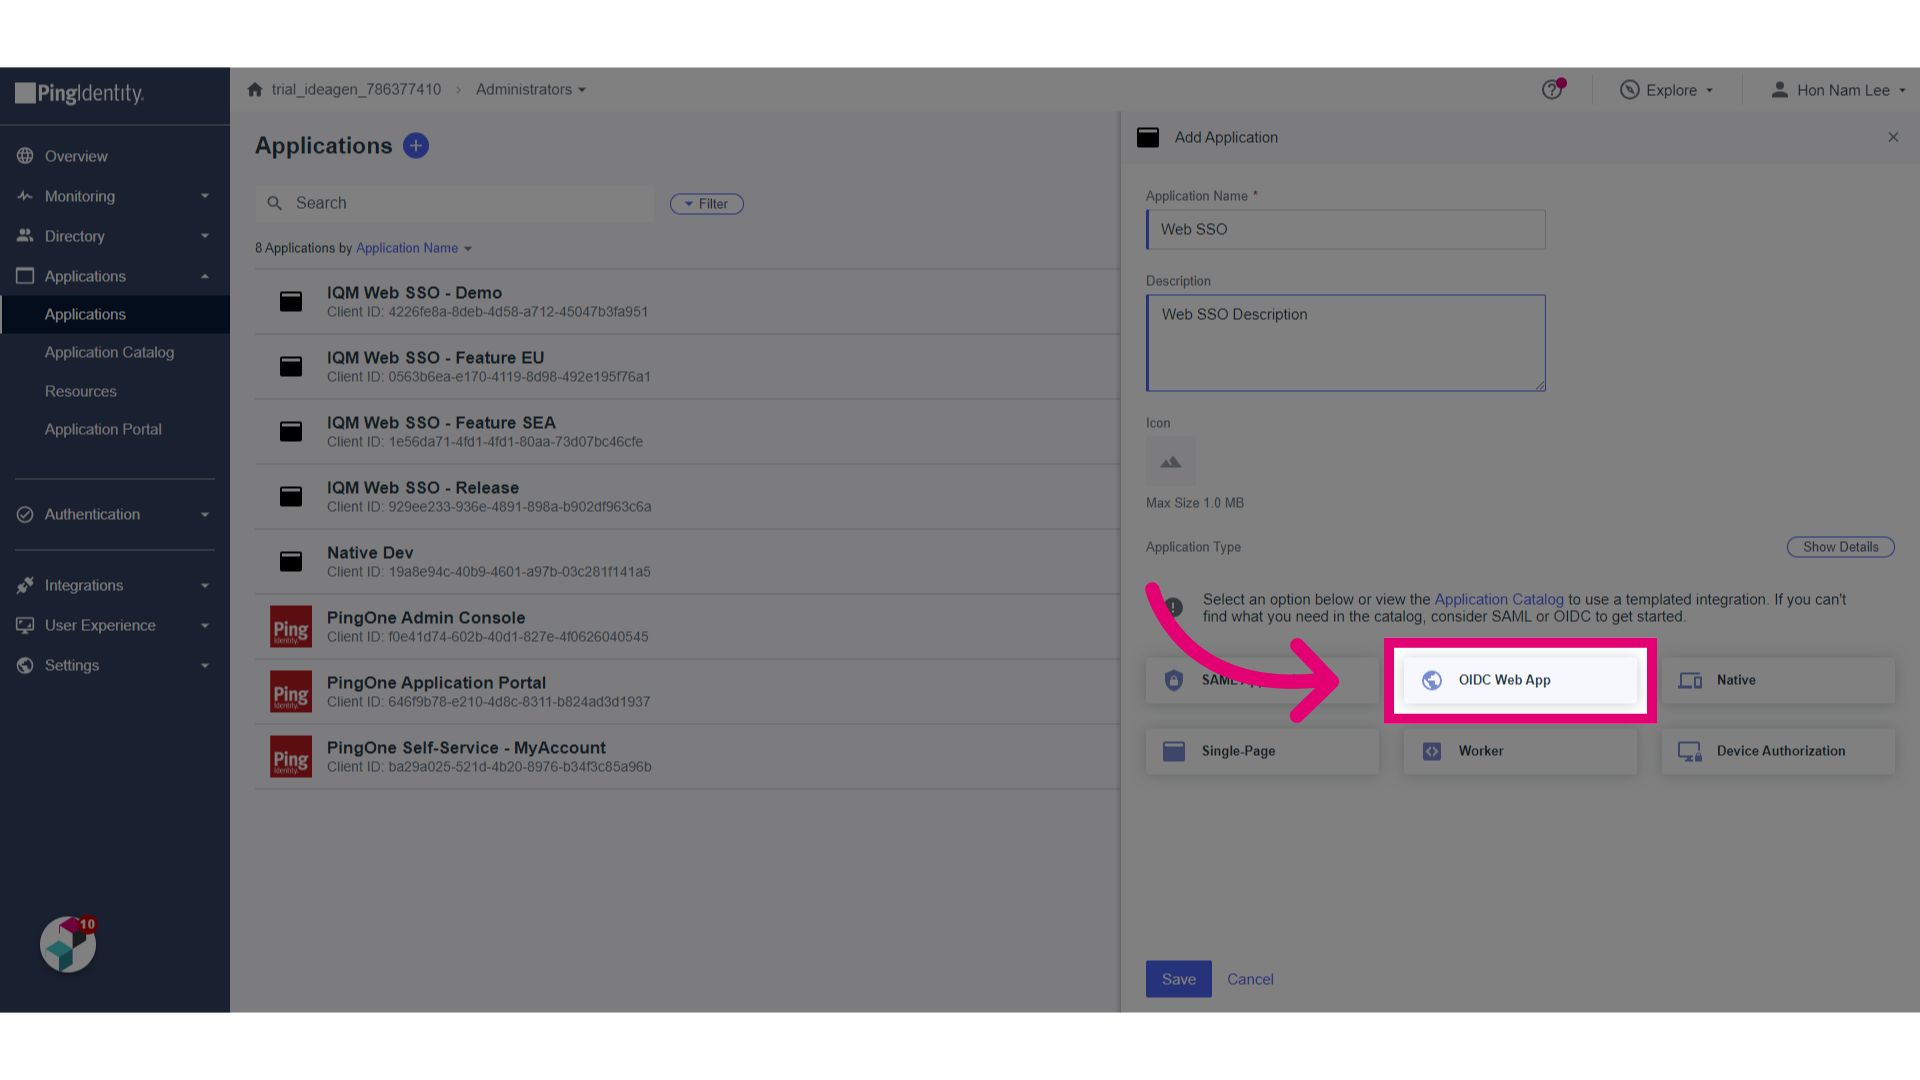
- Give a Name to the application.
- Enter a Description.
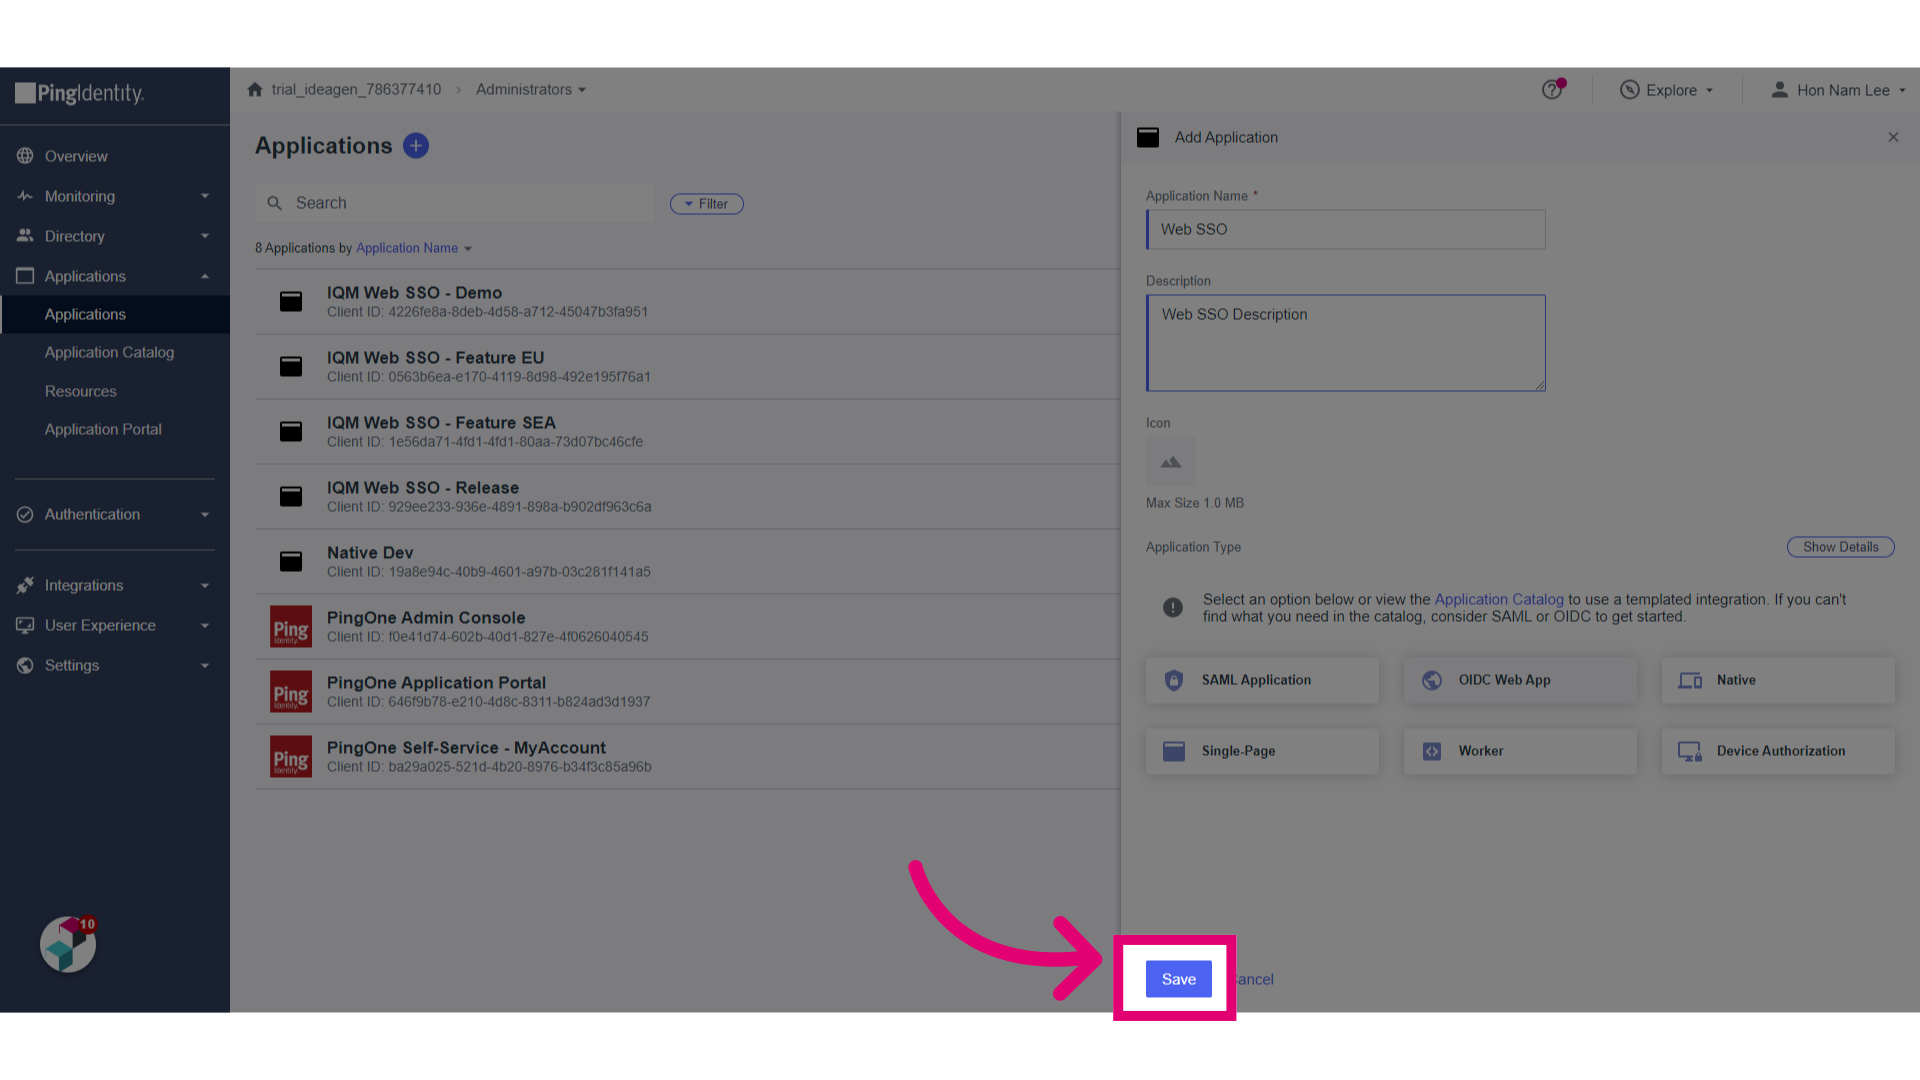
- Select OIDC Web App from the options.
- Click Save.
- Go to Configuration tab
- Click Edit.
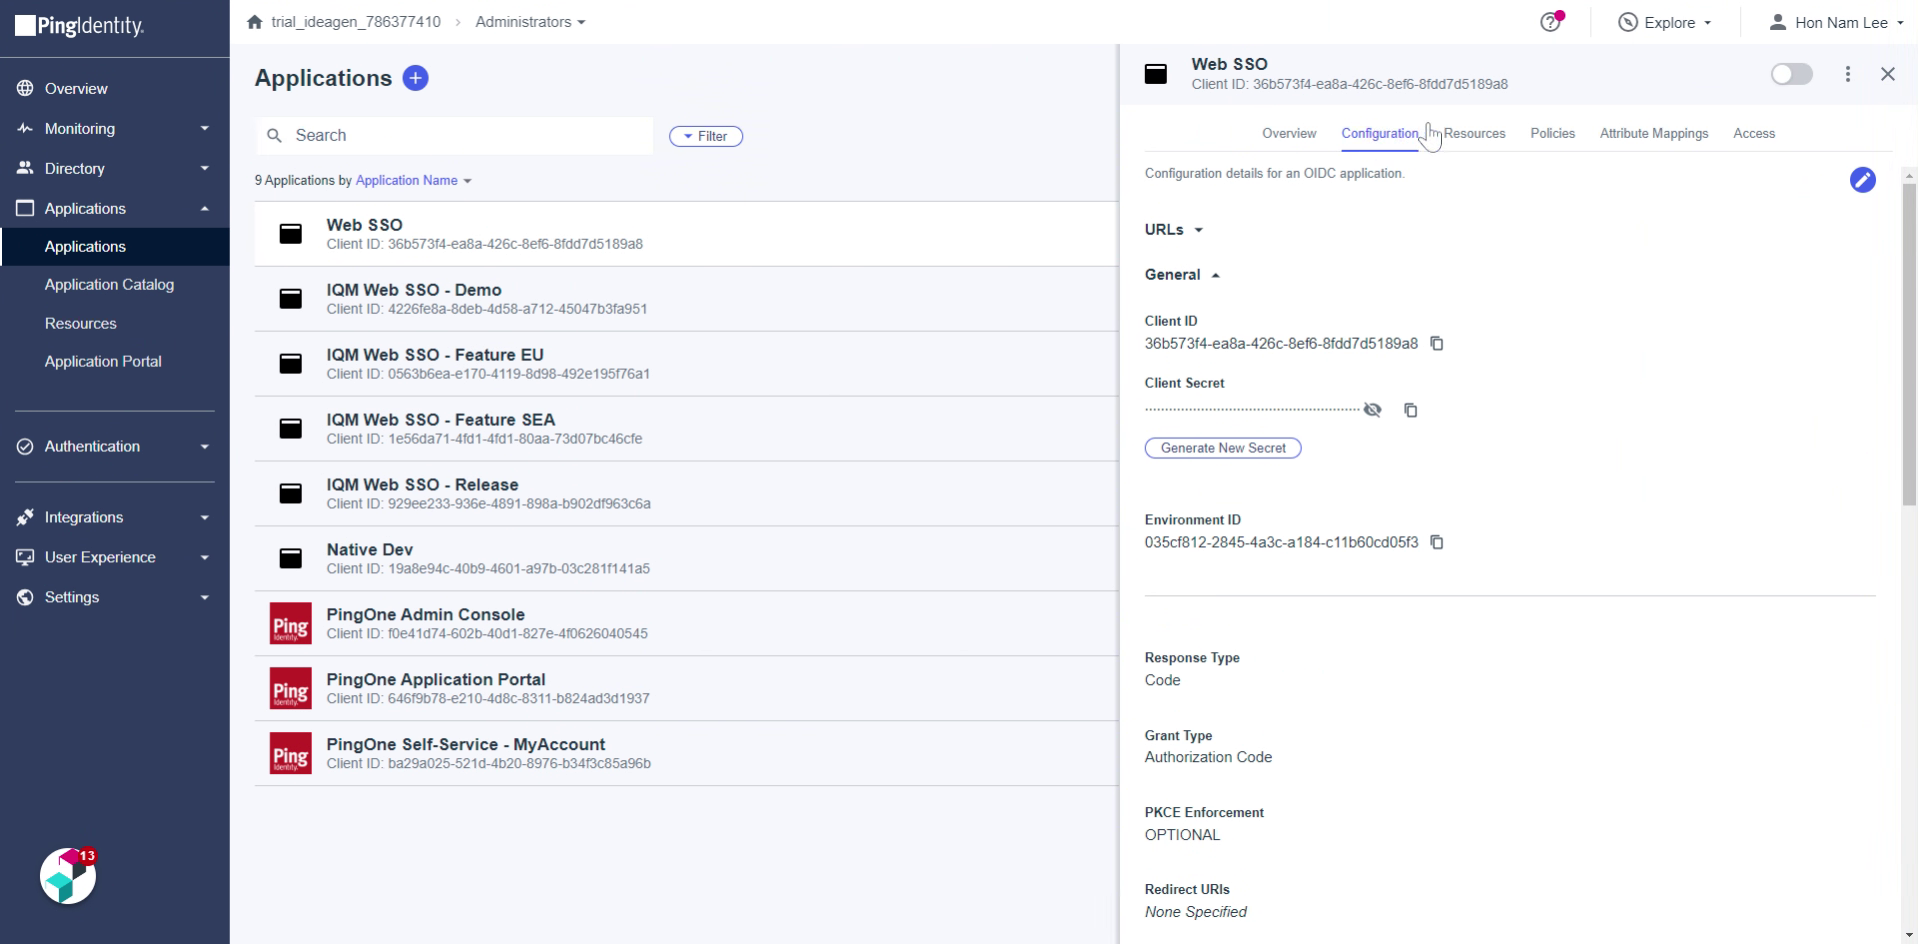
- Update the Response Types and Guest Types:
-
-
- Code
- Token
- ID Token
- Authorization Code (Optional)
- Implicit
- Client Credentials
- Refresh Tokens (30 days refresh)
-
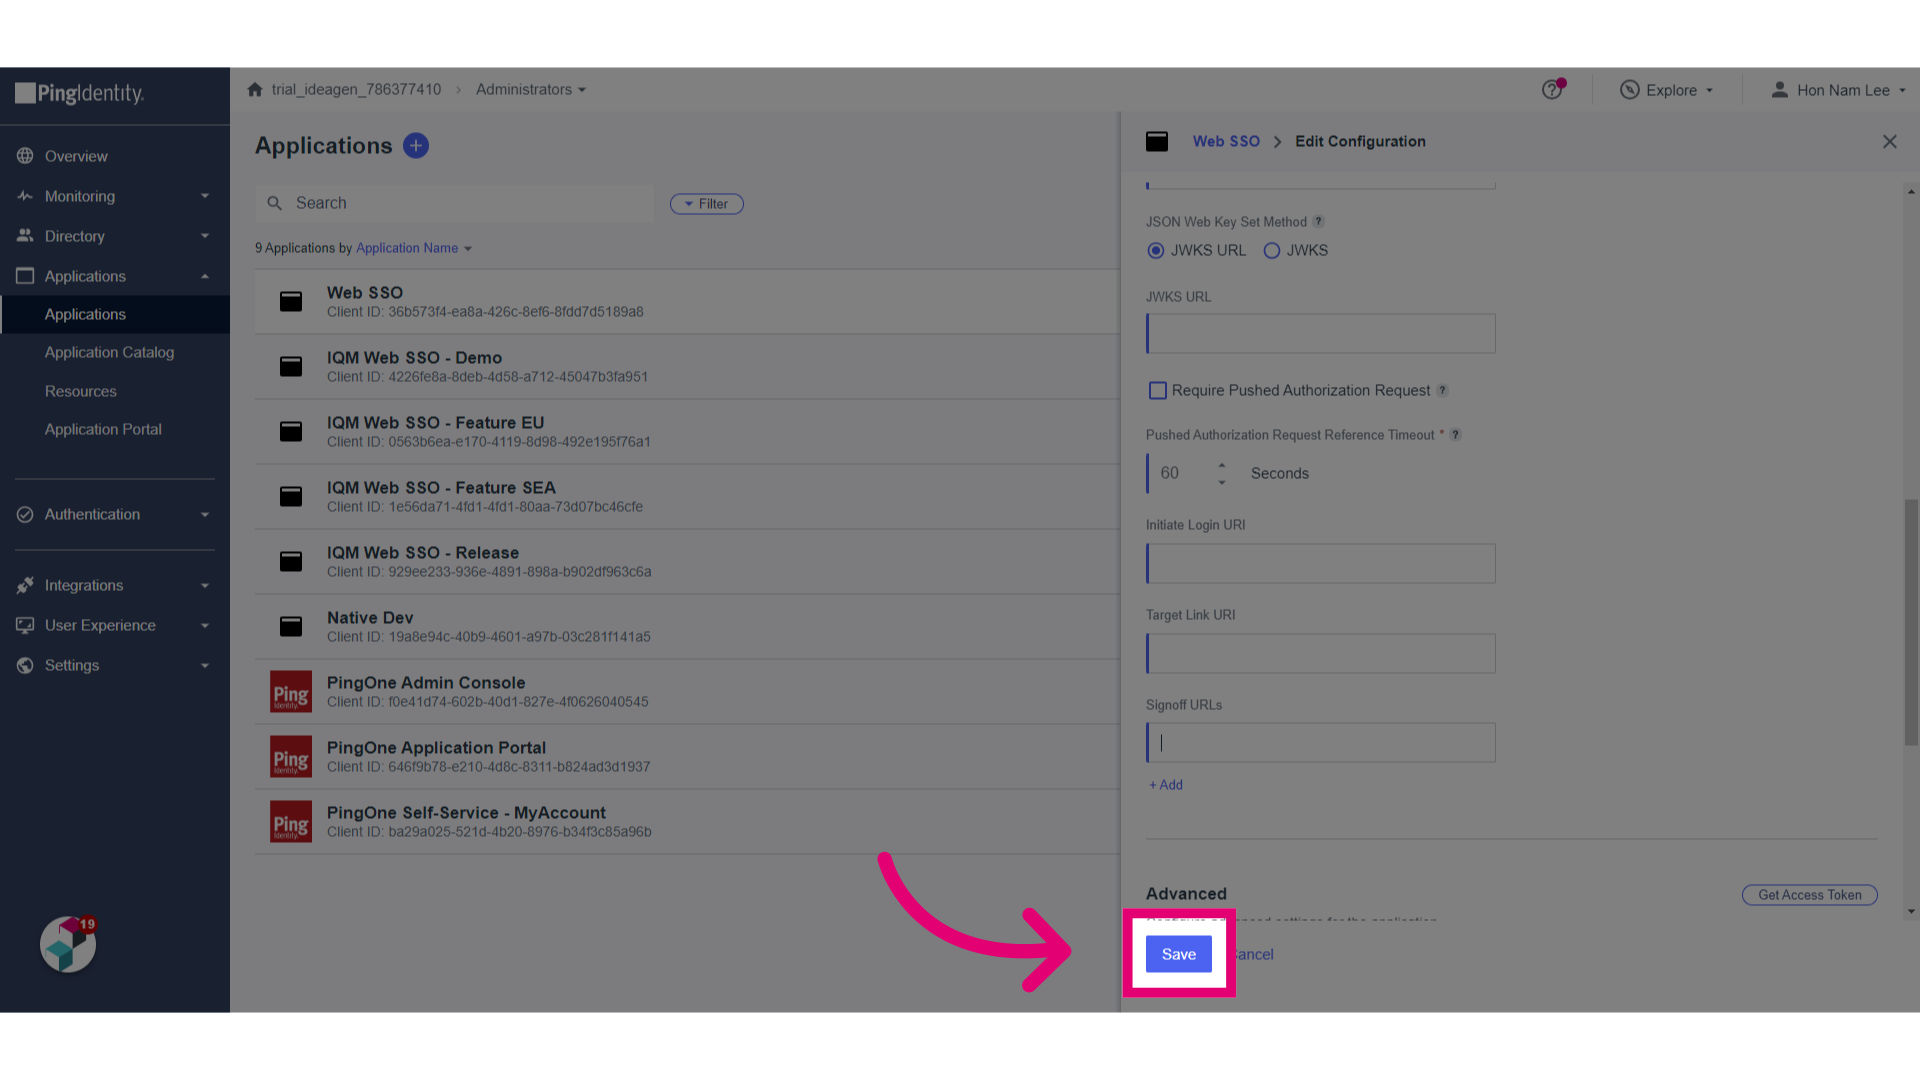
- Specify the Redirect and Signoff URLs.
- Set Token Endpoint Authentication Method as Client Secret Post.
All Web Client URL with available databases that users are able to access must be added to ‘Redirect URIs'.
- Set Token Endpoint Authentication Method to None.
- Add a Sign Off URL (e.g. https://example.ideagenplc.com/IQM/).
- Click Save.
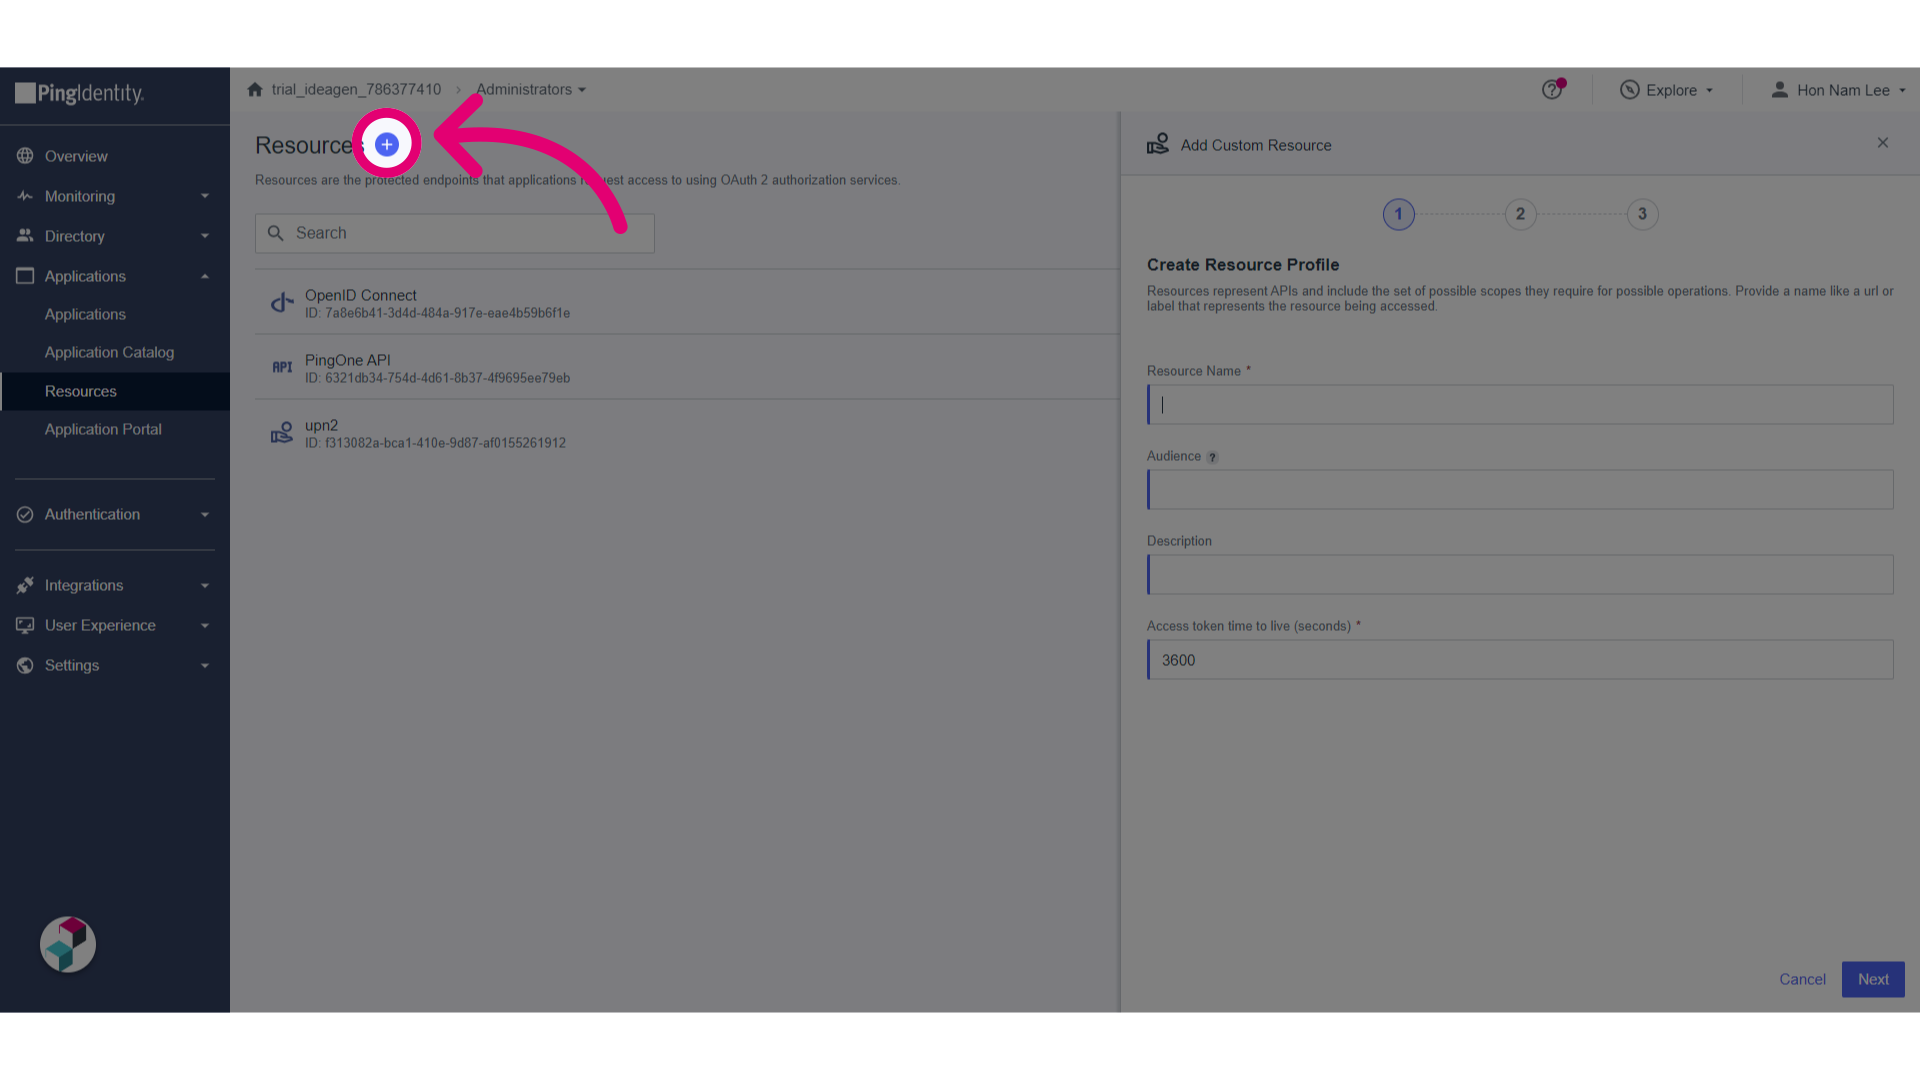
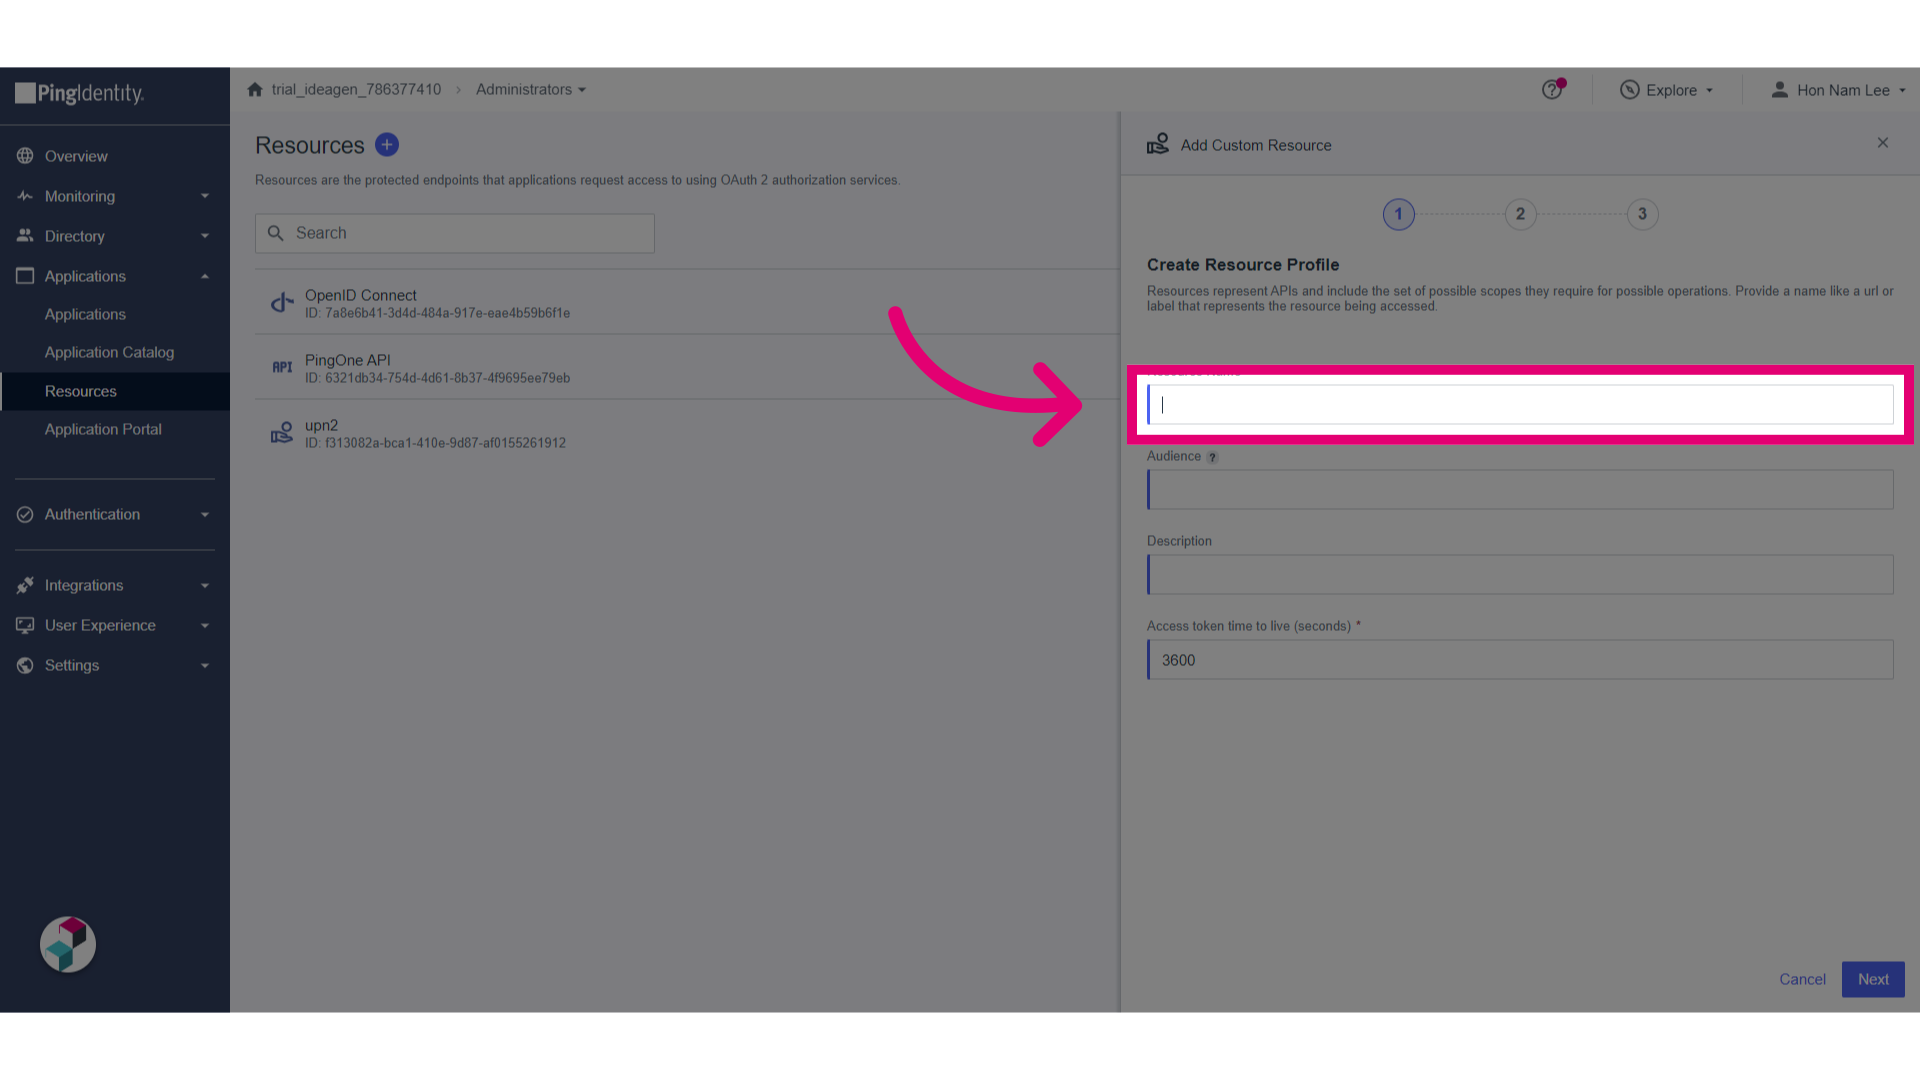
- Go to Resources.
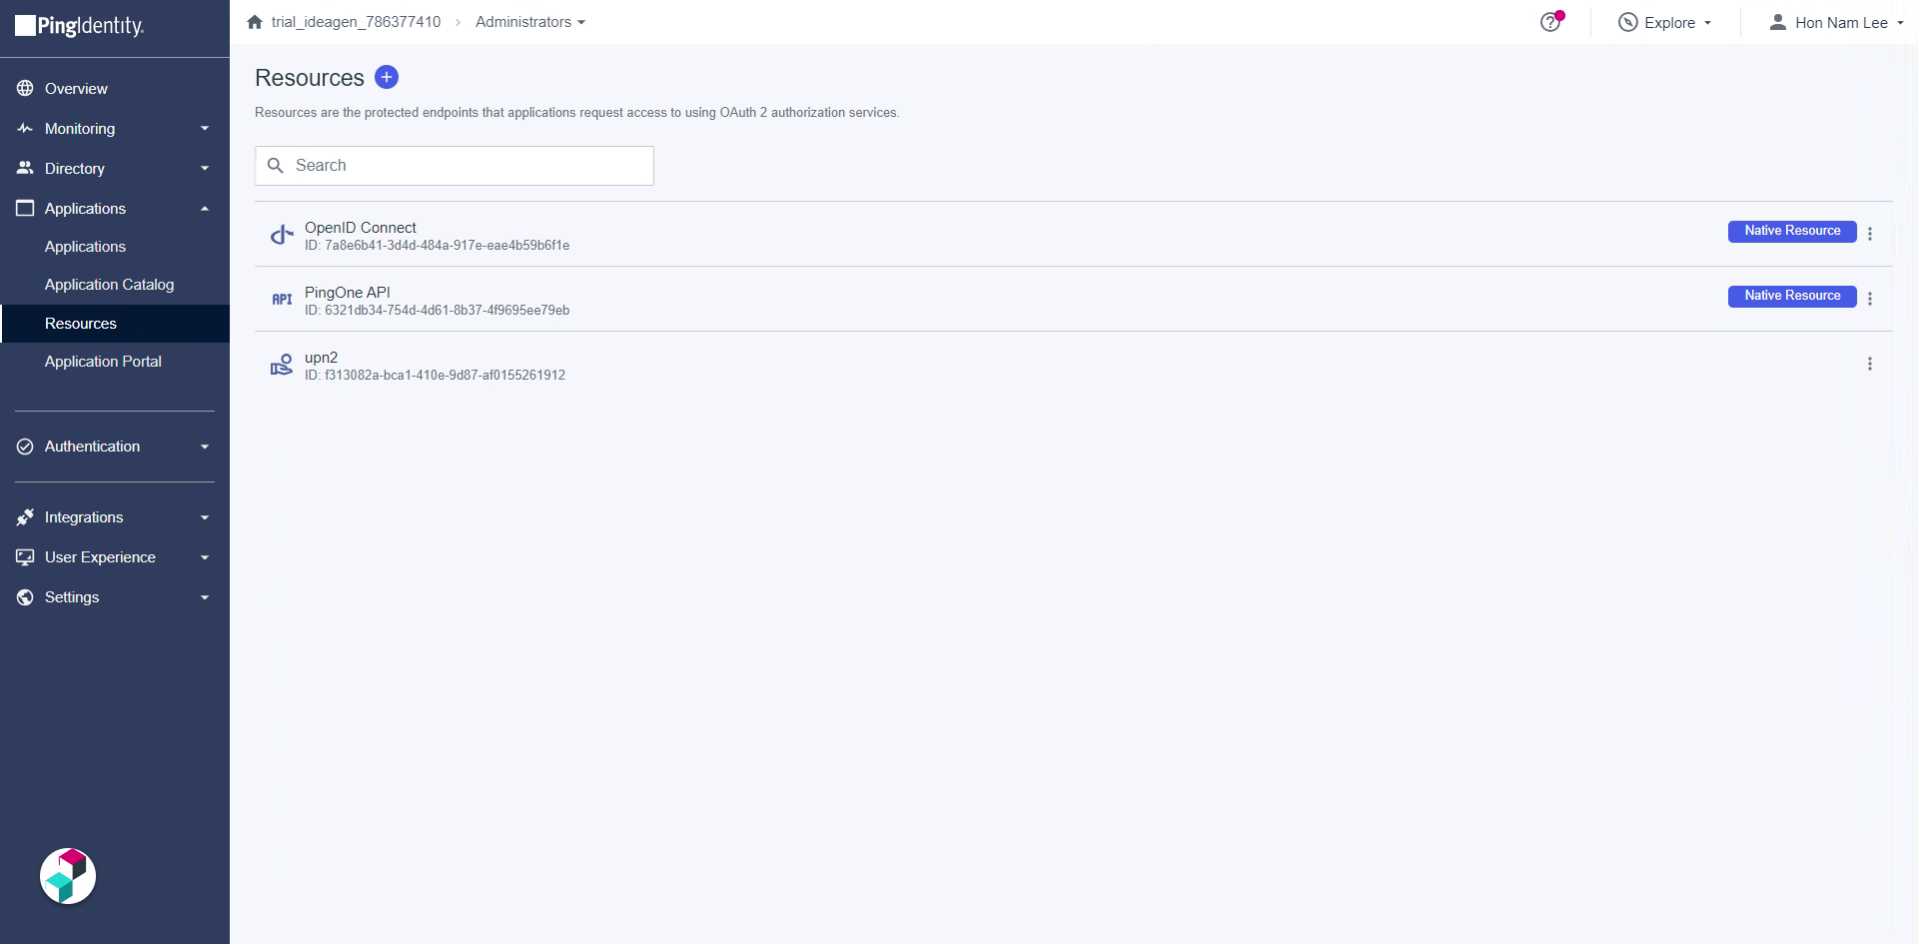
- Click Add.

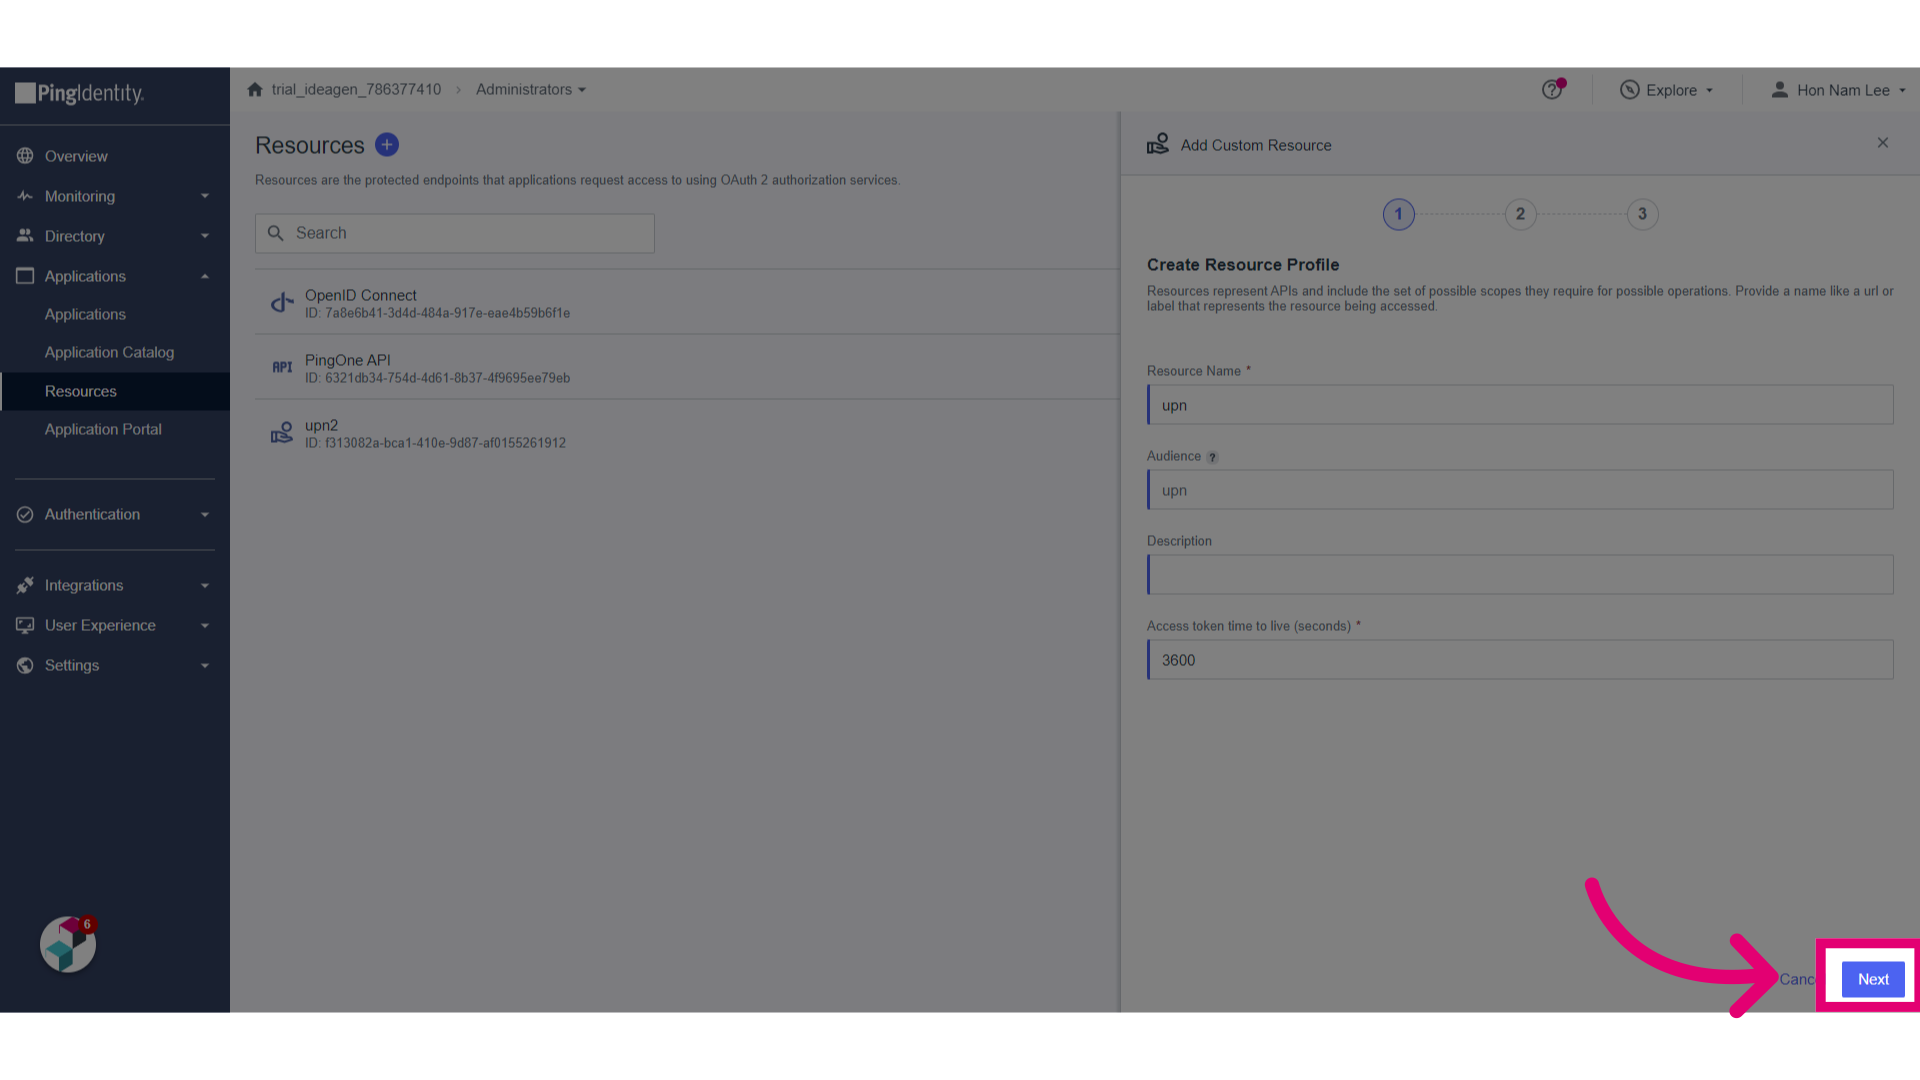
- Set Resource Name and Audience to upn.
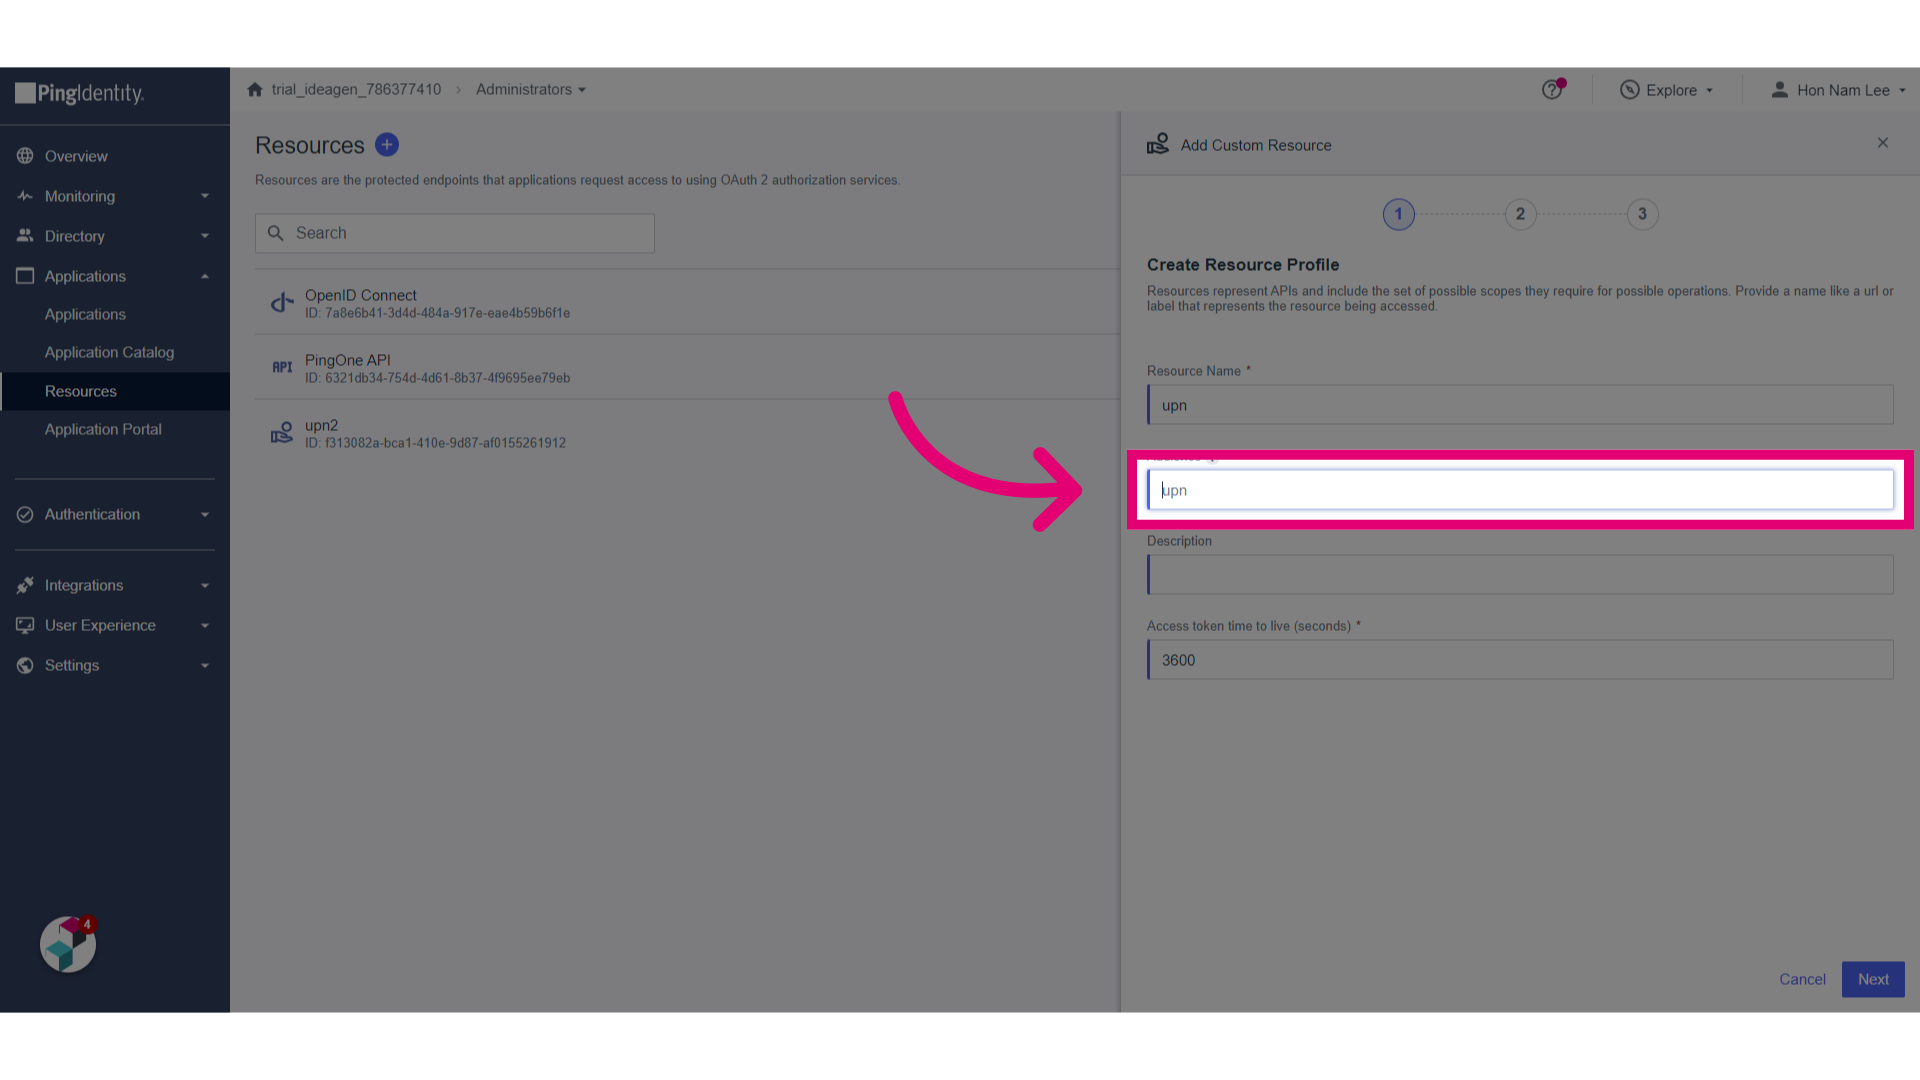
- Click Next.
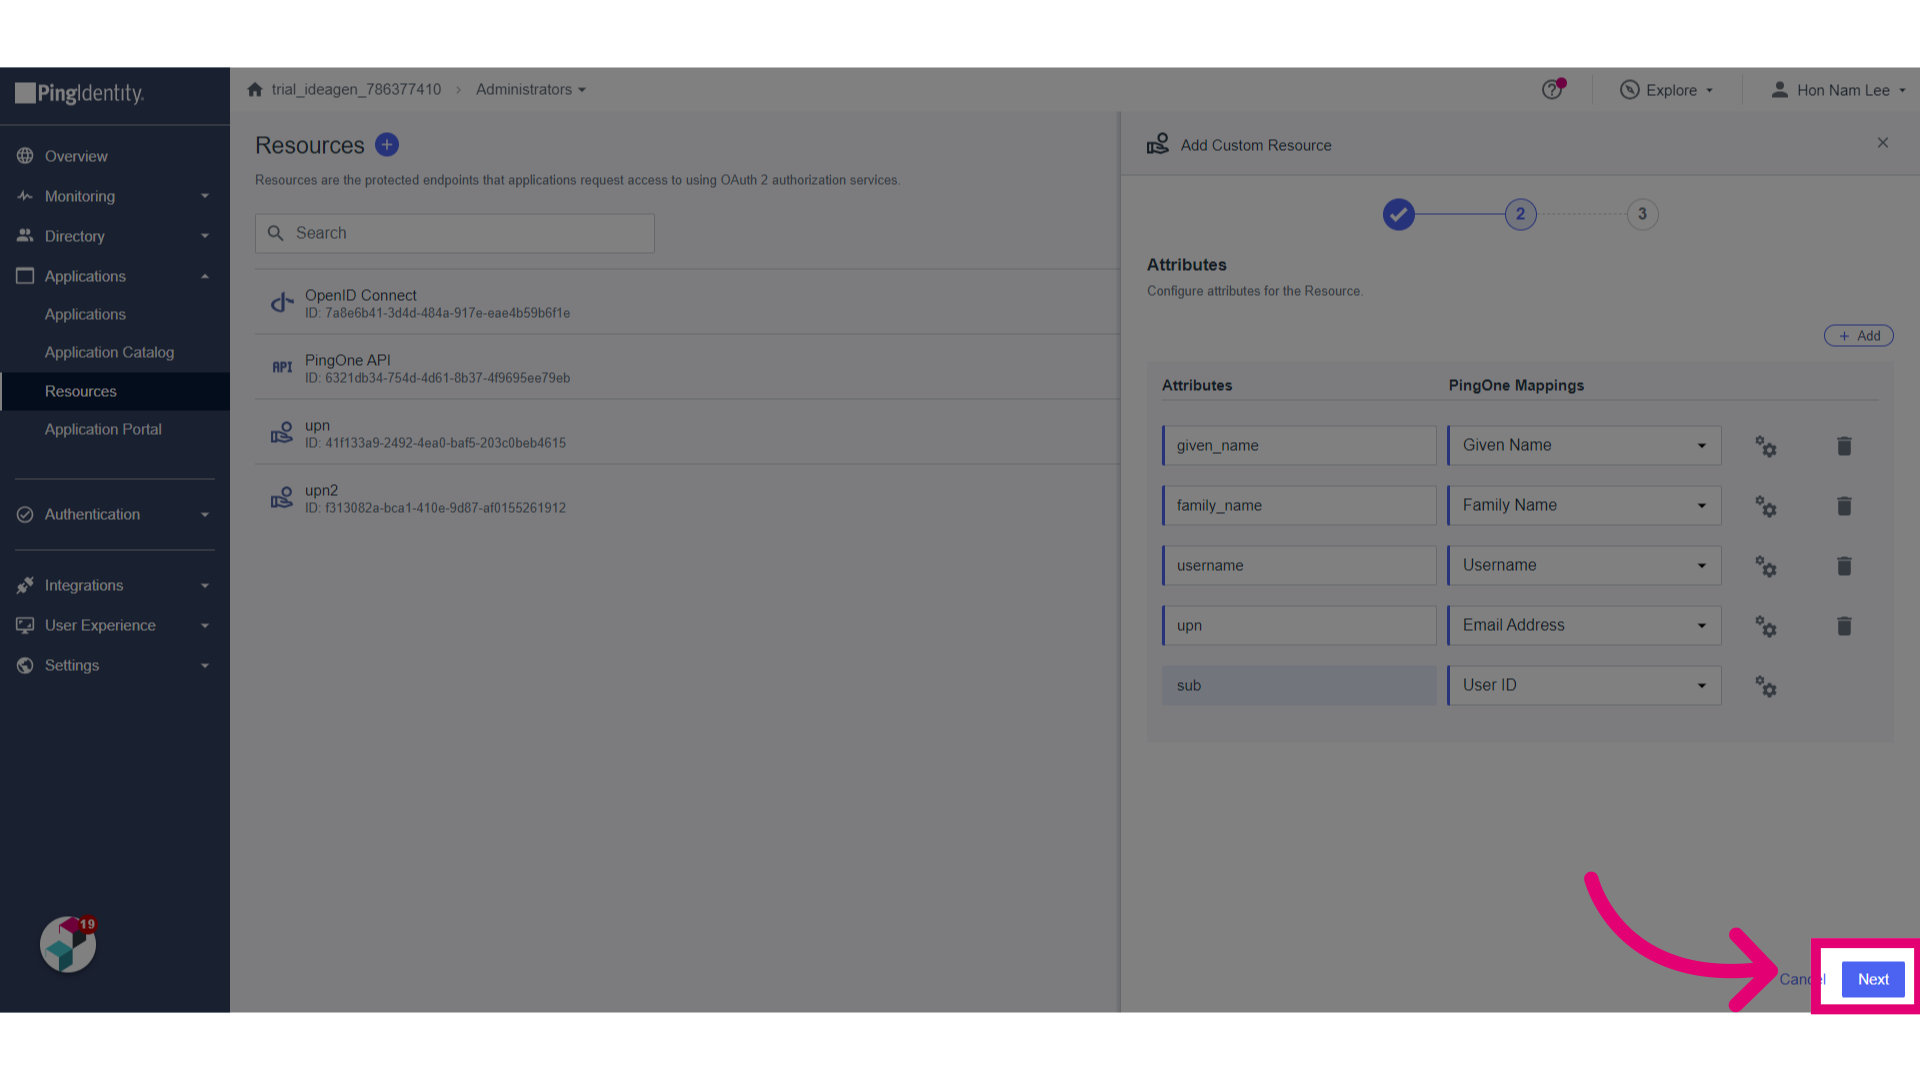
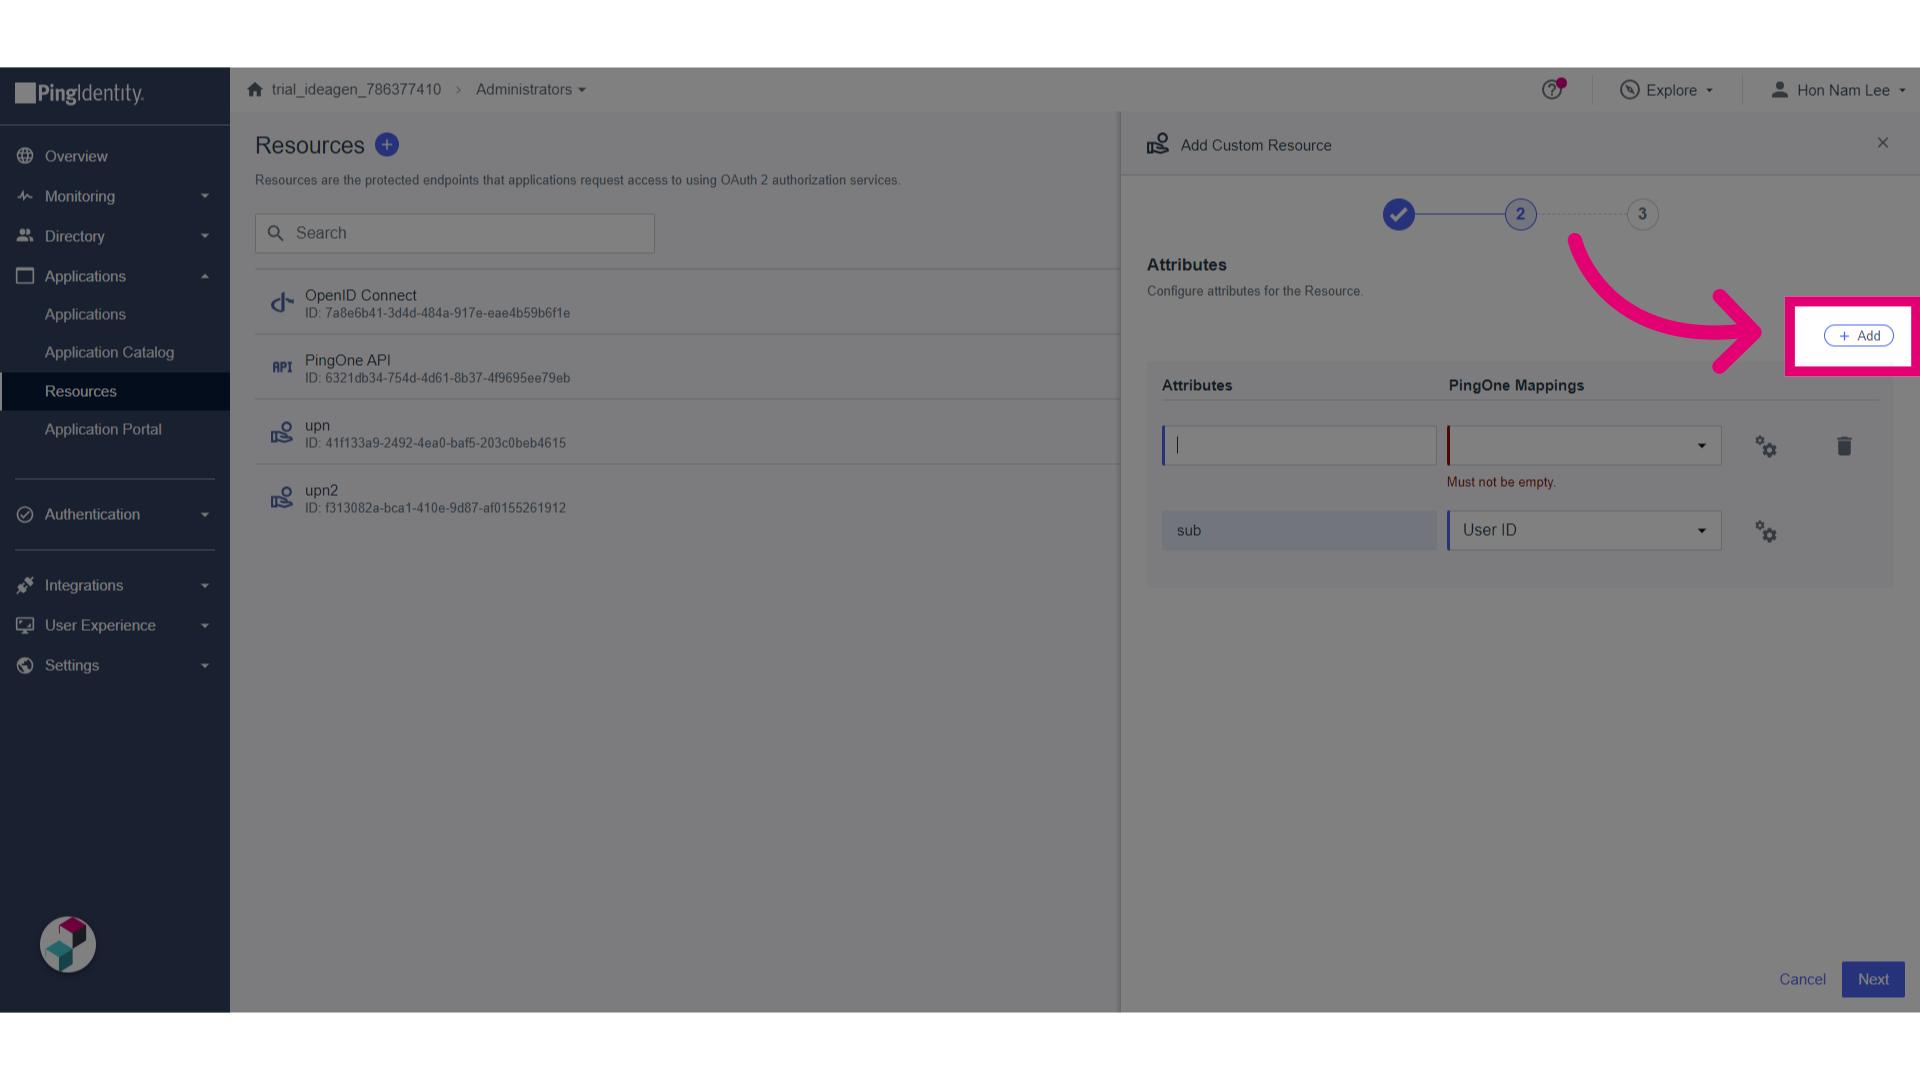
- Click Add.

- Set the attributes:
-
-
- upn to Email Address (this is embedded into the upn into Access Token)
- family_name to Family Name
- given_name to Given Name
- username to Username
-
- Click Next.
- Click Add Scope.
- Set Scope Name to userinfo.
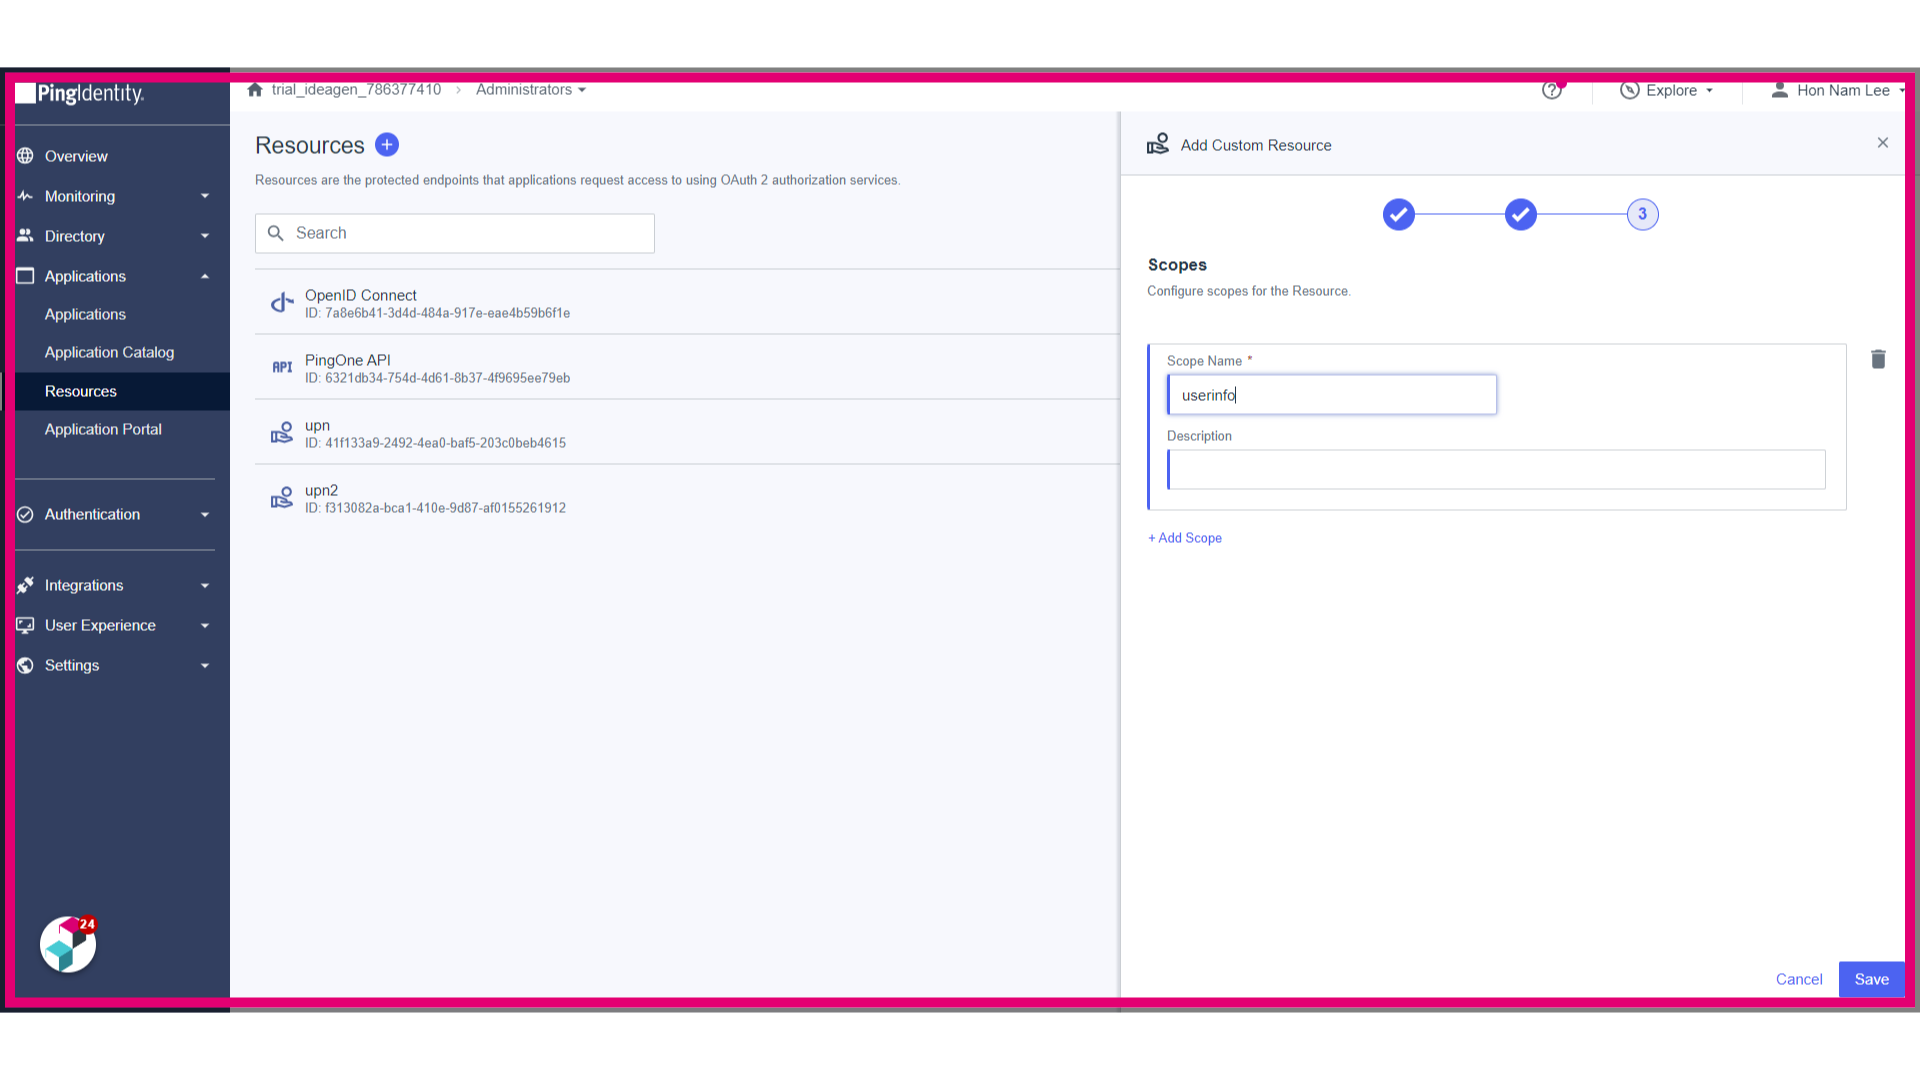
- Click Save.
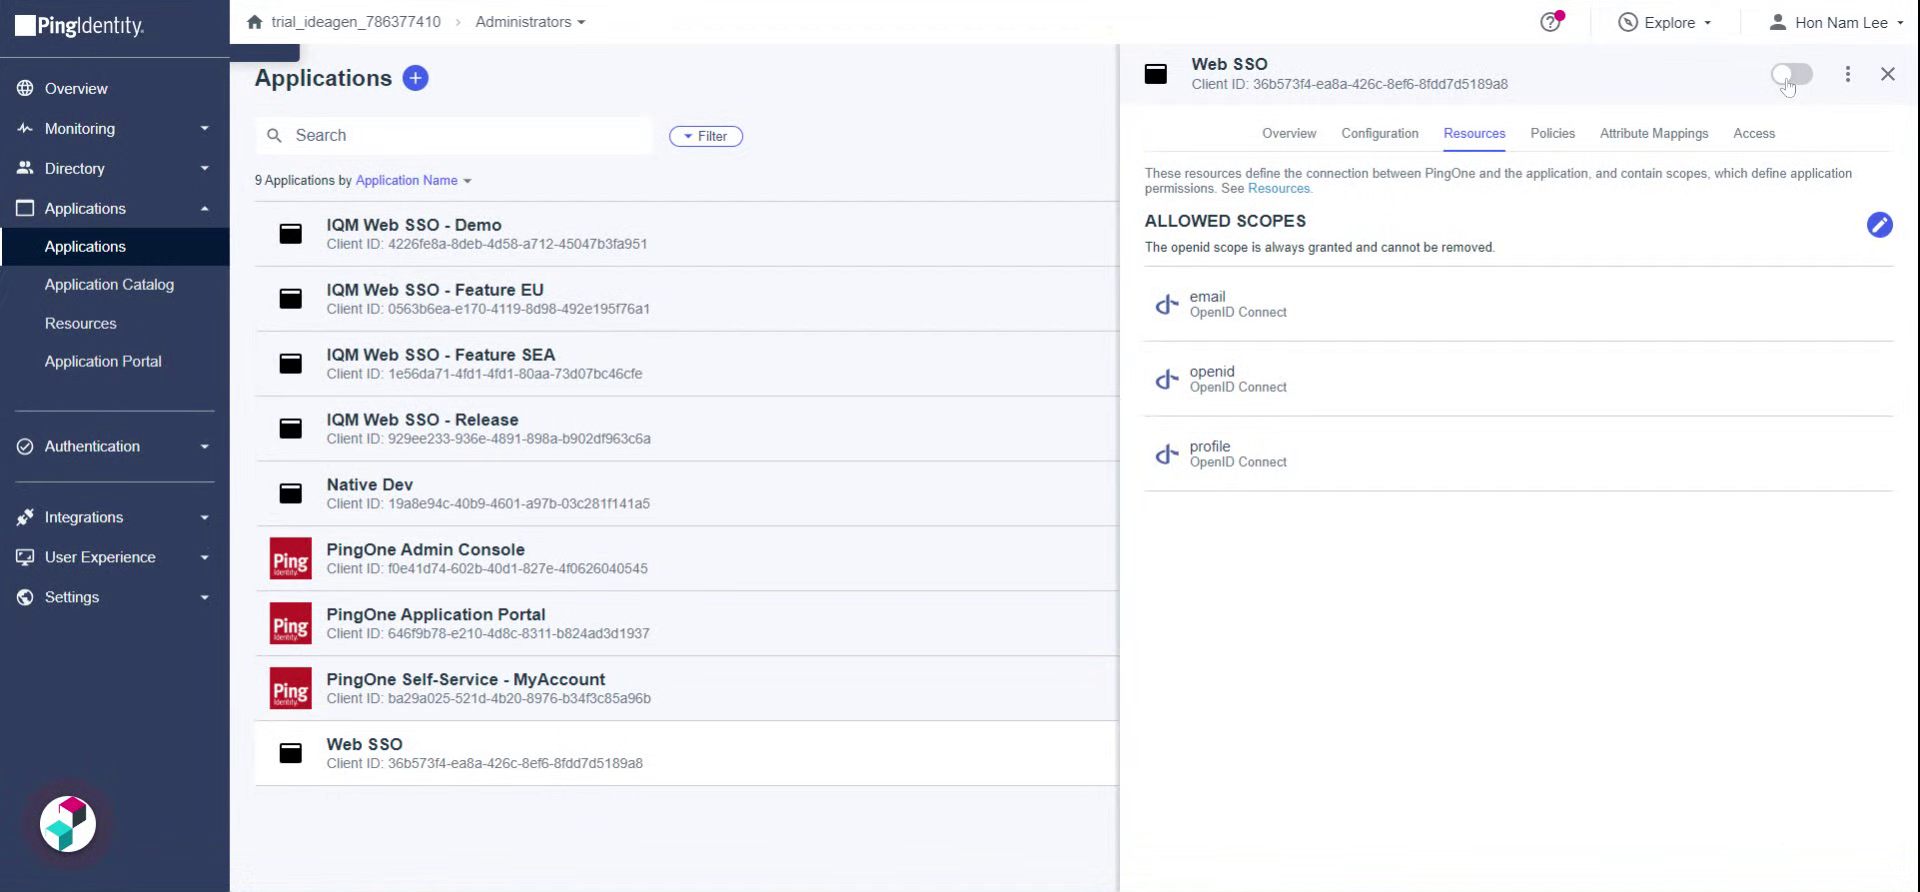
- Go back to Applications.
- Click on the created application.
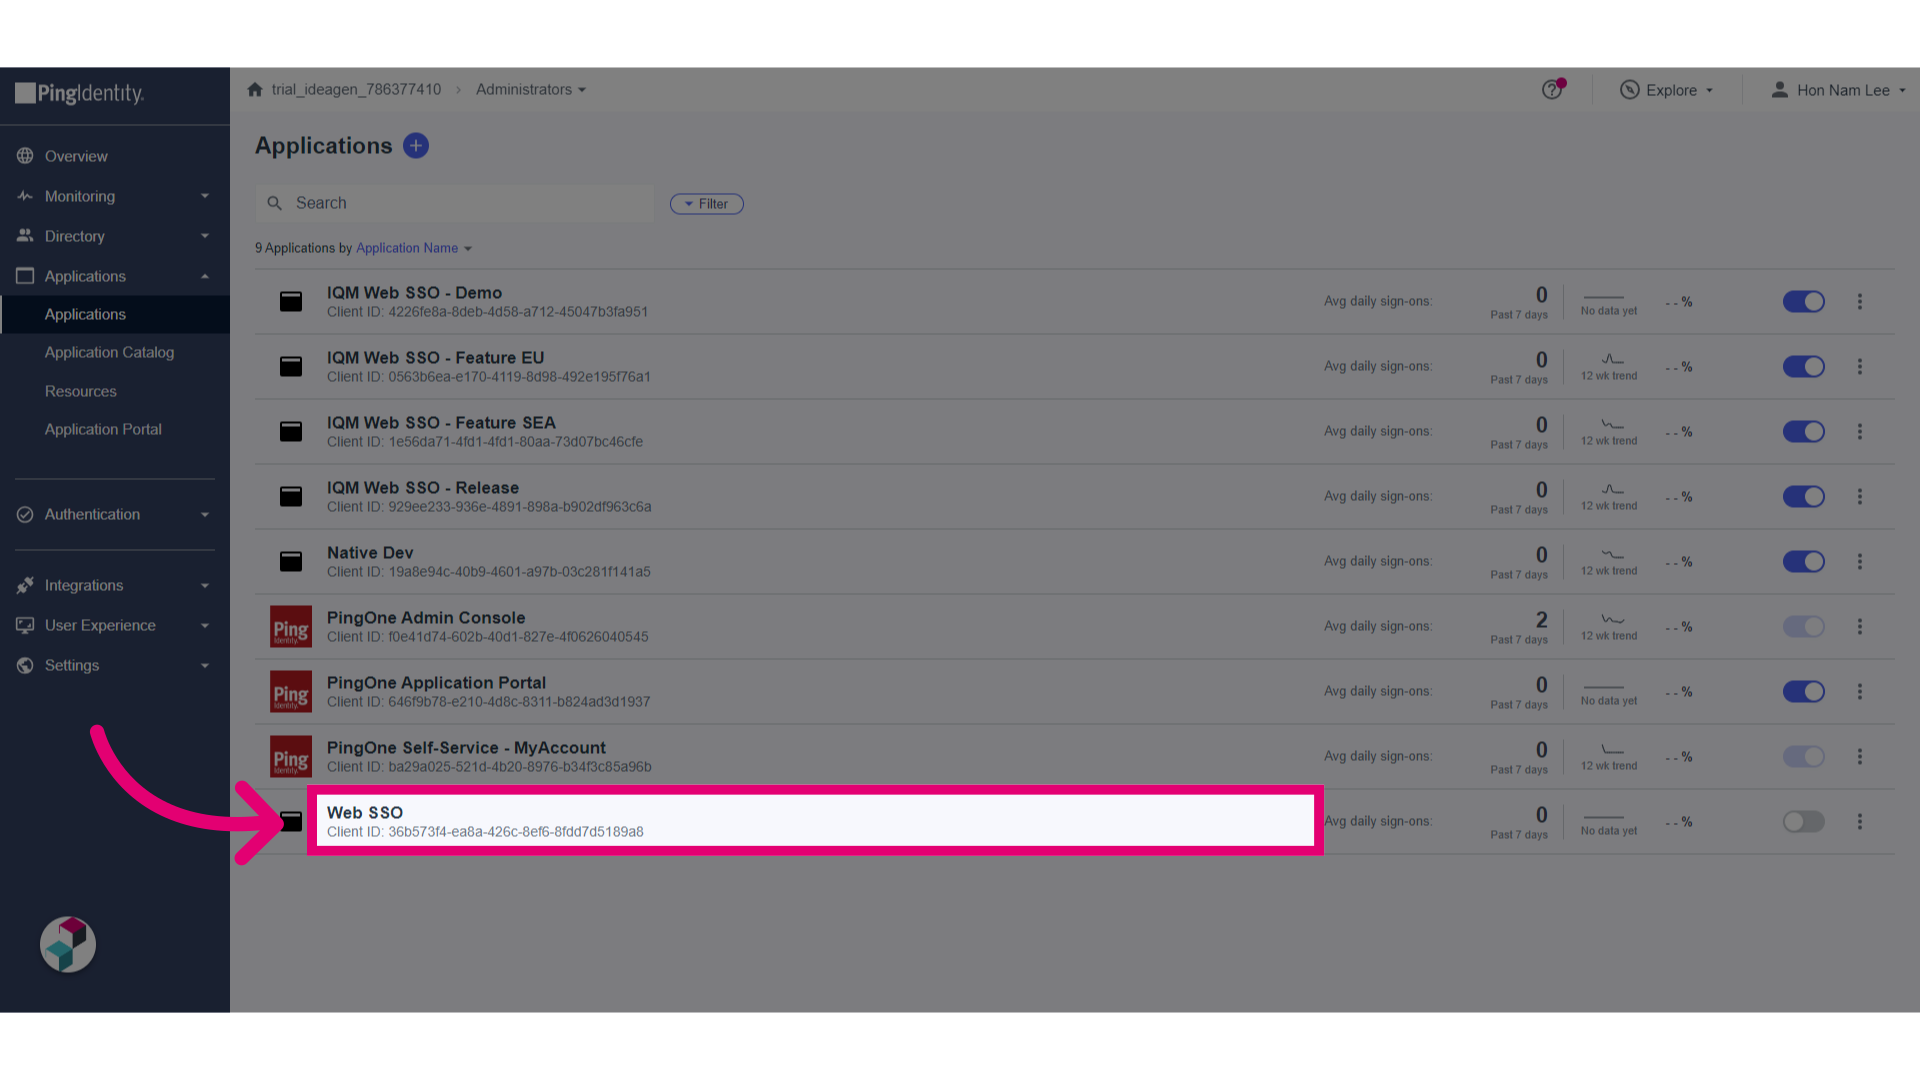
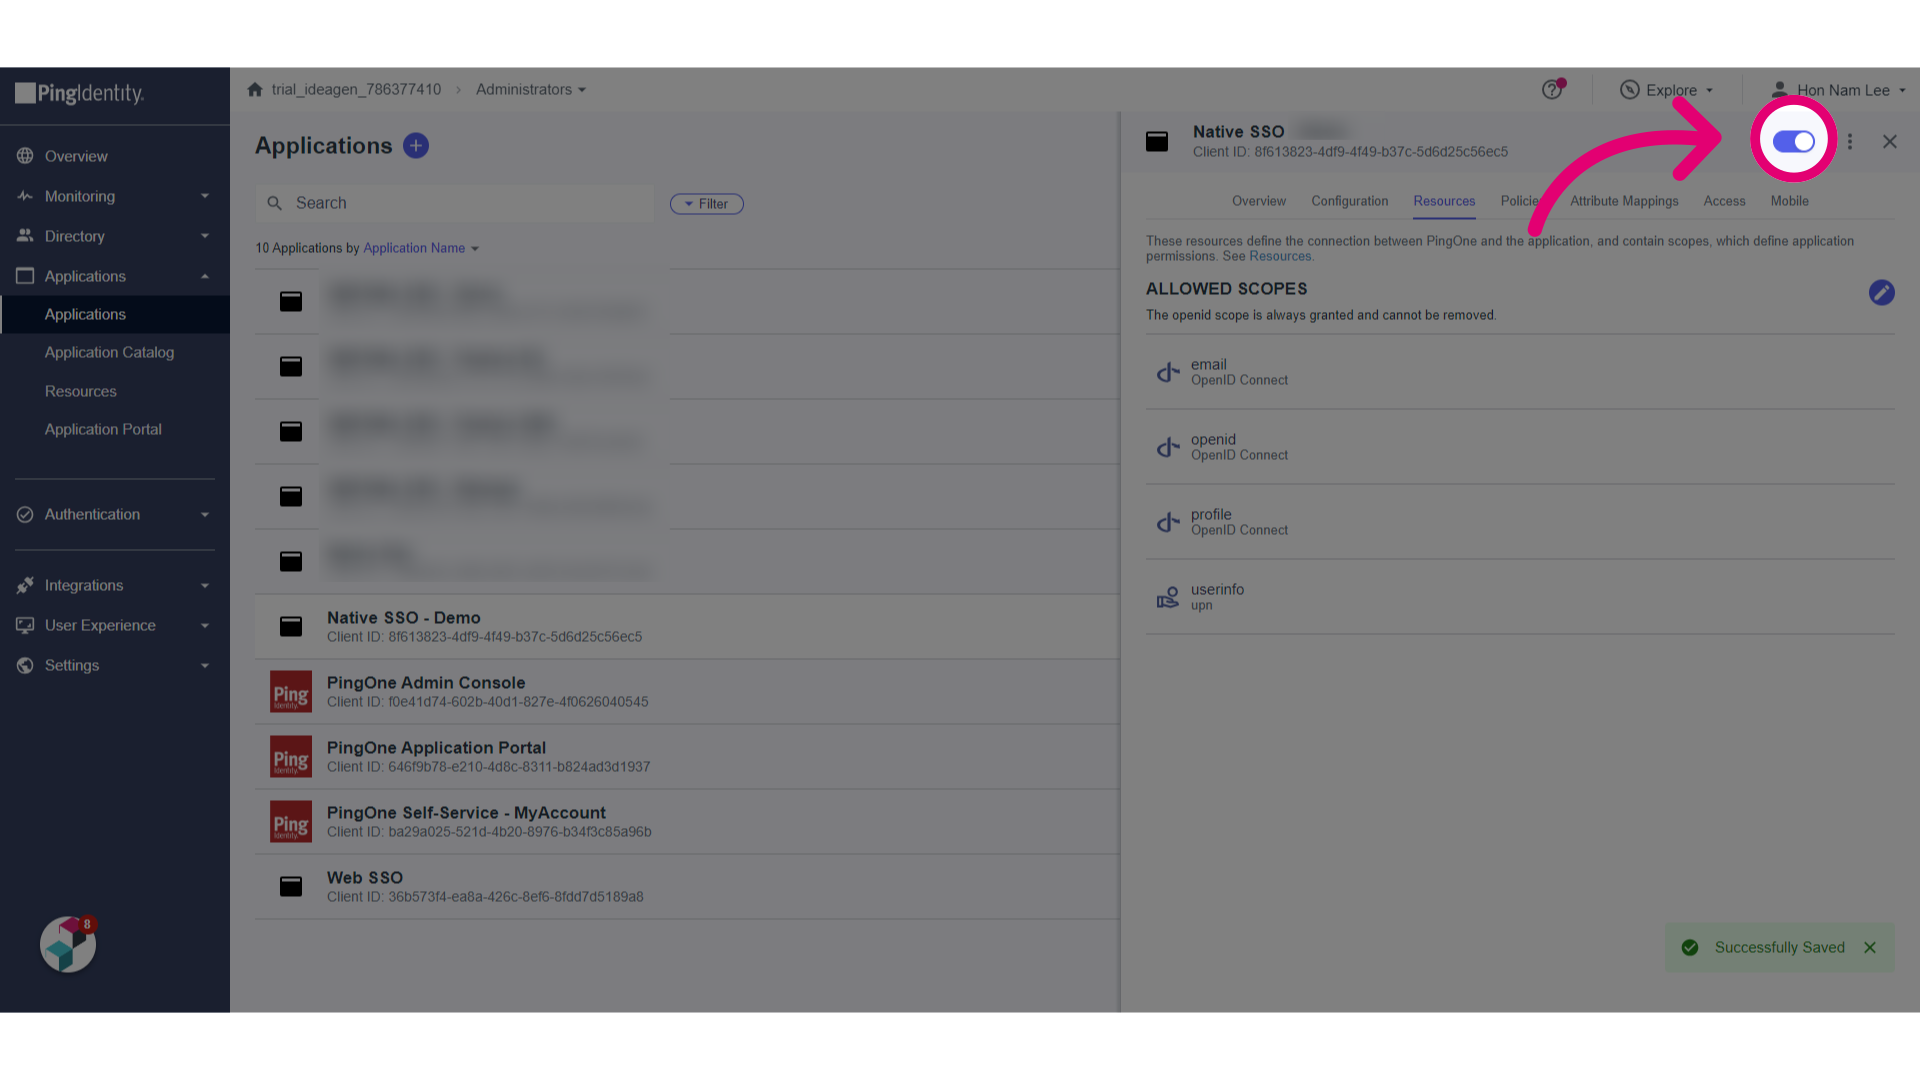
- Go to the Resources tab.
- Click Edit for Allowed Scopes.

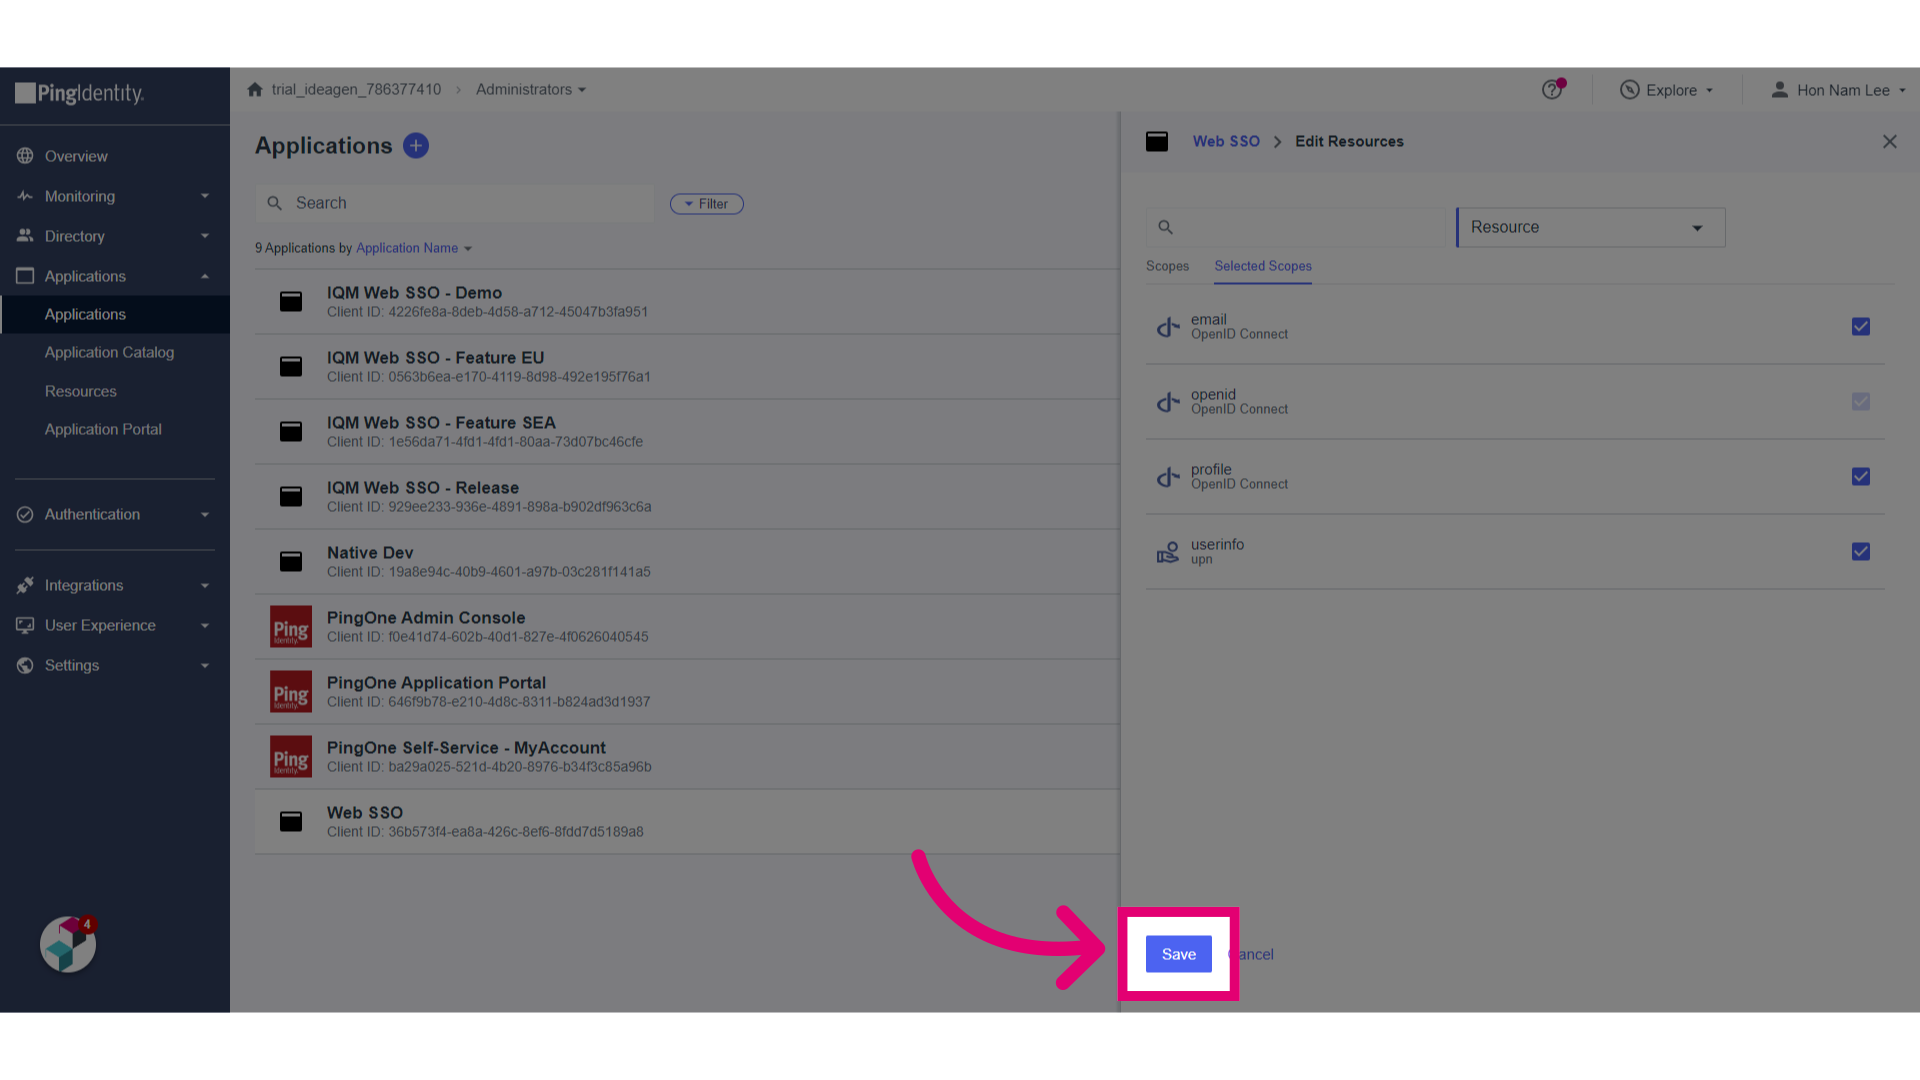
- Select email, profile and userinfo.
- Verify selected scopes.
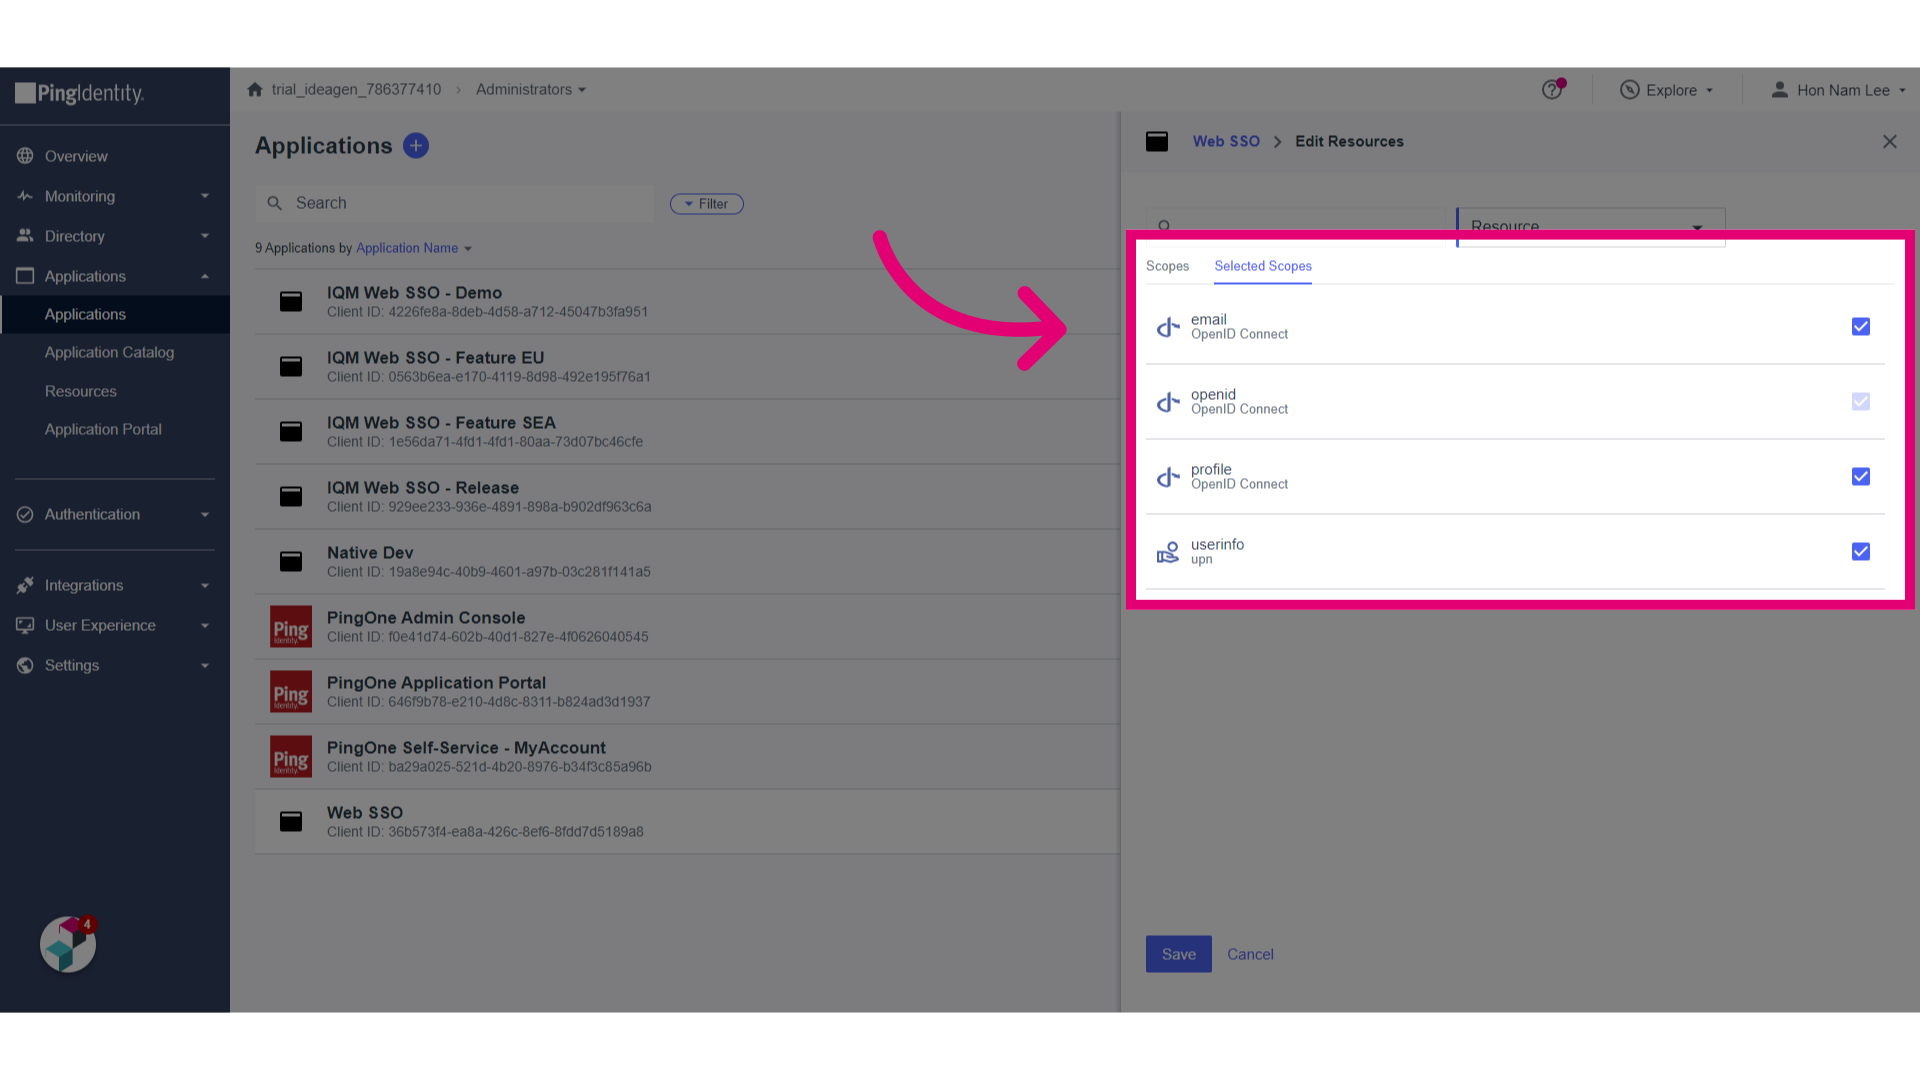
- Click Save.
- Turn on the Application by activating the toggle.
1. Configuring Windows
To configure SSO:
- Log in to PingOne.
- Go to Applications.
- Click Add.
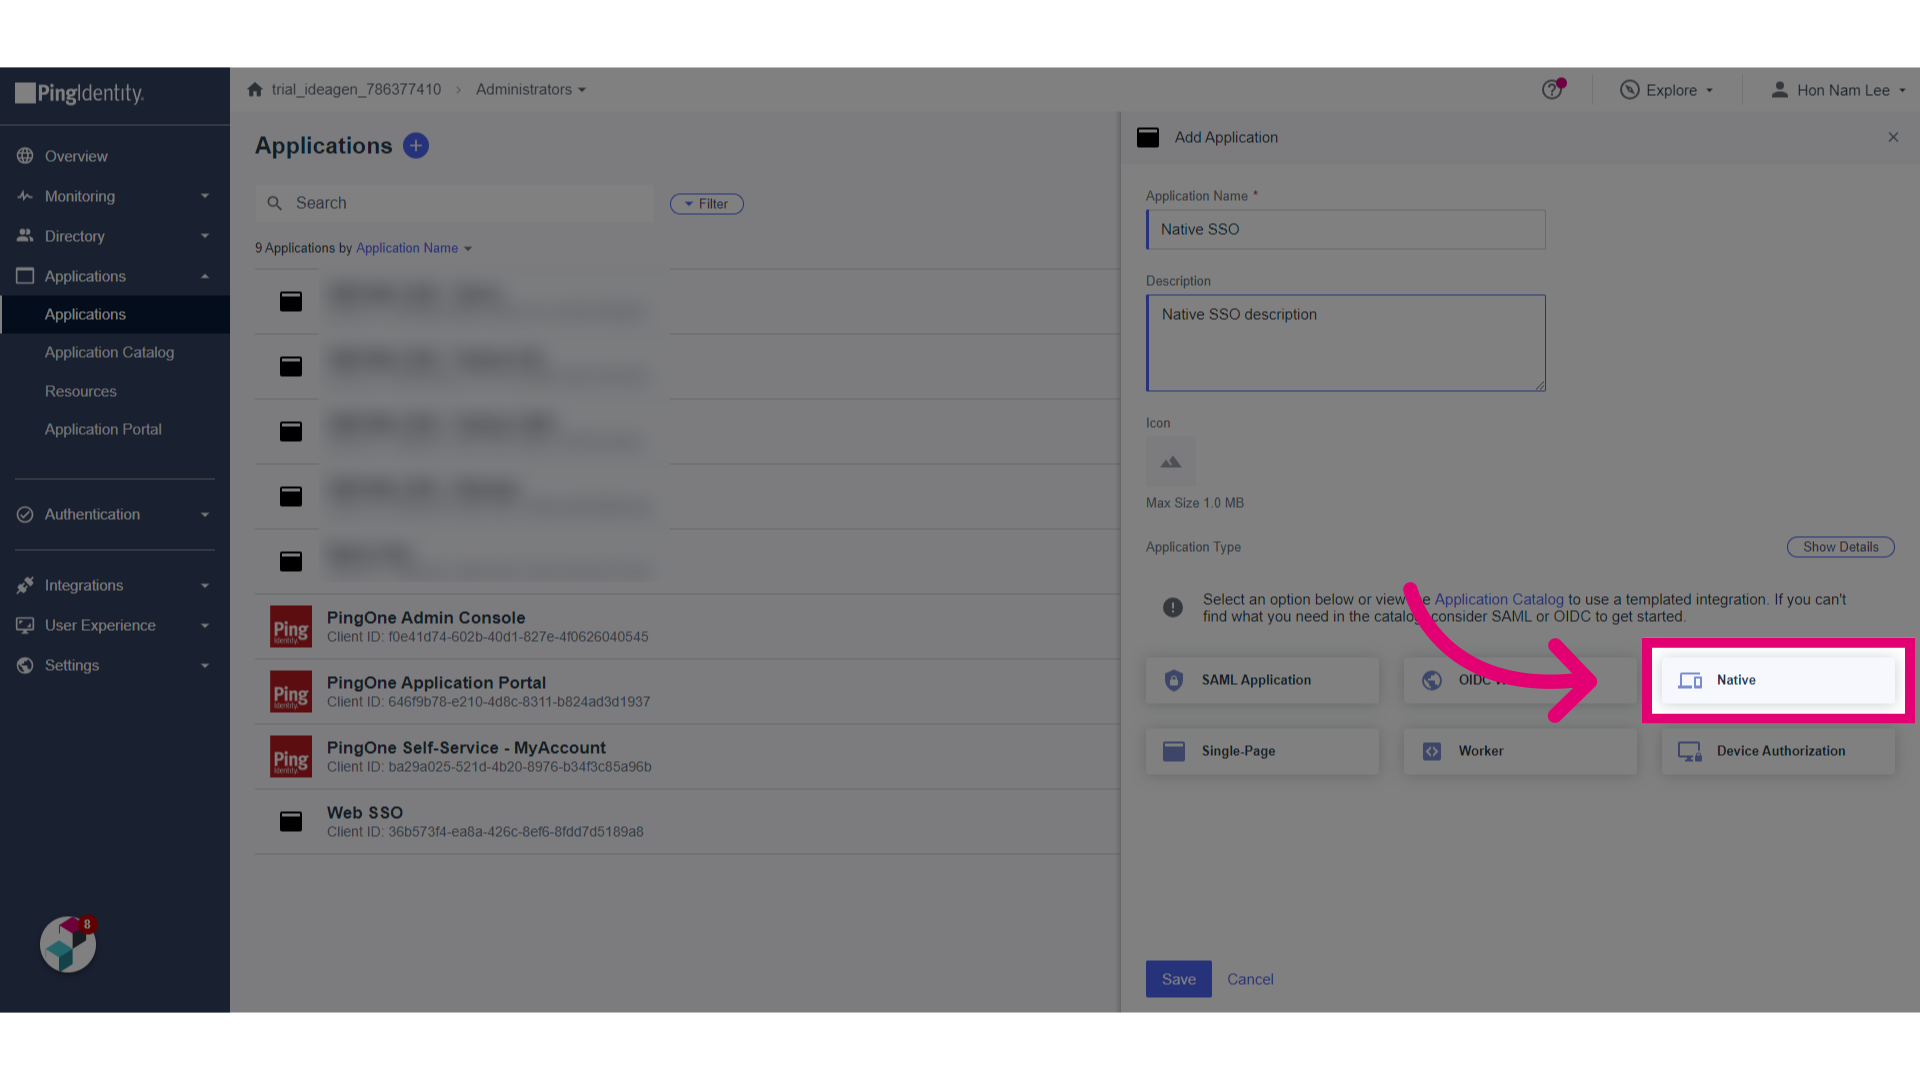
- Give the Native SSO as a Name to the application.
- Enter a Description.
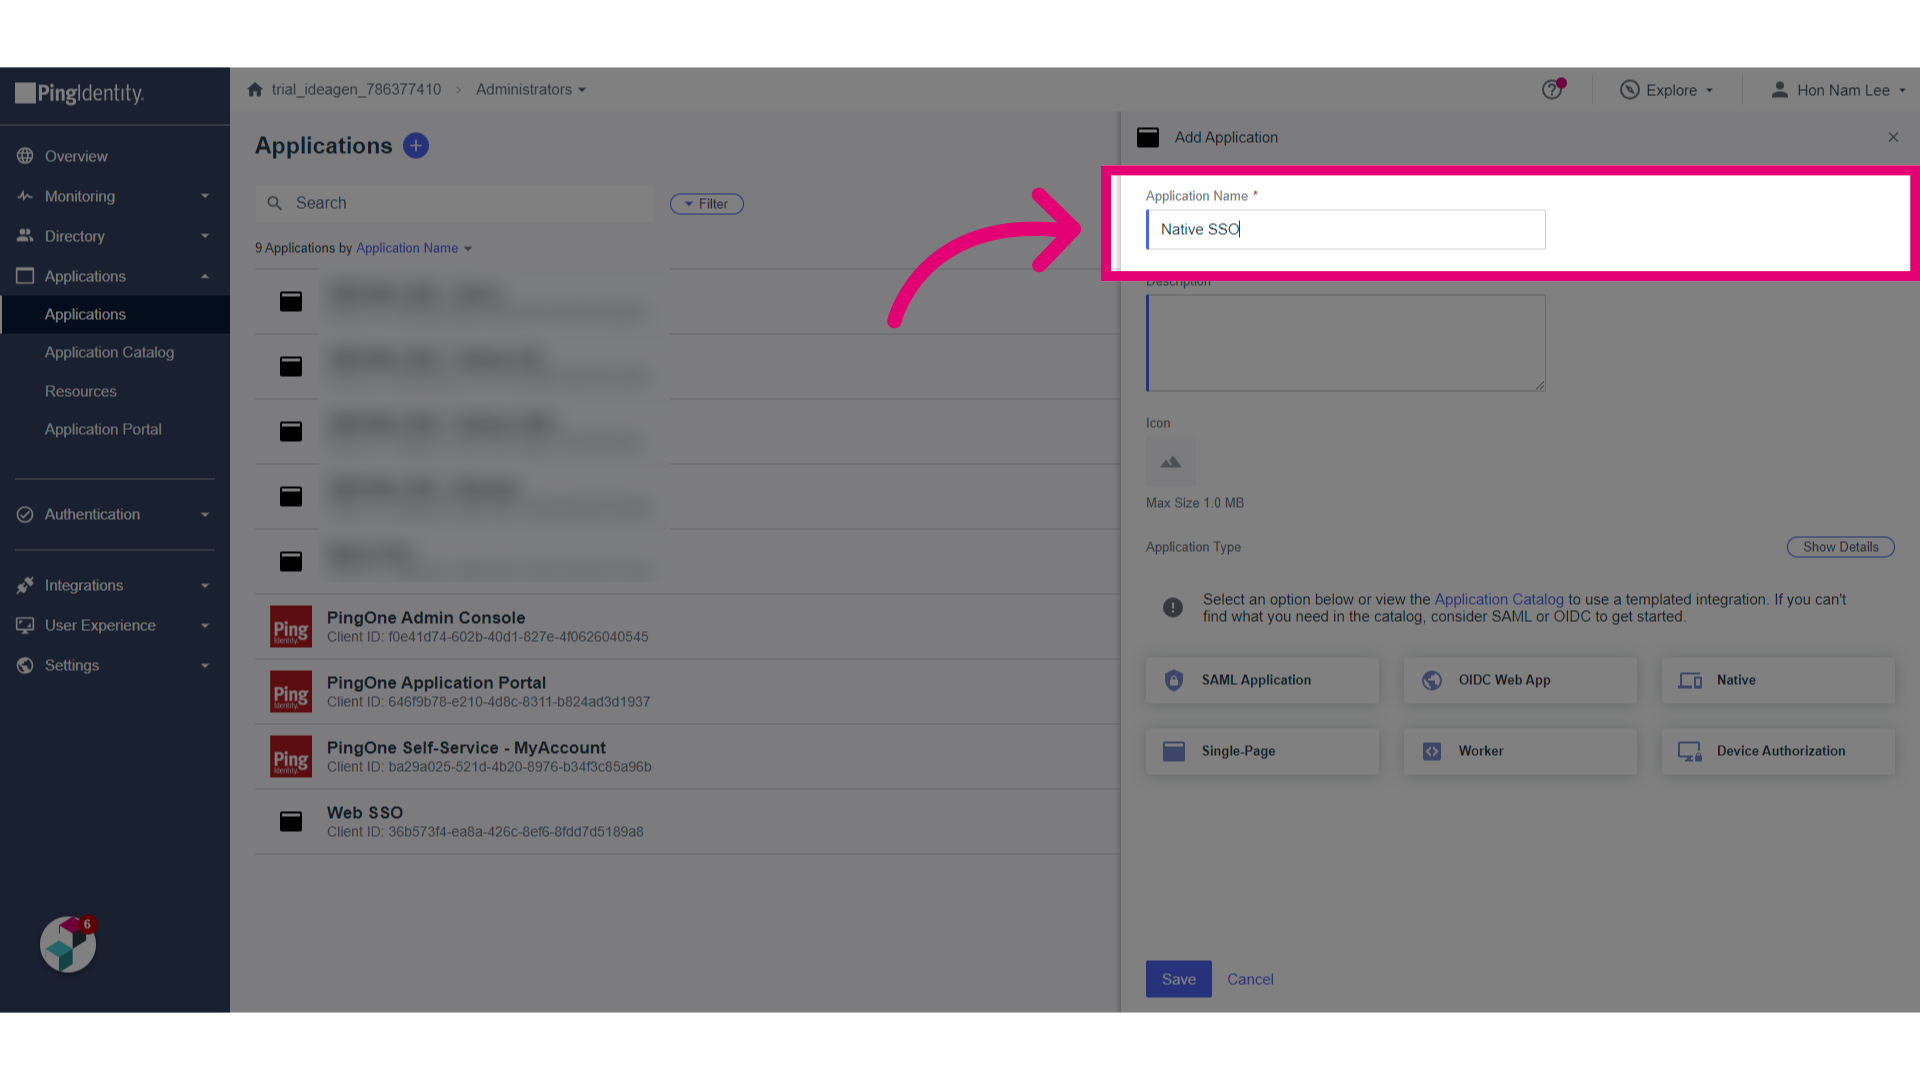
- Select Native.
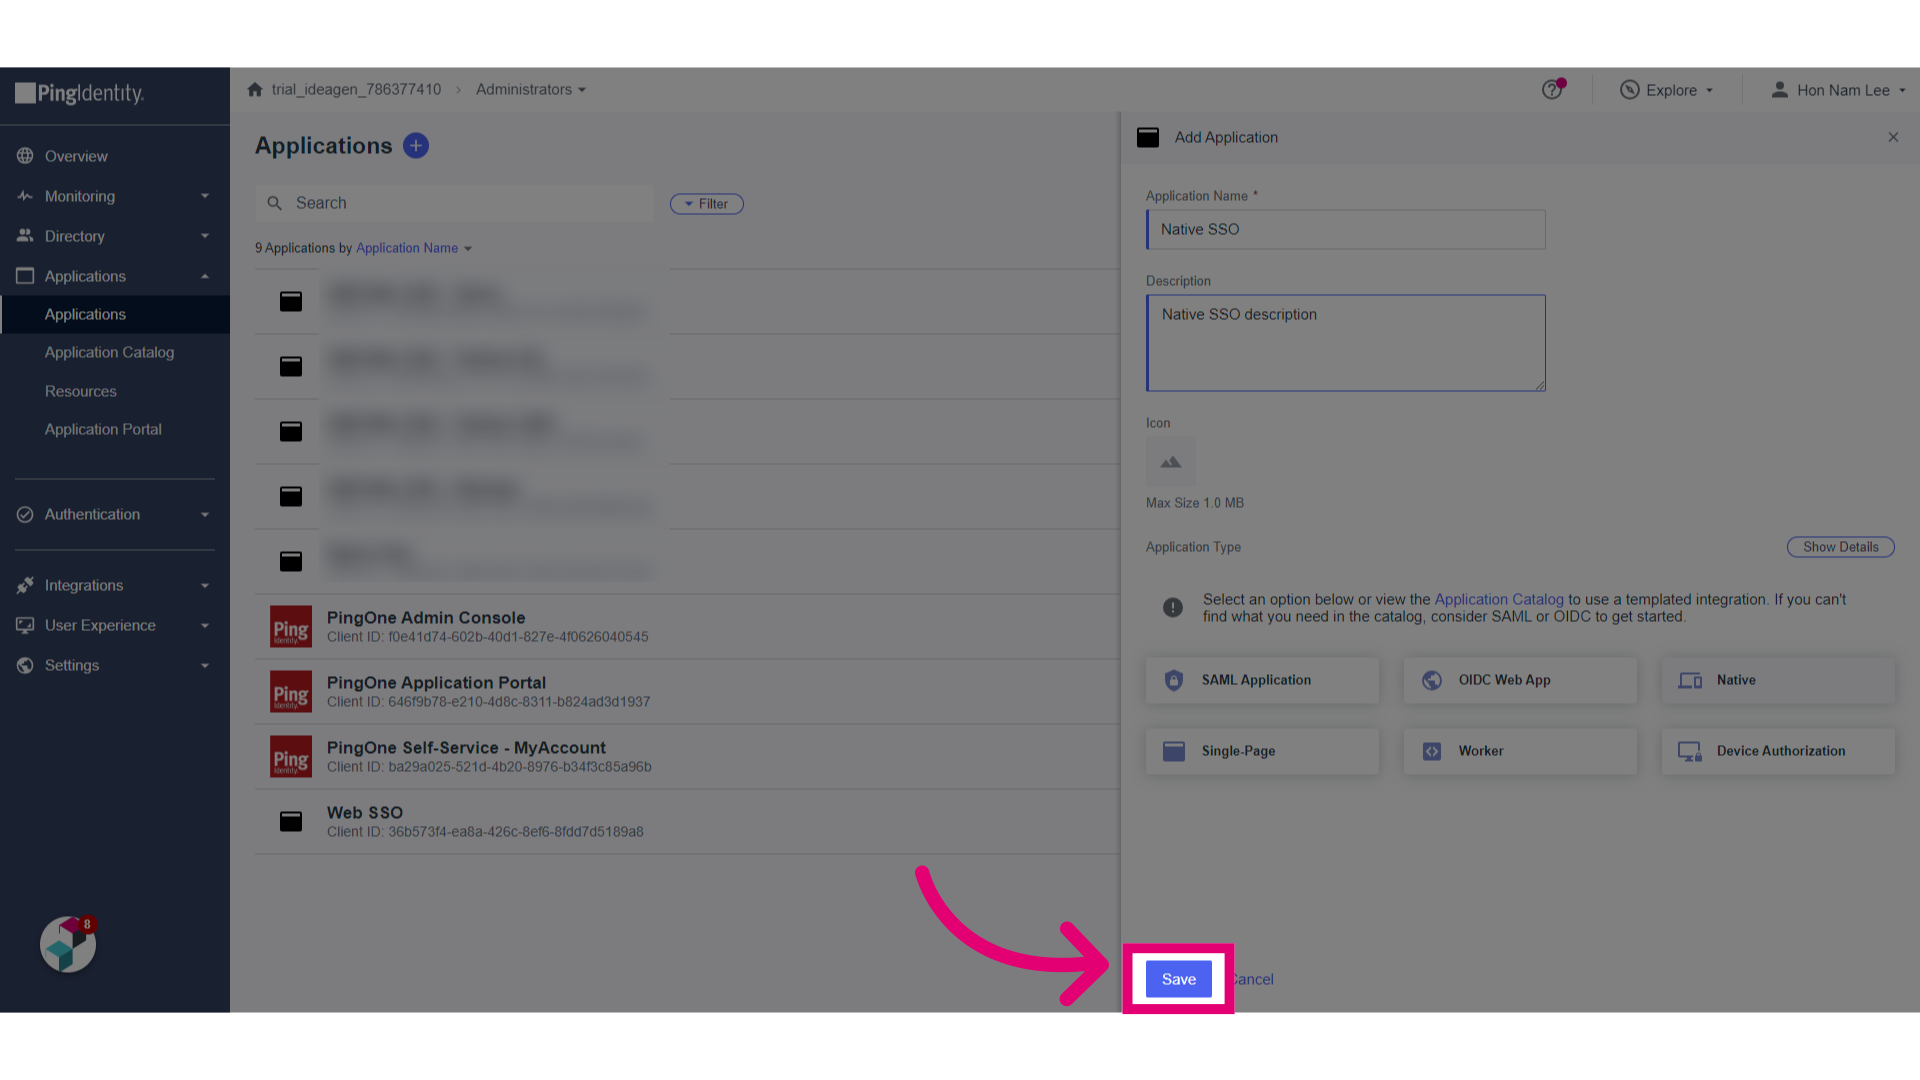
- Click Save.
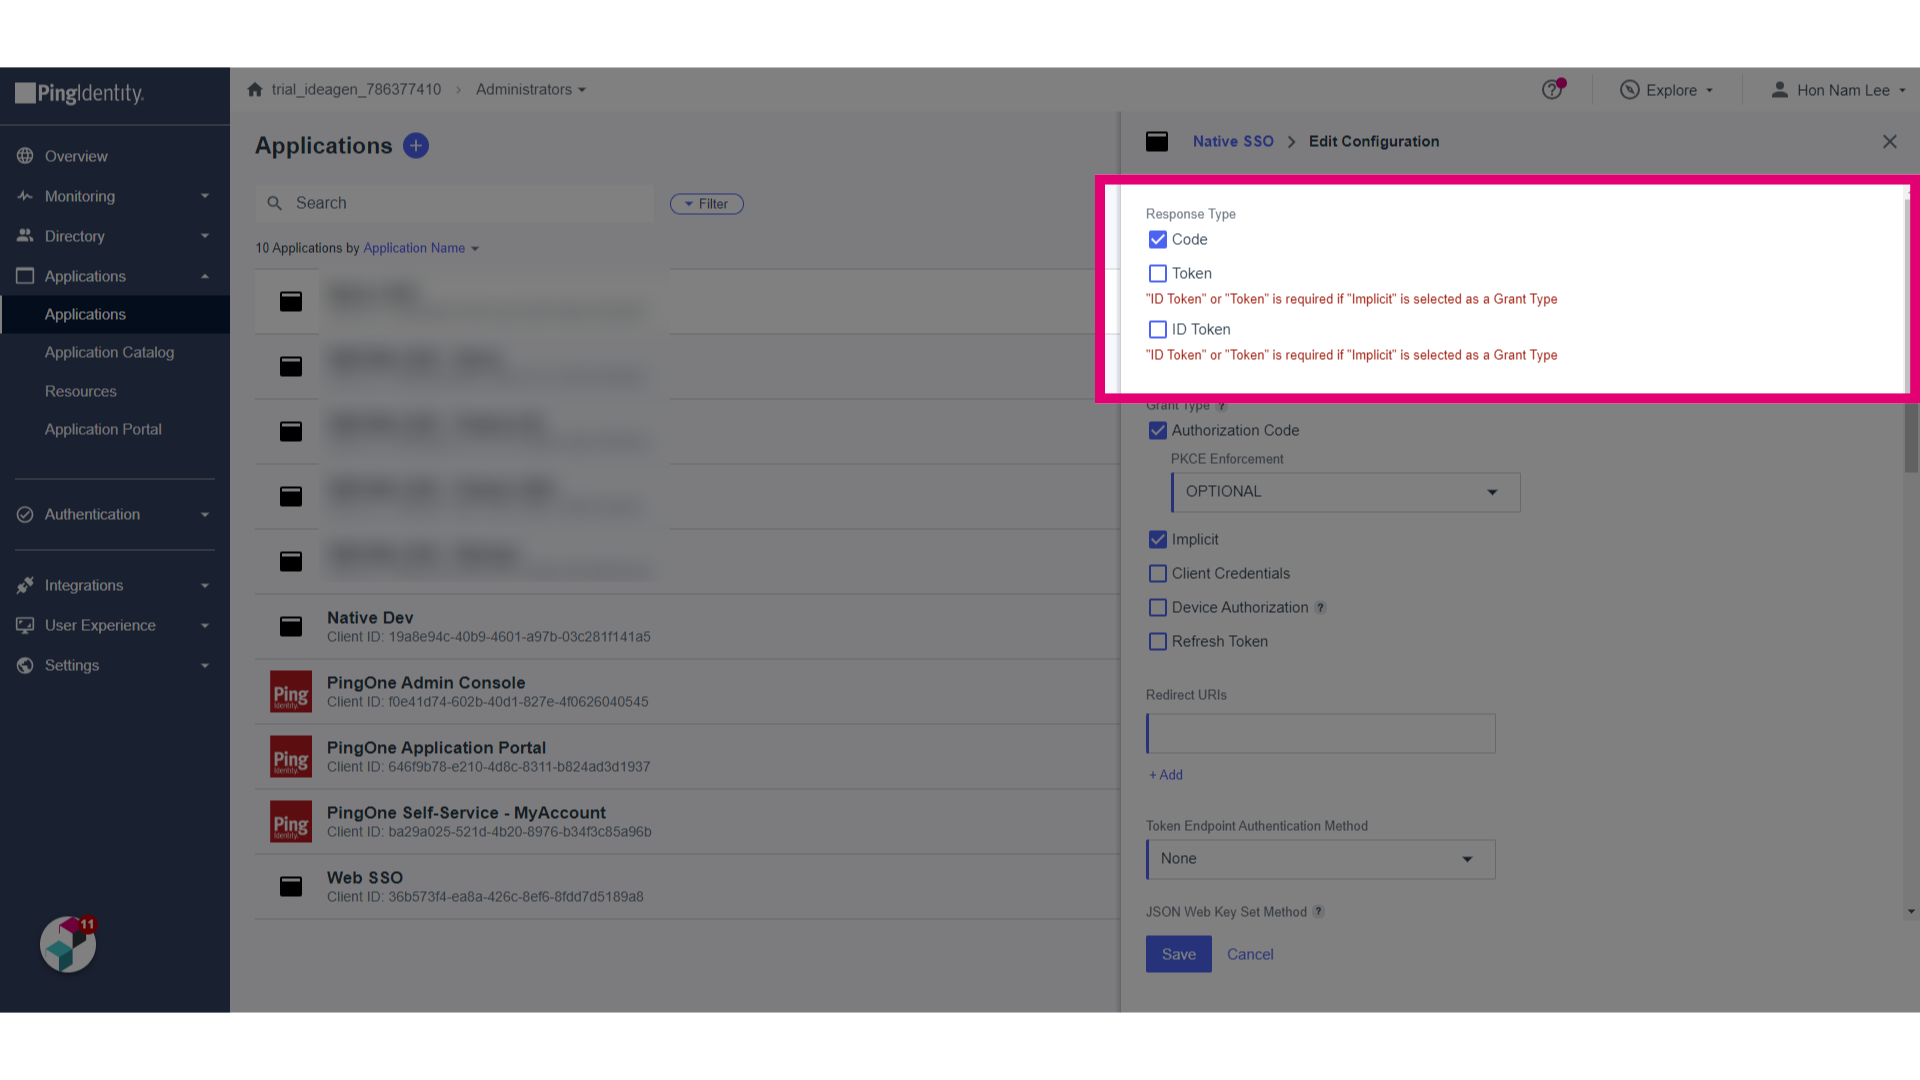
- Edit the configuration.
- Untick Token and ID Token for Response Type.
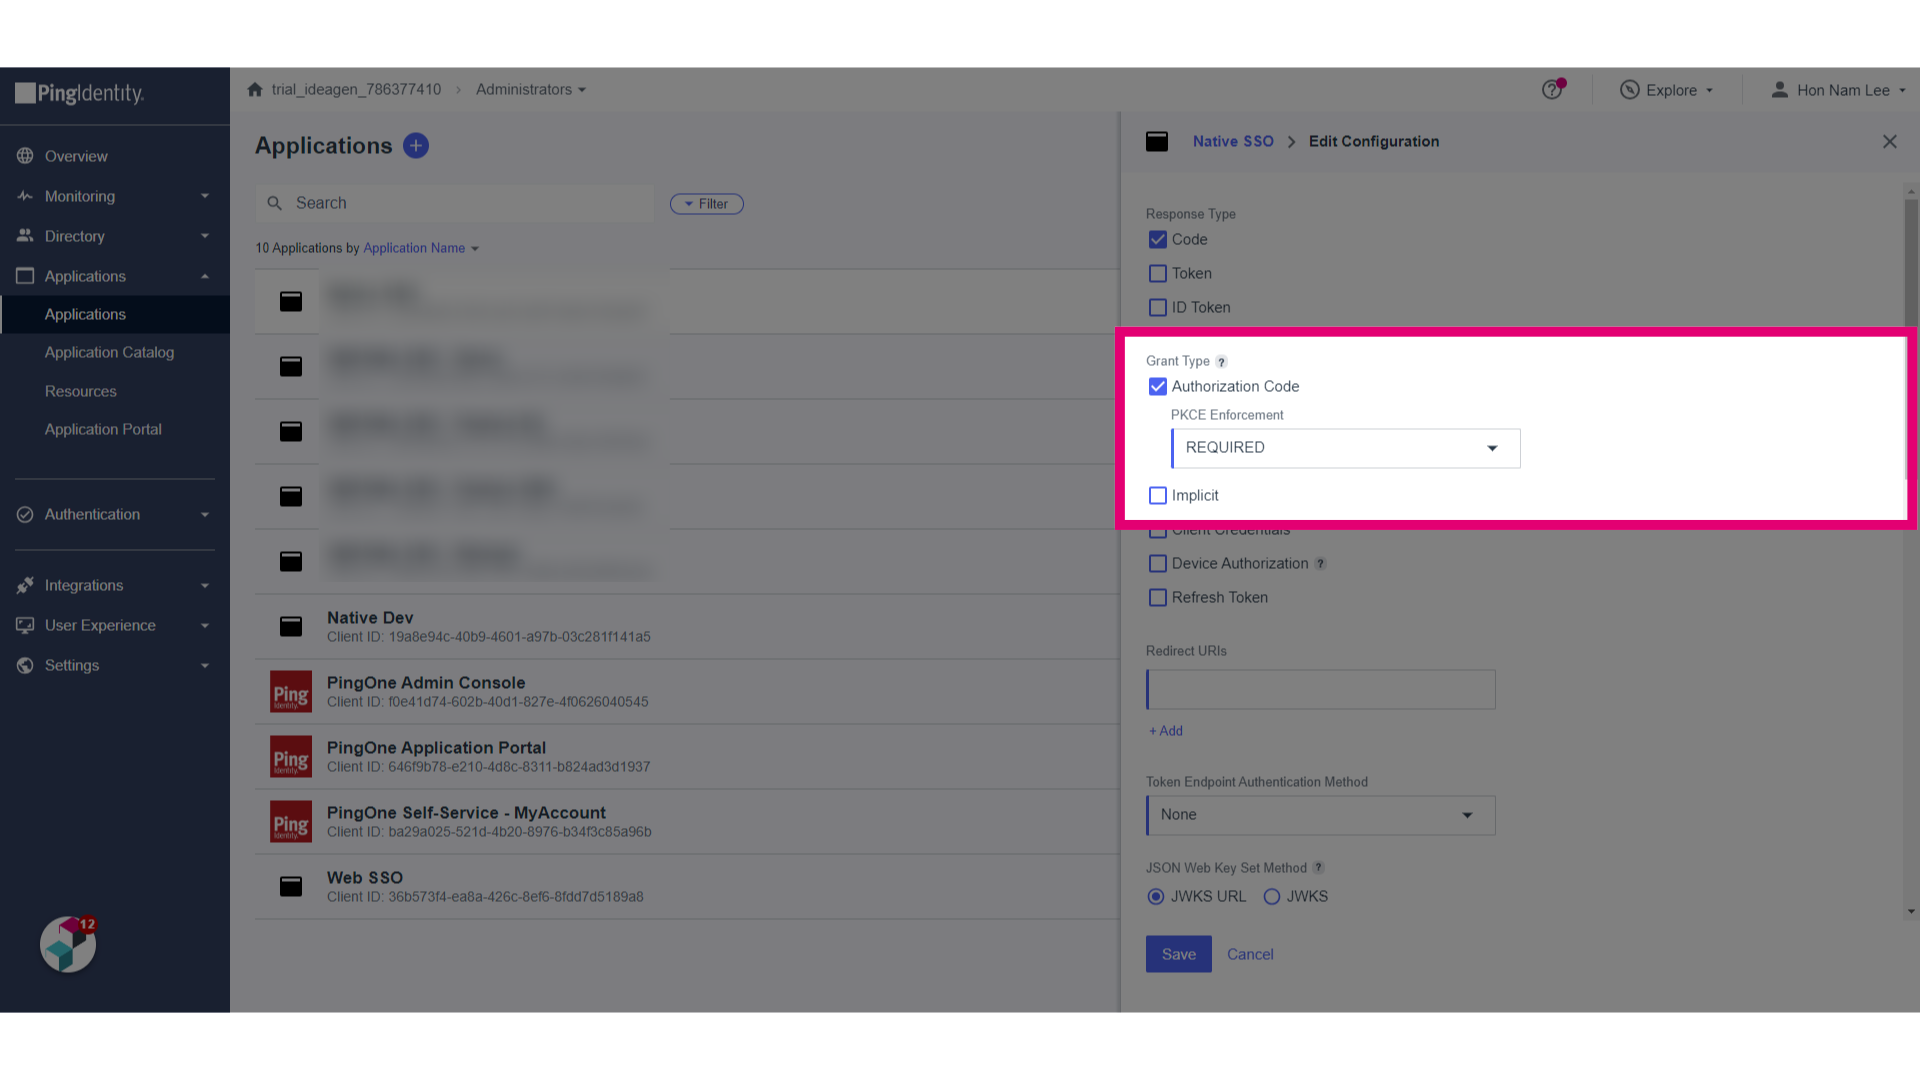
- Check Authorization Code for Grant Type.
- Set PCKE Enforcement to REQUIRED.
- Untick Implicit for GrantType.
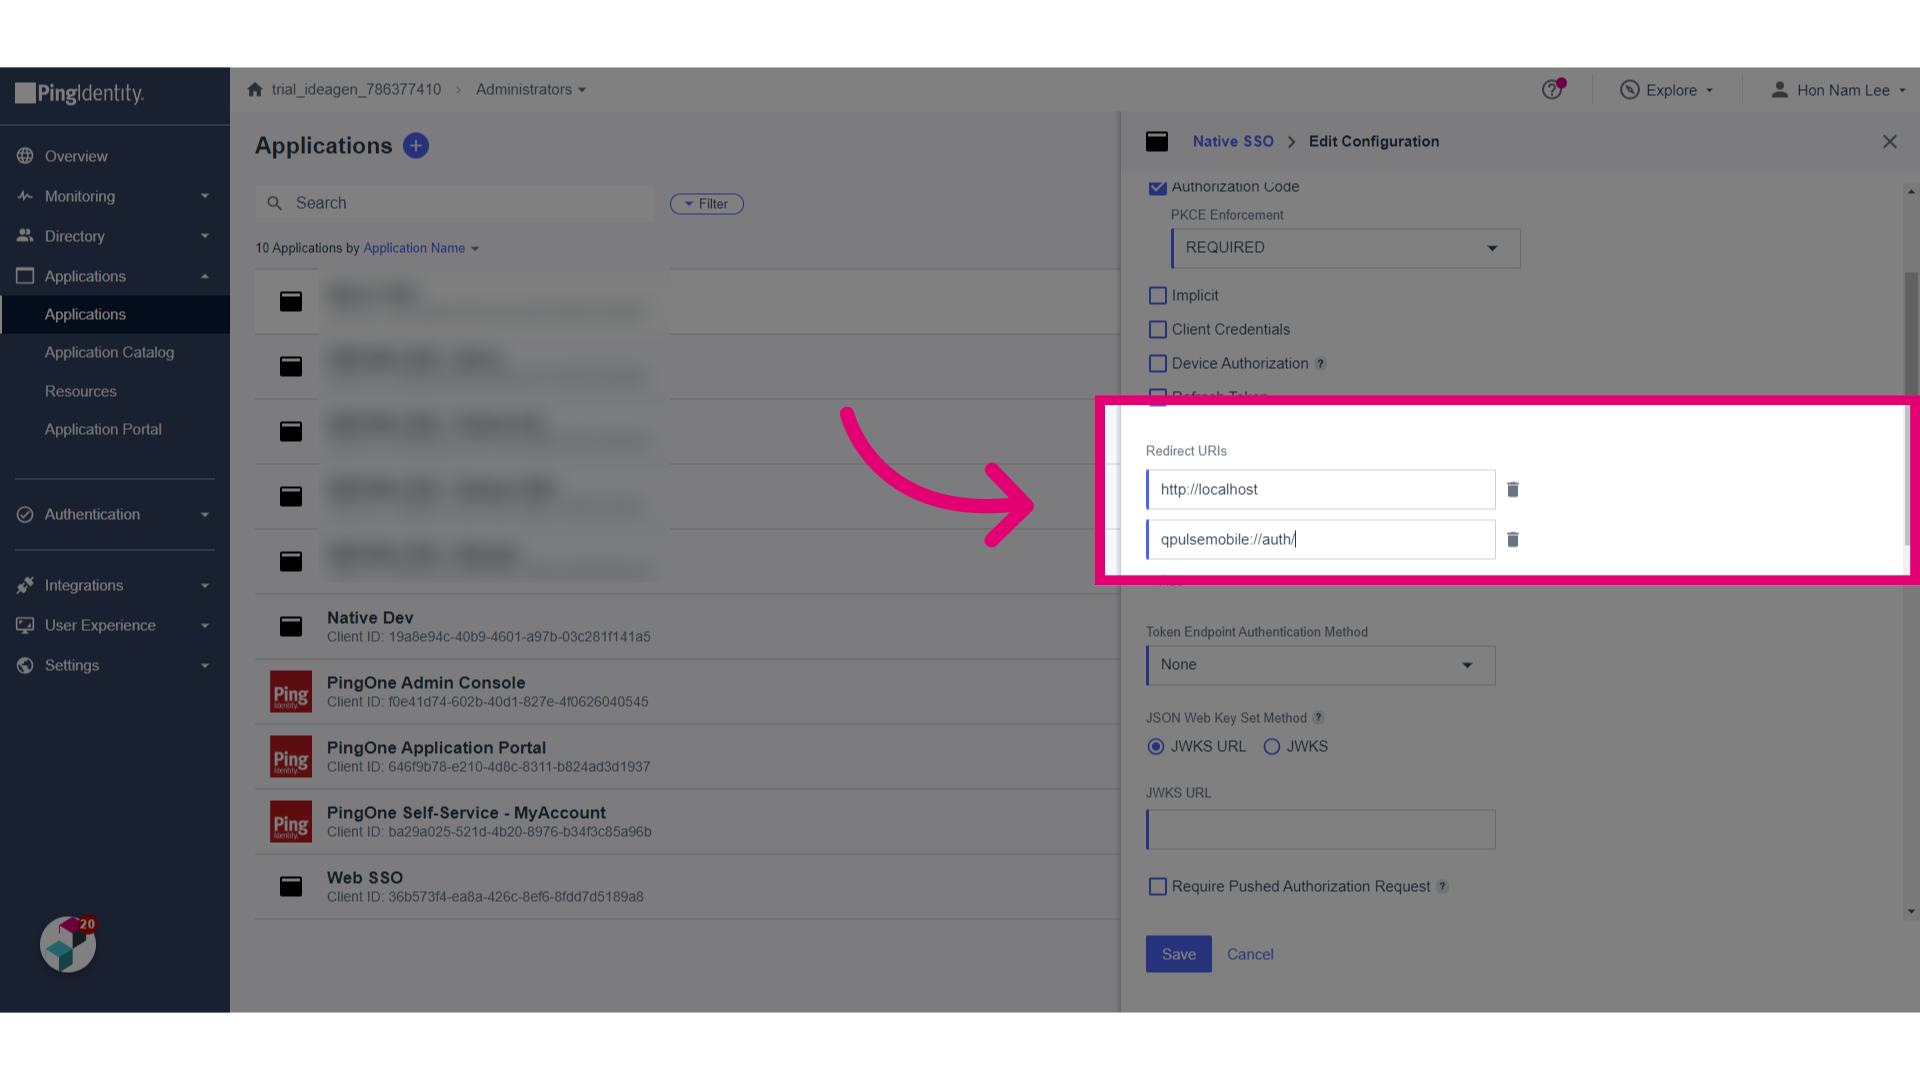
- Set the Redirect URLs.
Make sure you add qpulsemobile://auth/ to support the mobile application.
- Set Token Endpoint Authentication Method to None.
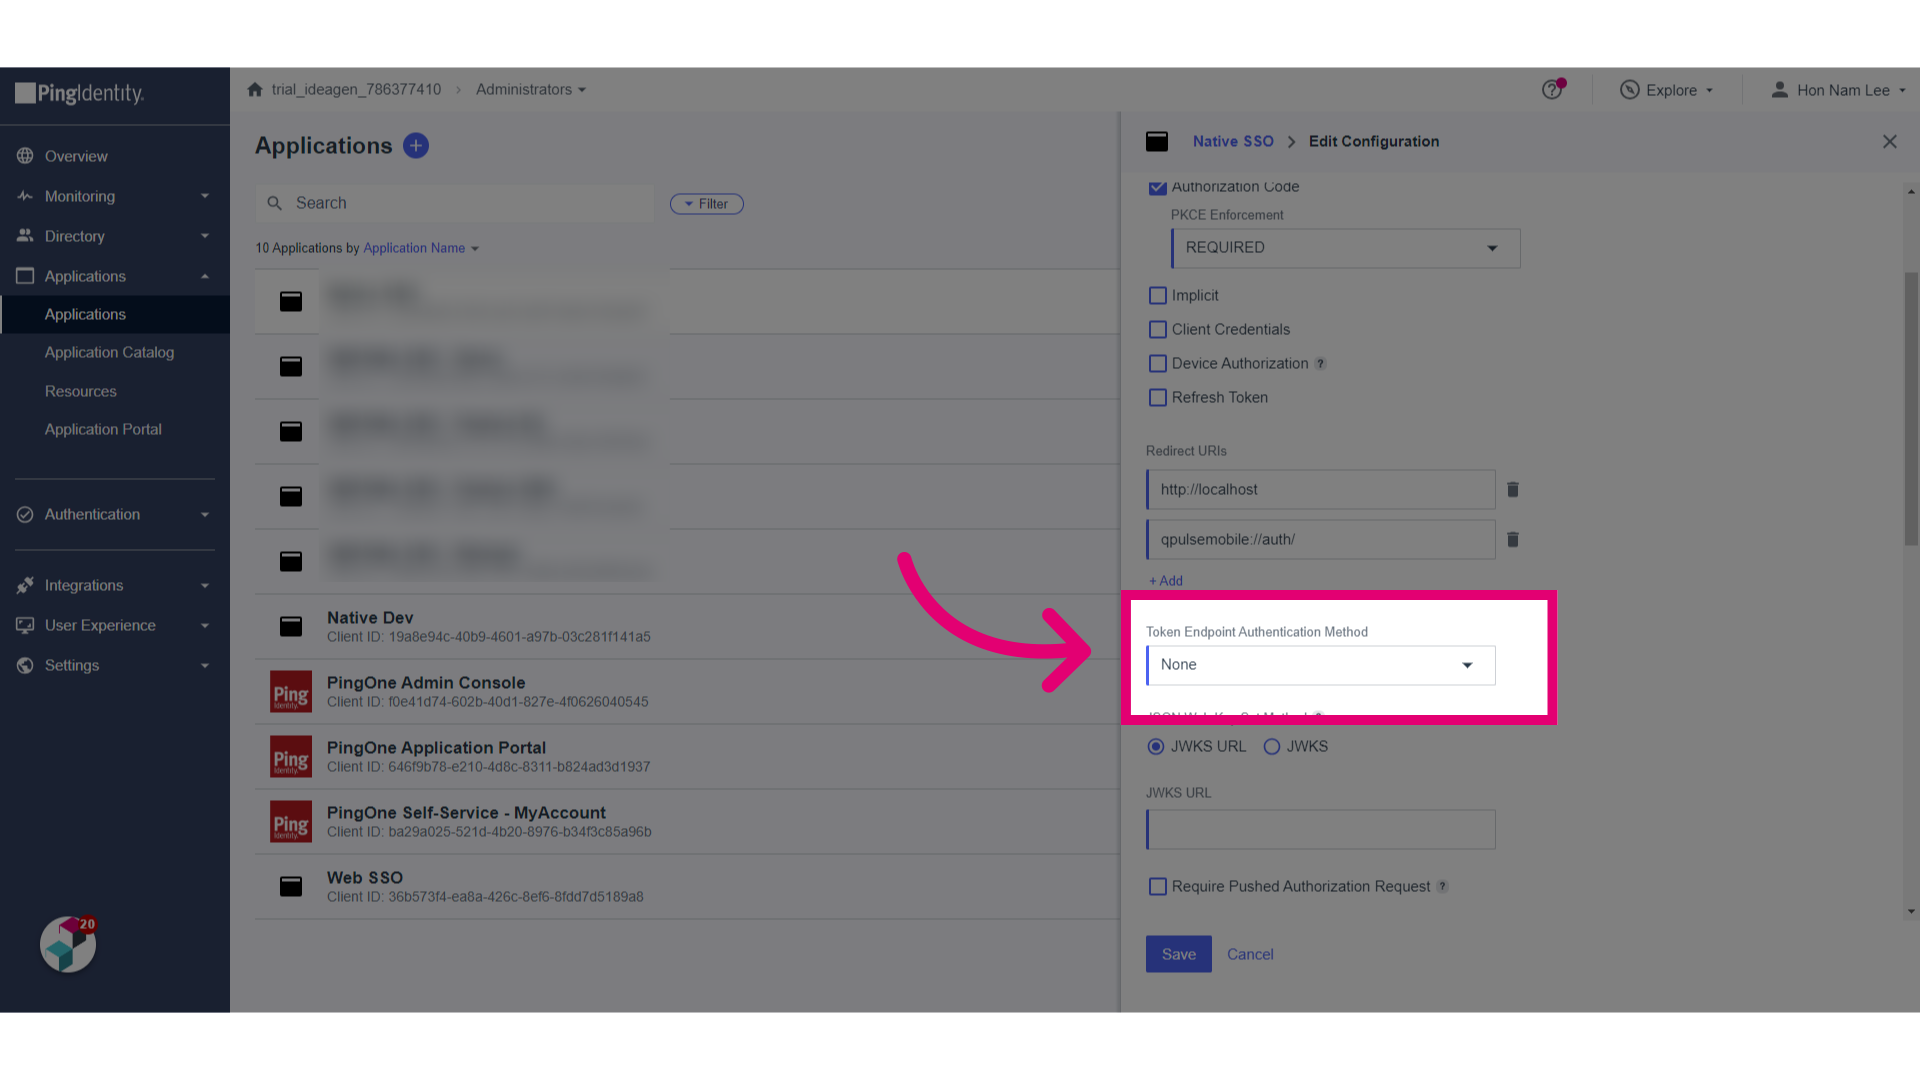
- Click Save.
- Switch to the Attributes Mappings tab.
- Click Edit.
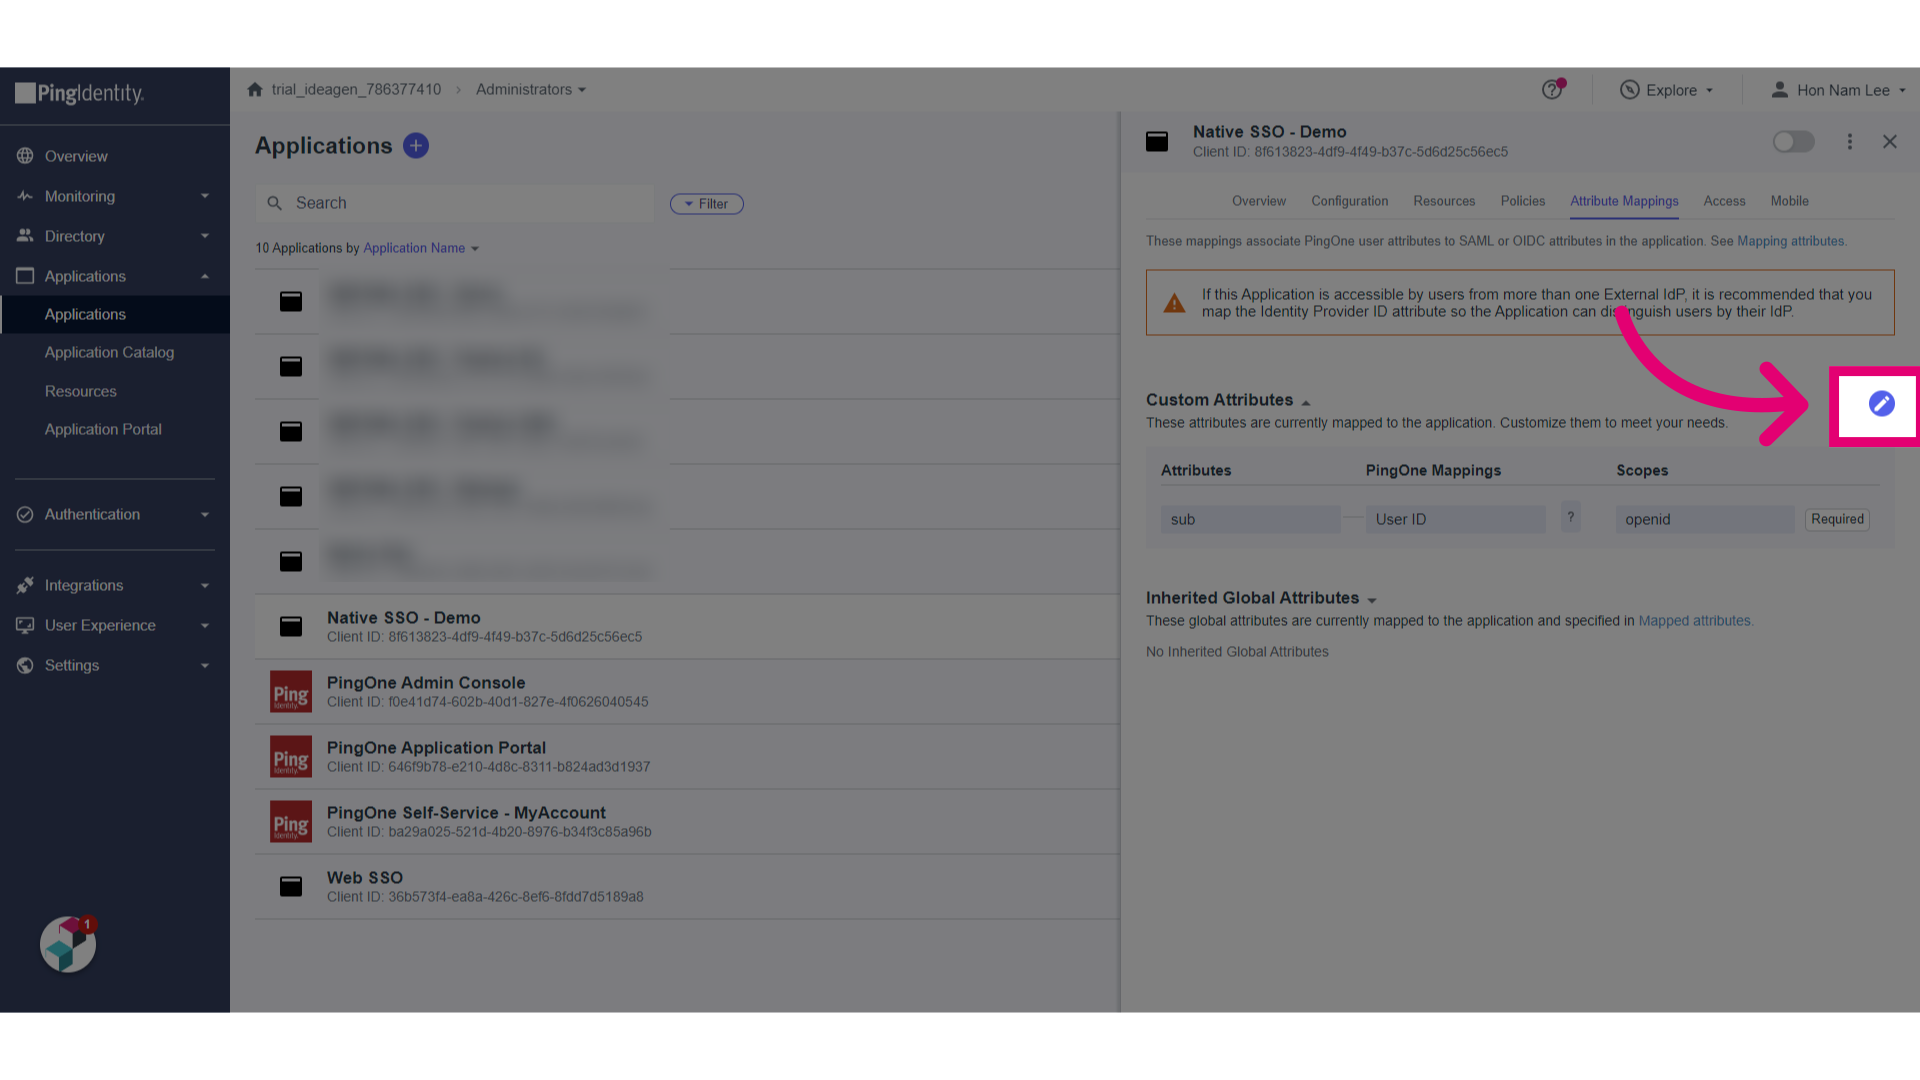
- Click Add.
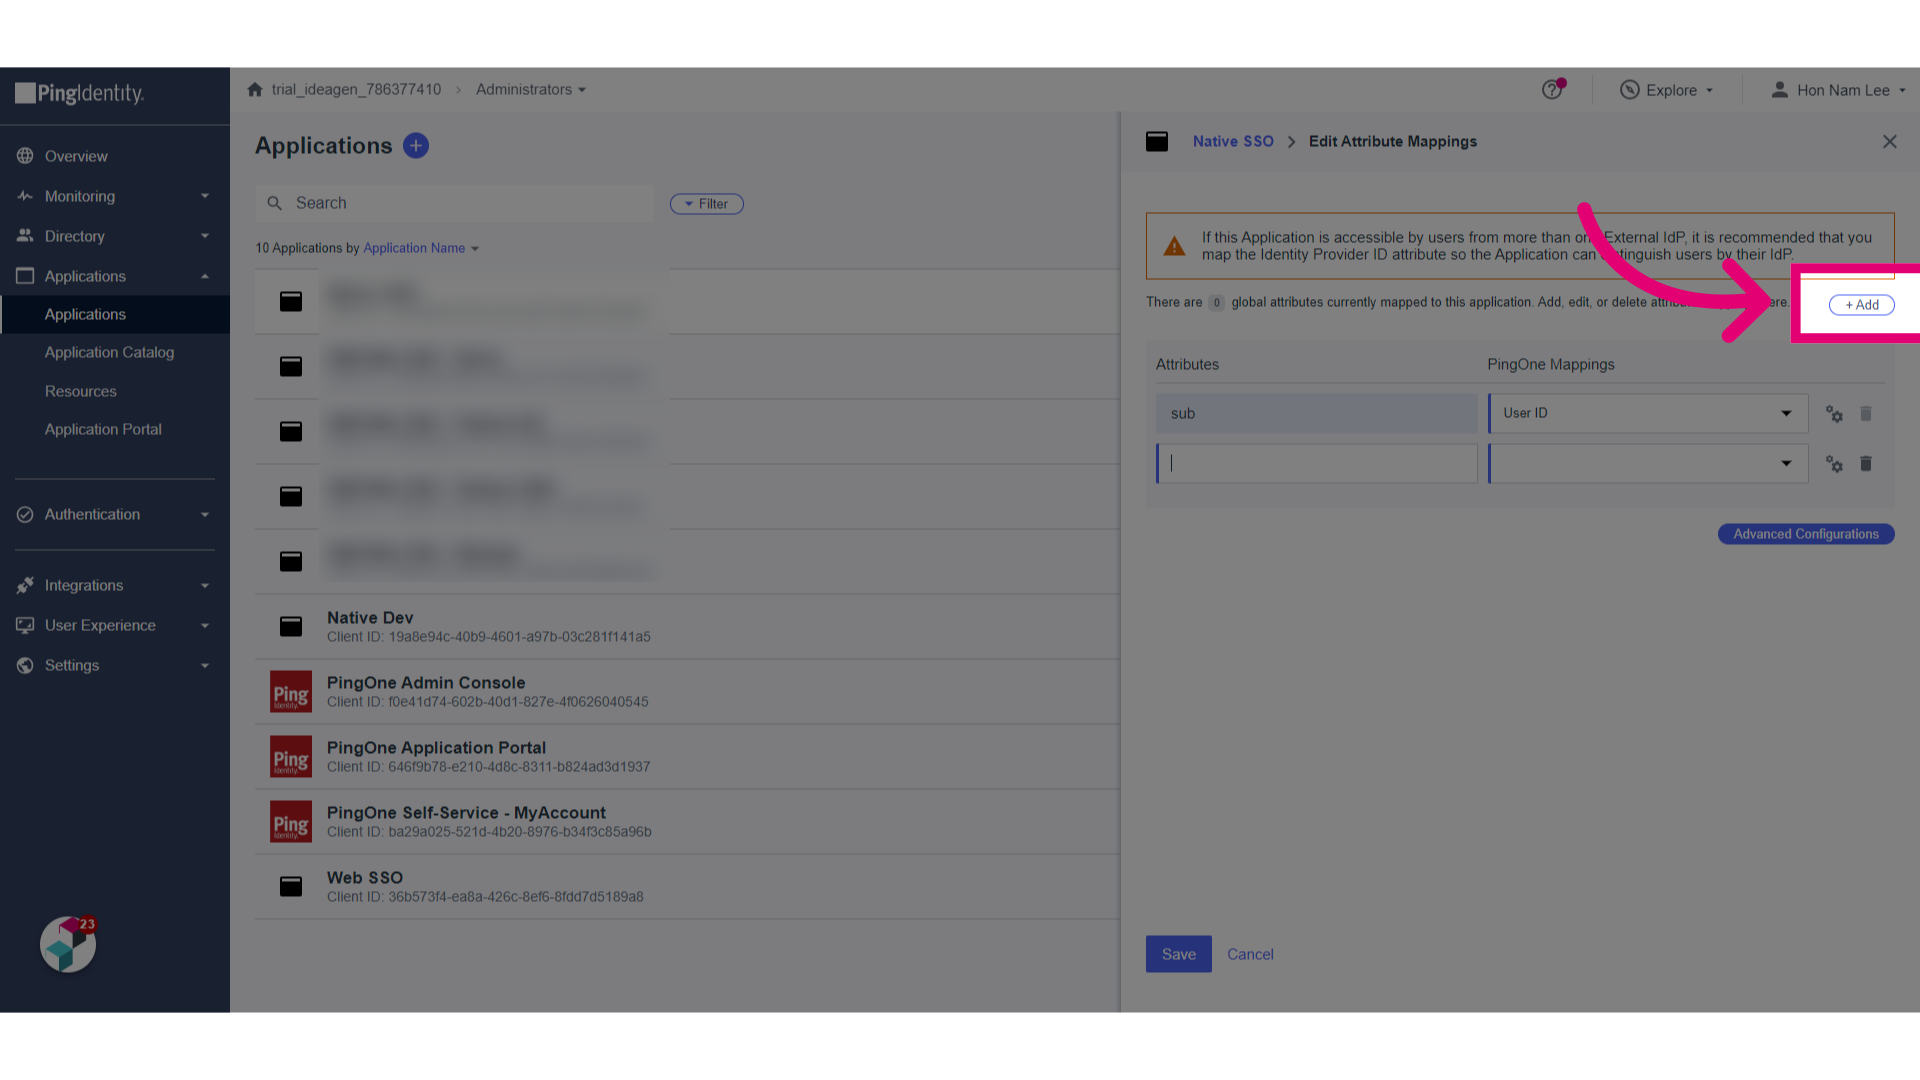
- Set the attributes:
- upn to Email Address (this is embedded into the upn into Access Token)
- family_name to Family Name
- given_name to Given Name
- username to Username
- Click Next.
- Click Add Scope.
- Set Scope Name to userinfo.
- Click Save.
- Click Add.
- Enter a Resource Name.
- Set Audience to upn.
- Click Next.
- Click Add.
- Set the attributes:
- upn to Email Address (this is embedded into the upn into Access Token)
- family_name to Family Name
- given_name to Given Name
- username to Username
- Click Next.
- Click Save.
- Go to the Resources tab.
- Click Edit for Allowed Scopes.
- Select email, profile, and userinfo.
- Verify selected scopes.
- Turn on the Application by activating the toggle.